Custom Fabricated Rack 2022#
I got a couple of items that warranted rewiring my TV cabinet rack: StarTech extenders and P-Link server rails. I inverted the extenders so I could recess the patch panel and switch, making room for the SFP modules and fiber cables. I can’t believe I can’t find any right angle adapters for the LC/UPC fiber patch cables!
It took me a couple of years of off and on searching and buying to finally find some rails that actually fit inside the cabinet. The only downside is that my rack is a bit louder than before since I no longer have the rubber feet absorbing the vibration of my spinning hard drives. It’s not too bad though.
Items Used#
Travla T2241 2U Dual Mini-ITX Case
Pictures#
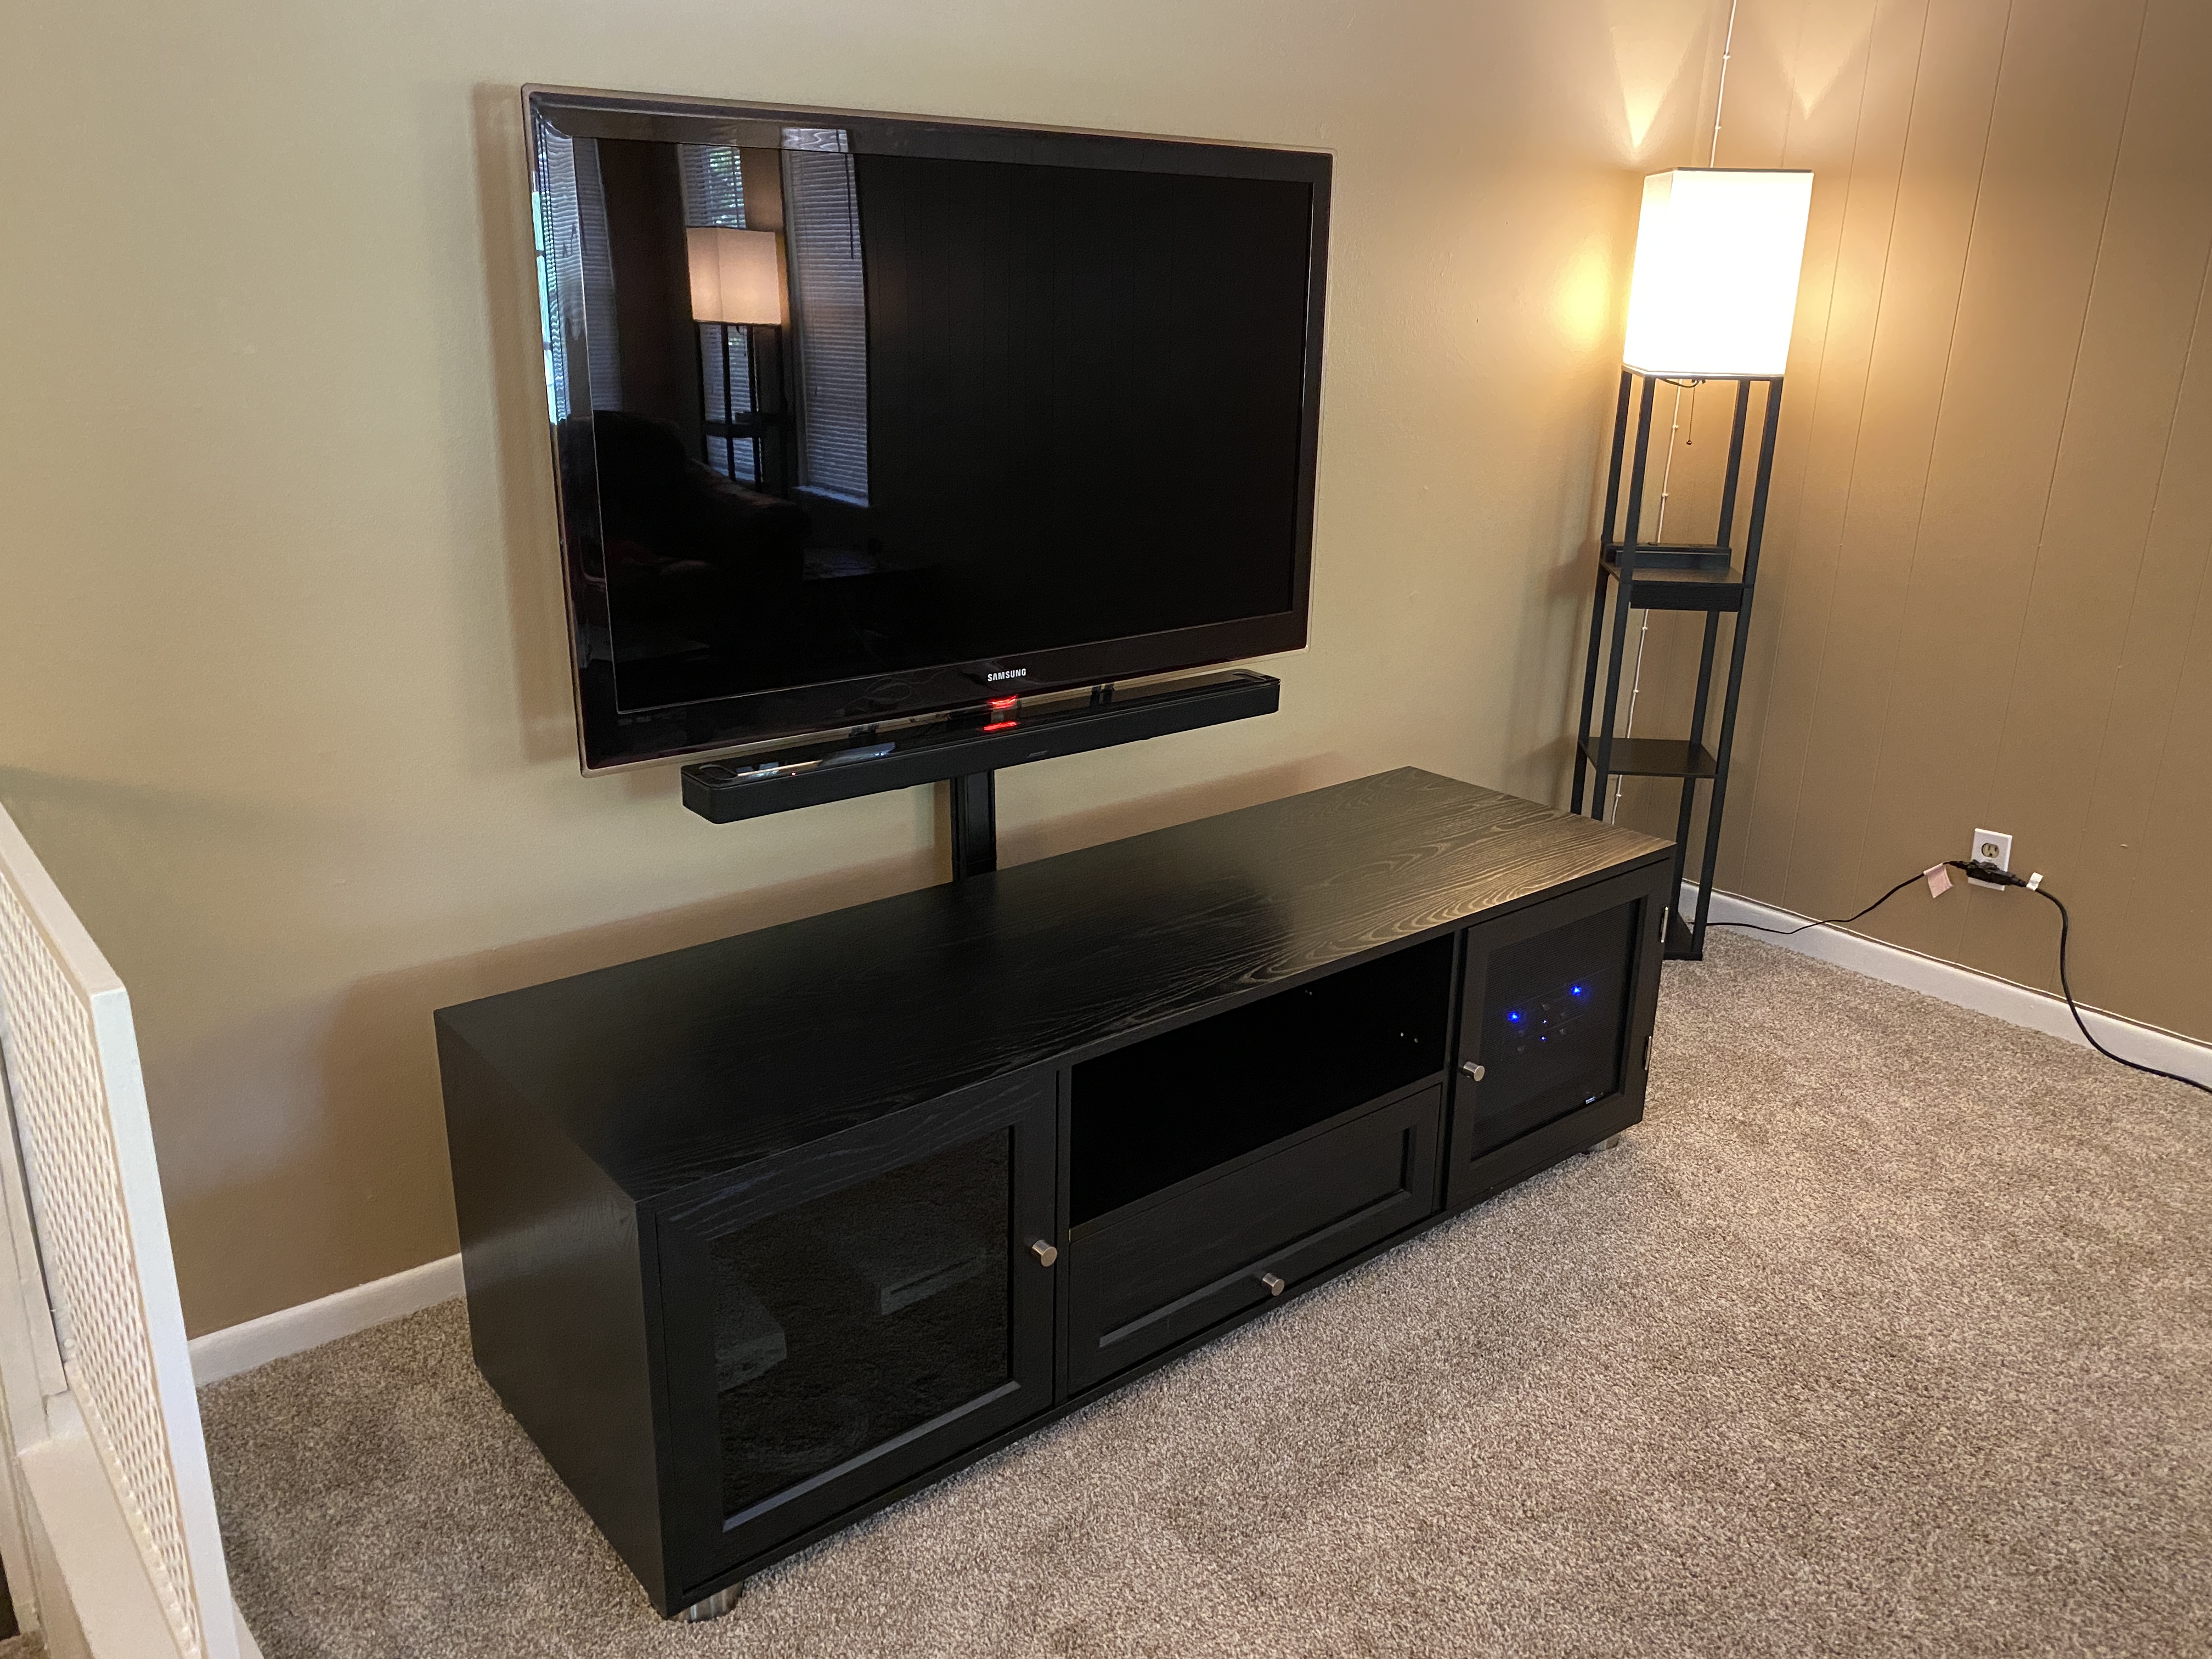
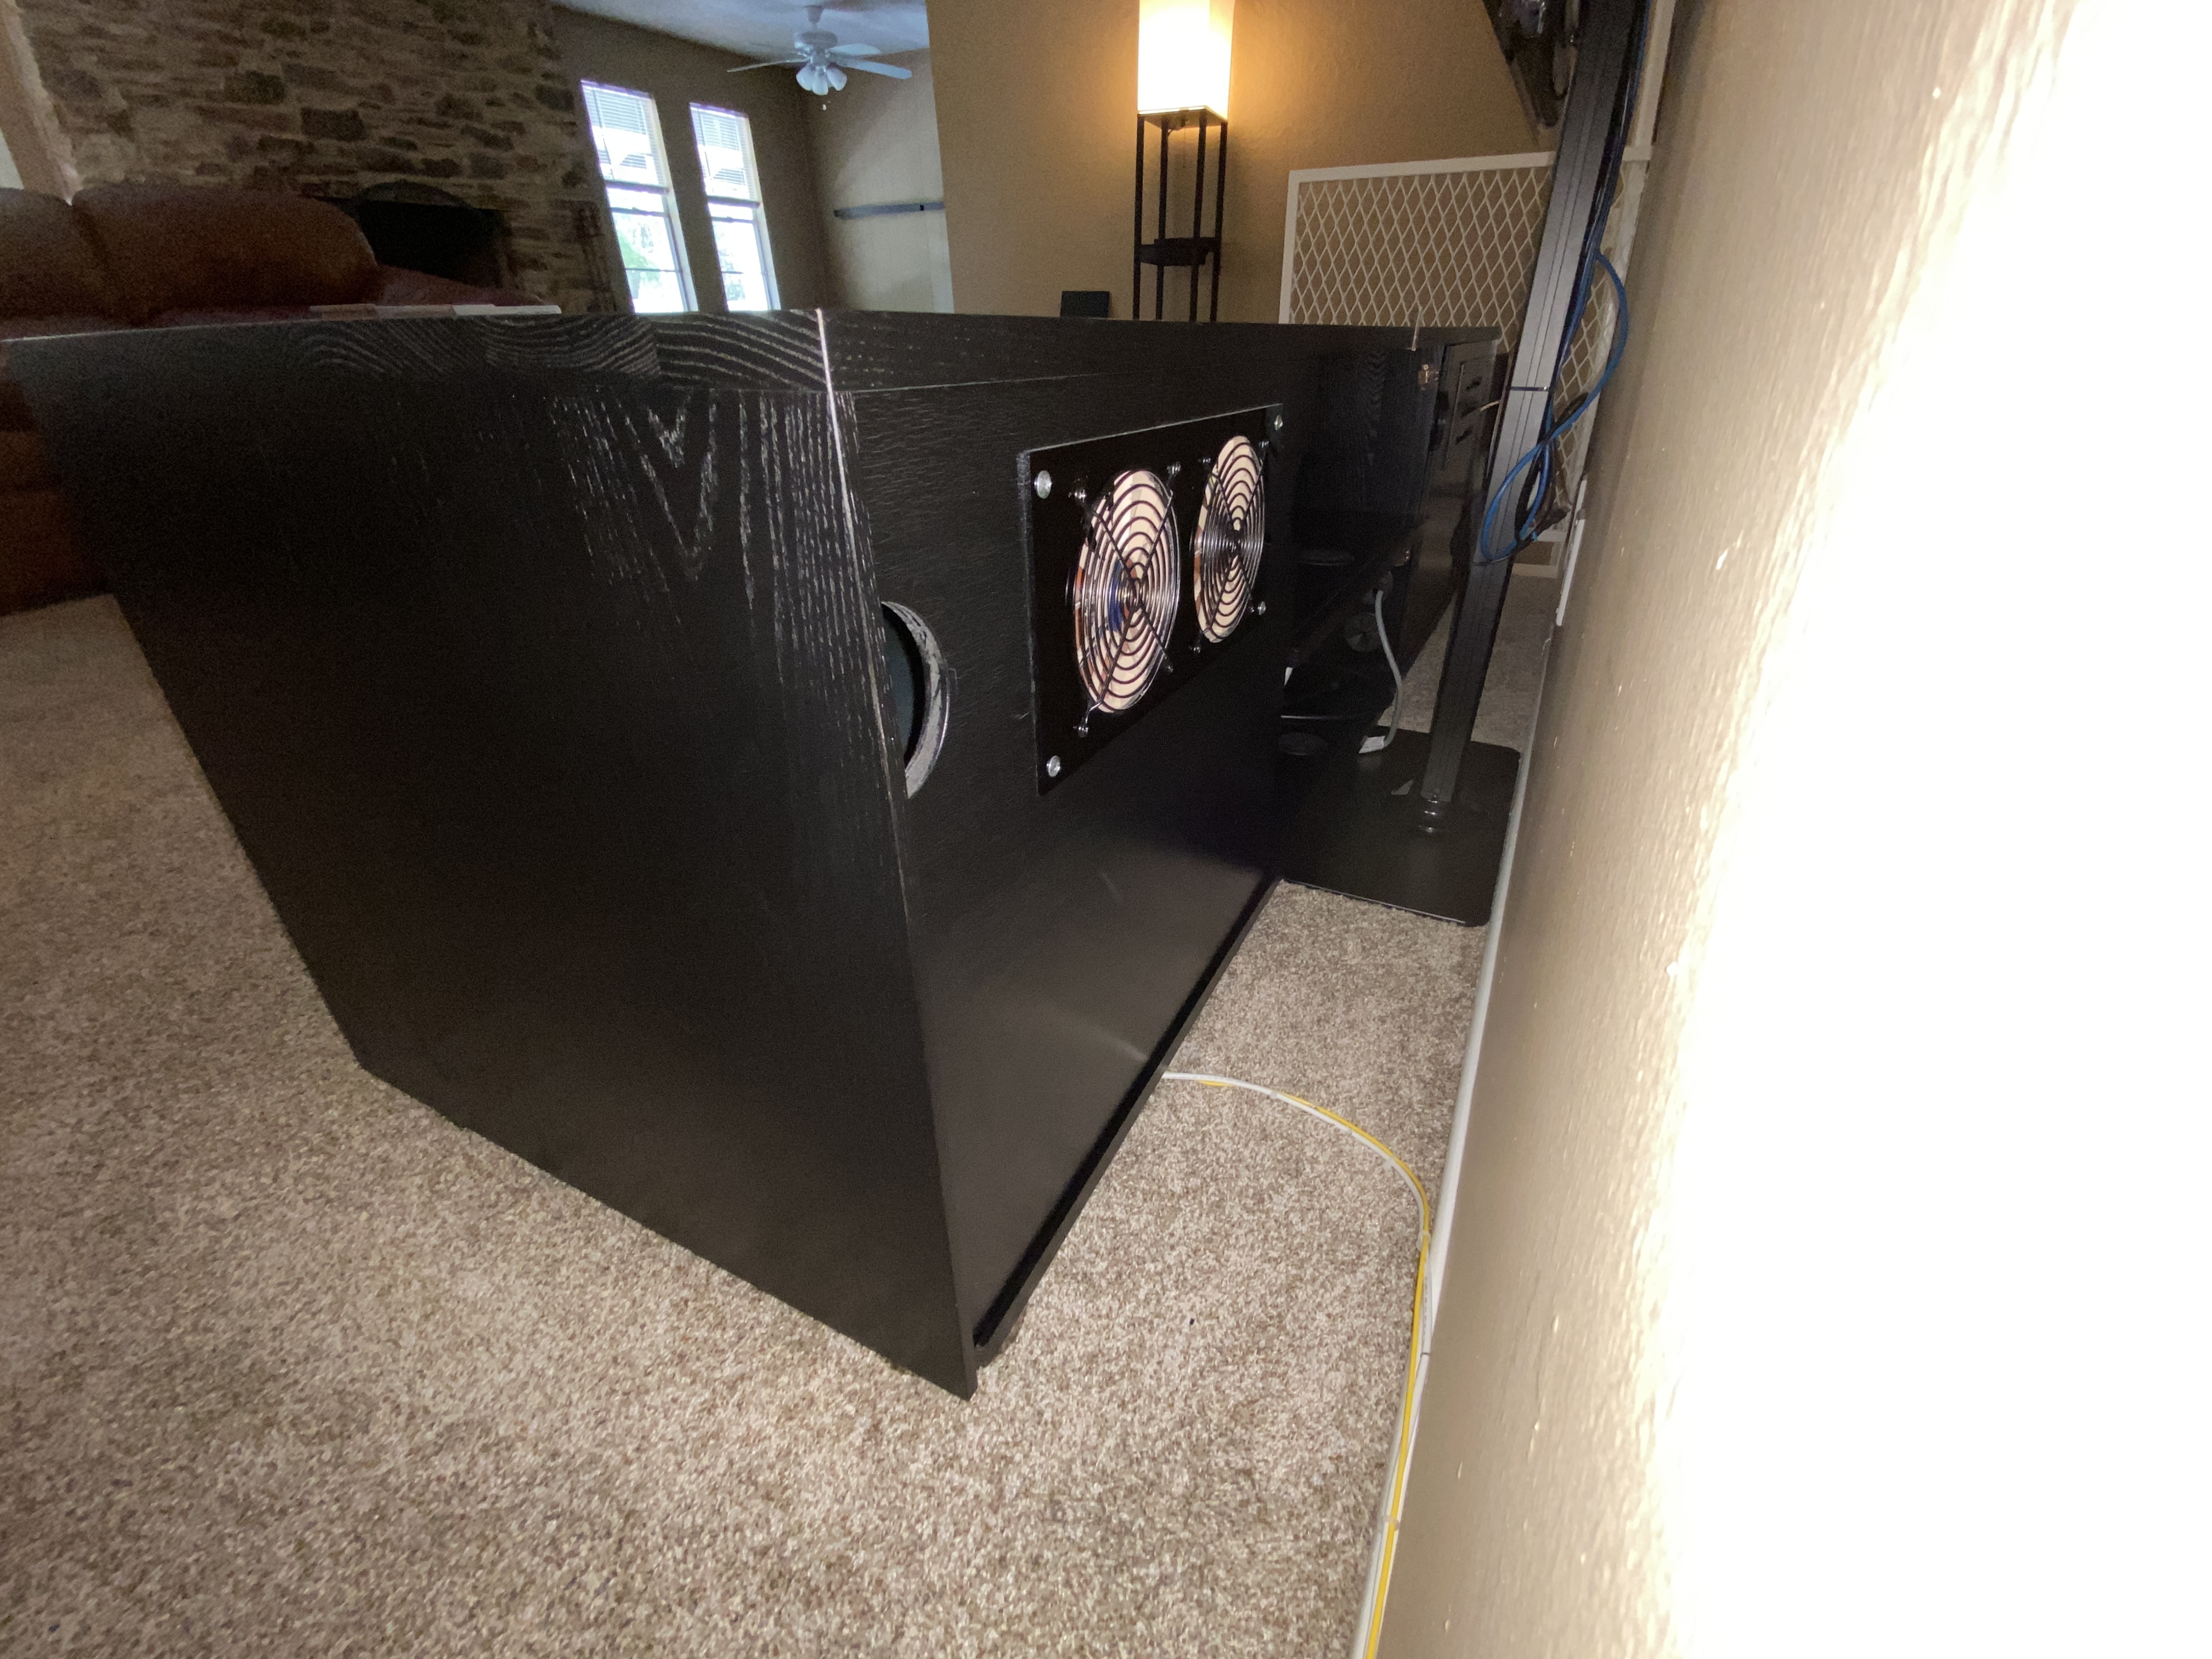
Stealth Living Room Rack# My newly rewired 9U server rack cabinet hidden in my living room. |
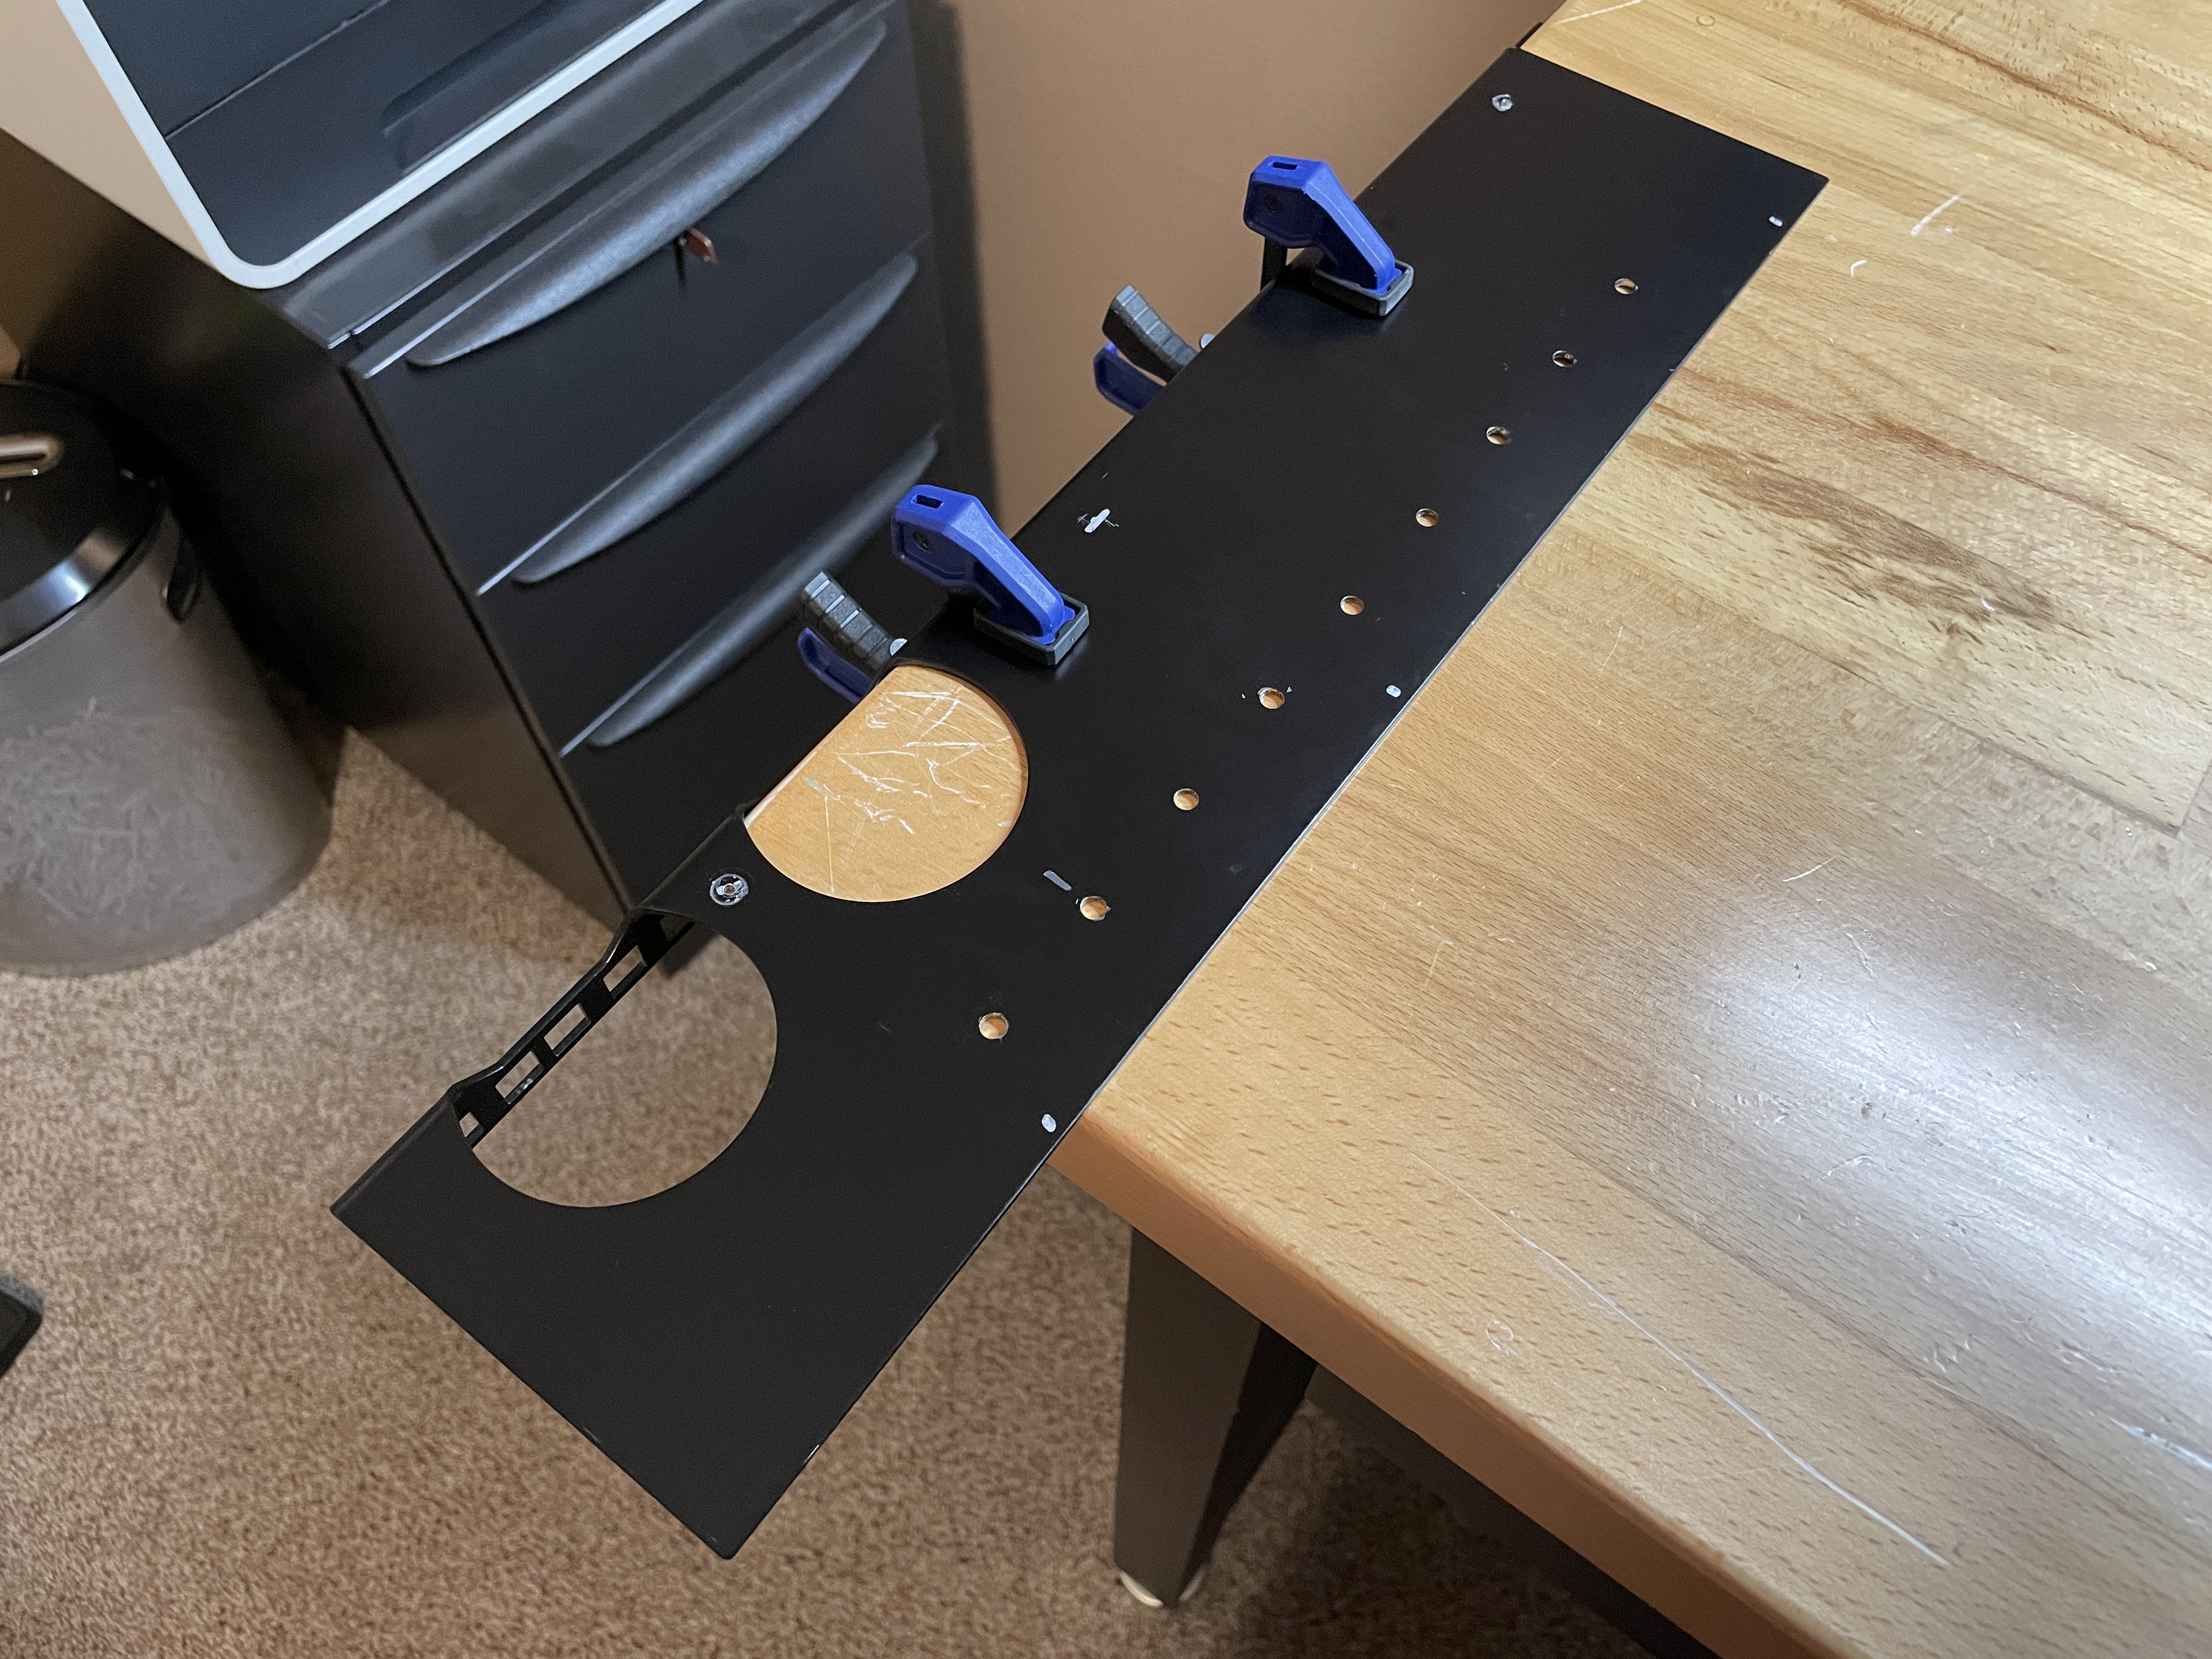
Drilling Three Holes# I had to drill additional holes near the bend on my custom designed rack posts to keep them flush against the TV cabinet walls. Easier, faster, and cheaper than updating my design and having new ones fabricated. |
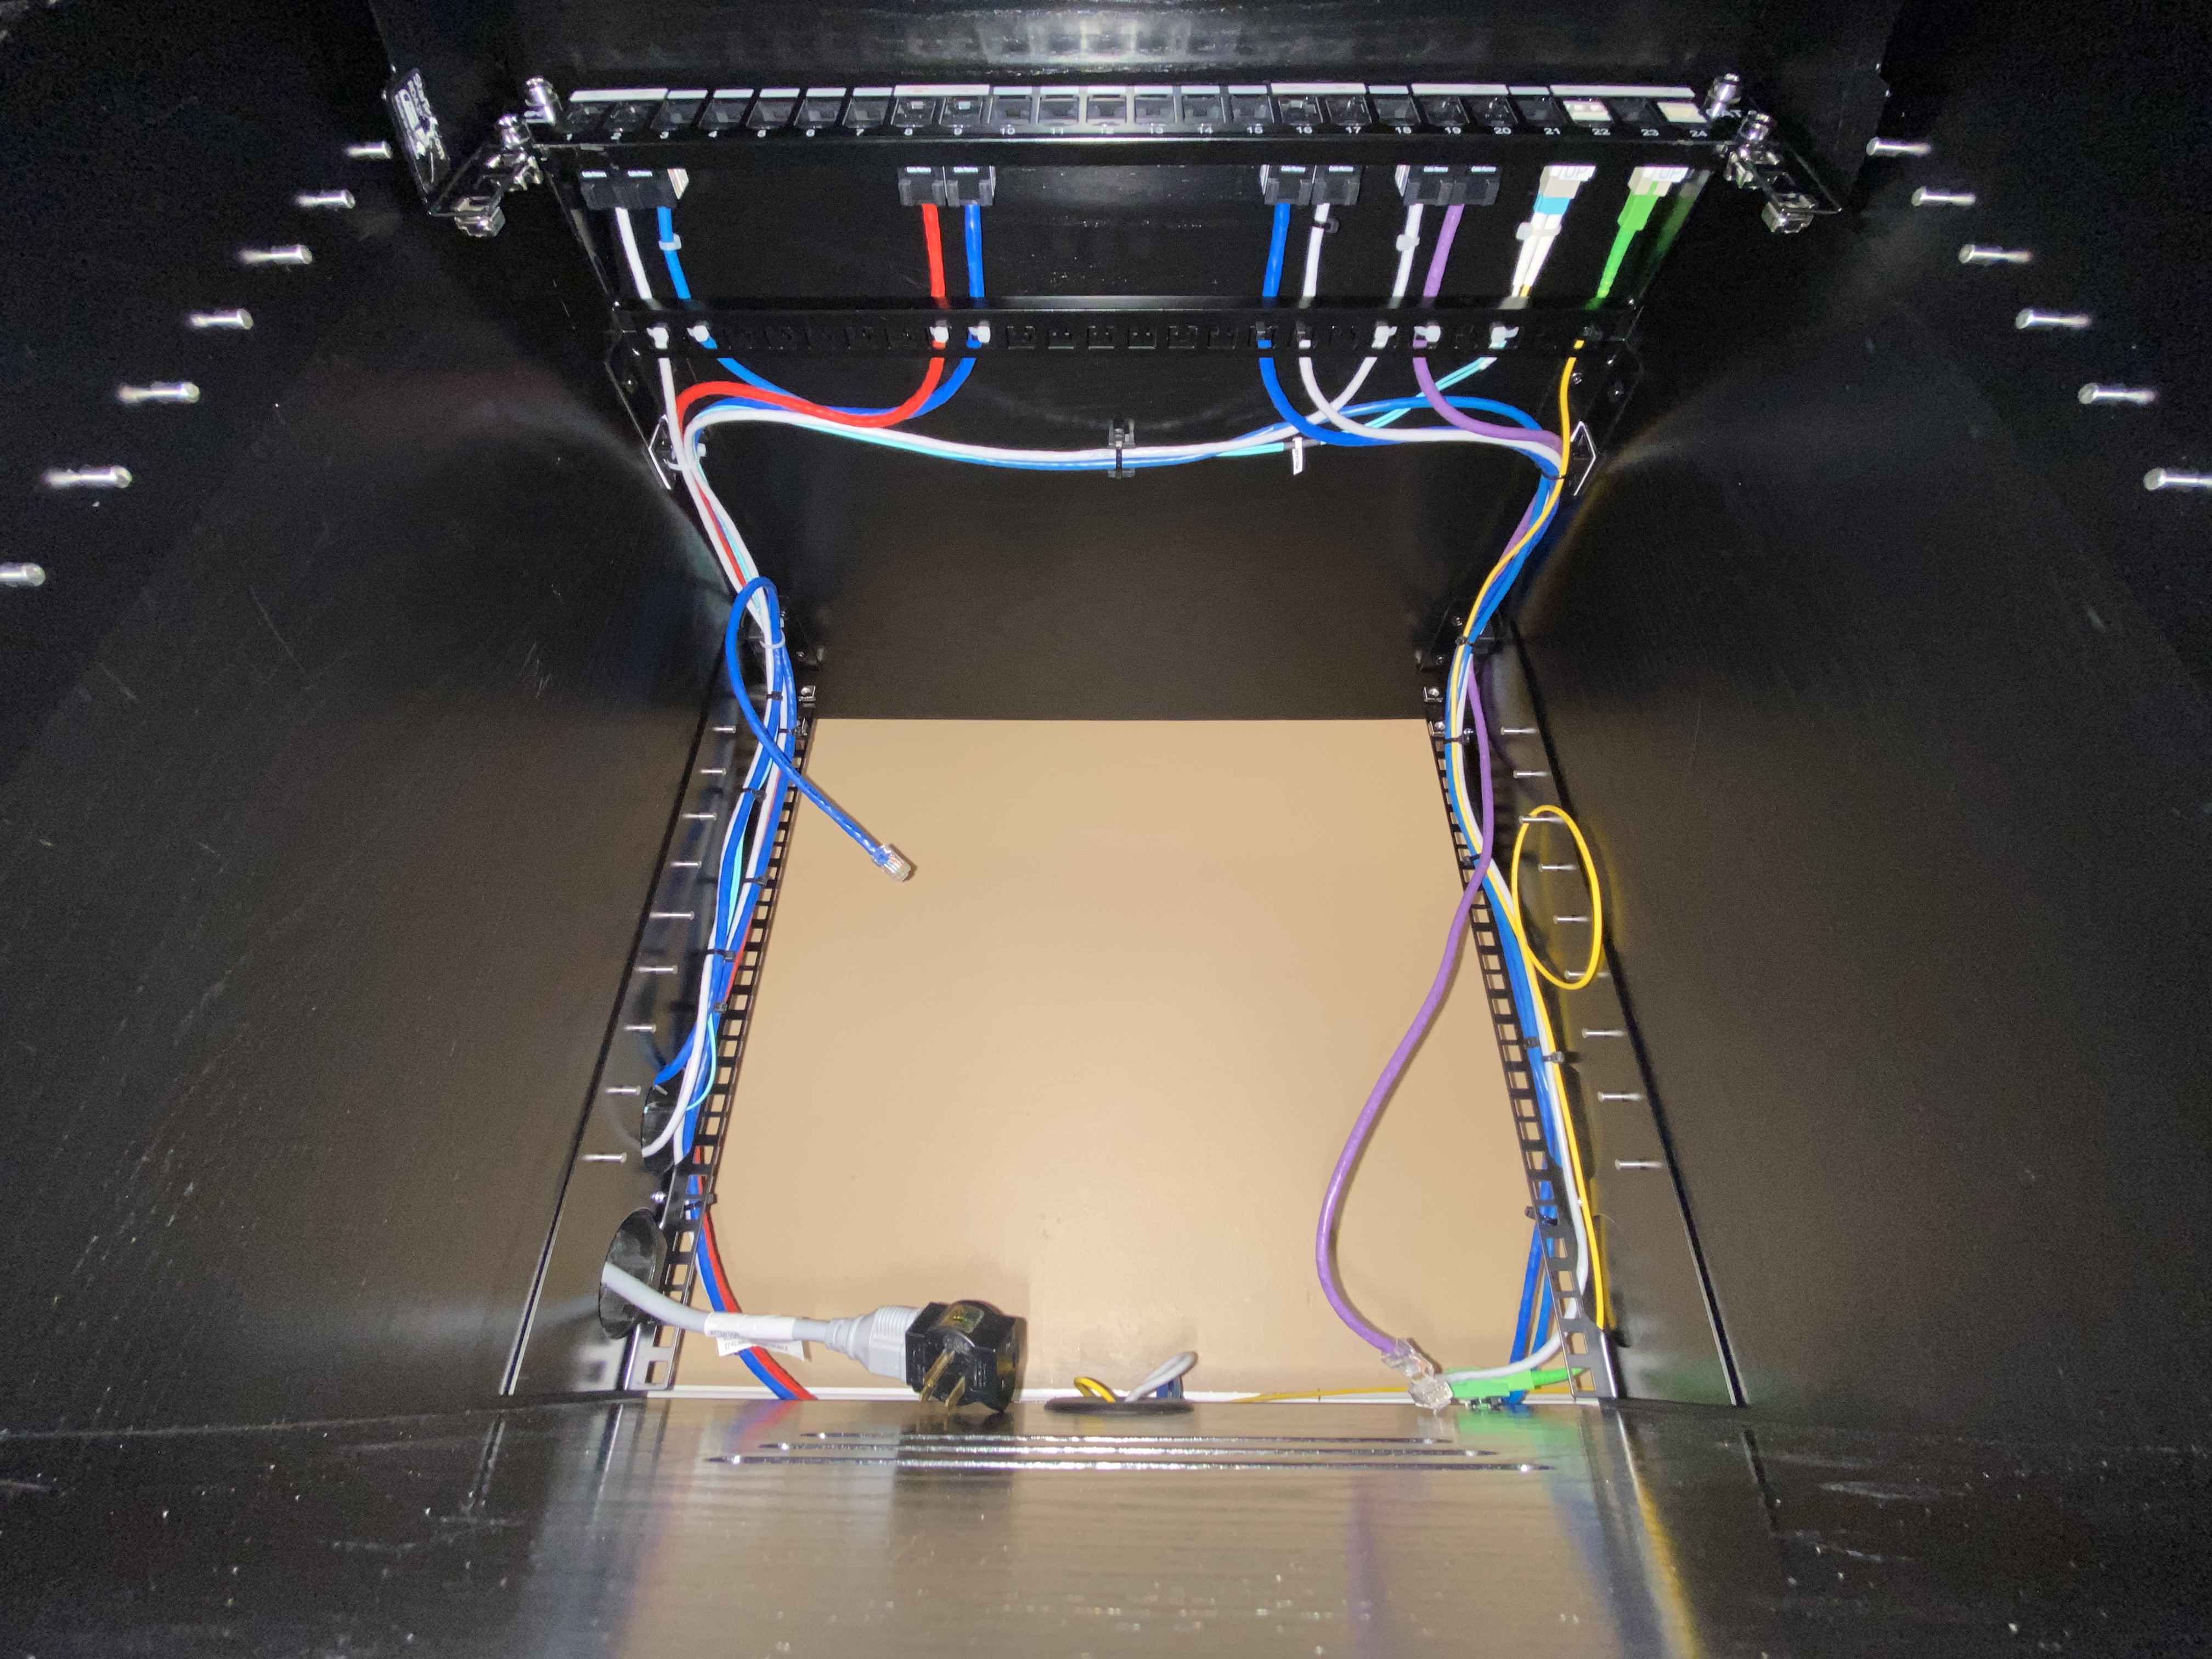
Wiring First# Crimped custom-length CAT6 cables and got lucky with 1 meter long fiber cables. The yellow fiber cable is for my Google Fiber internet service and the blue fiber cable goes to my office on the other side of the wall. |
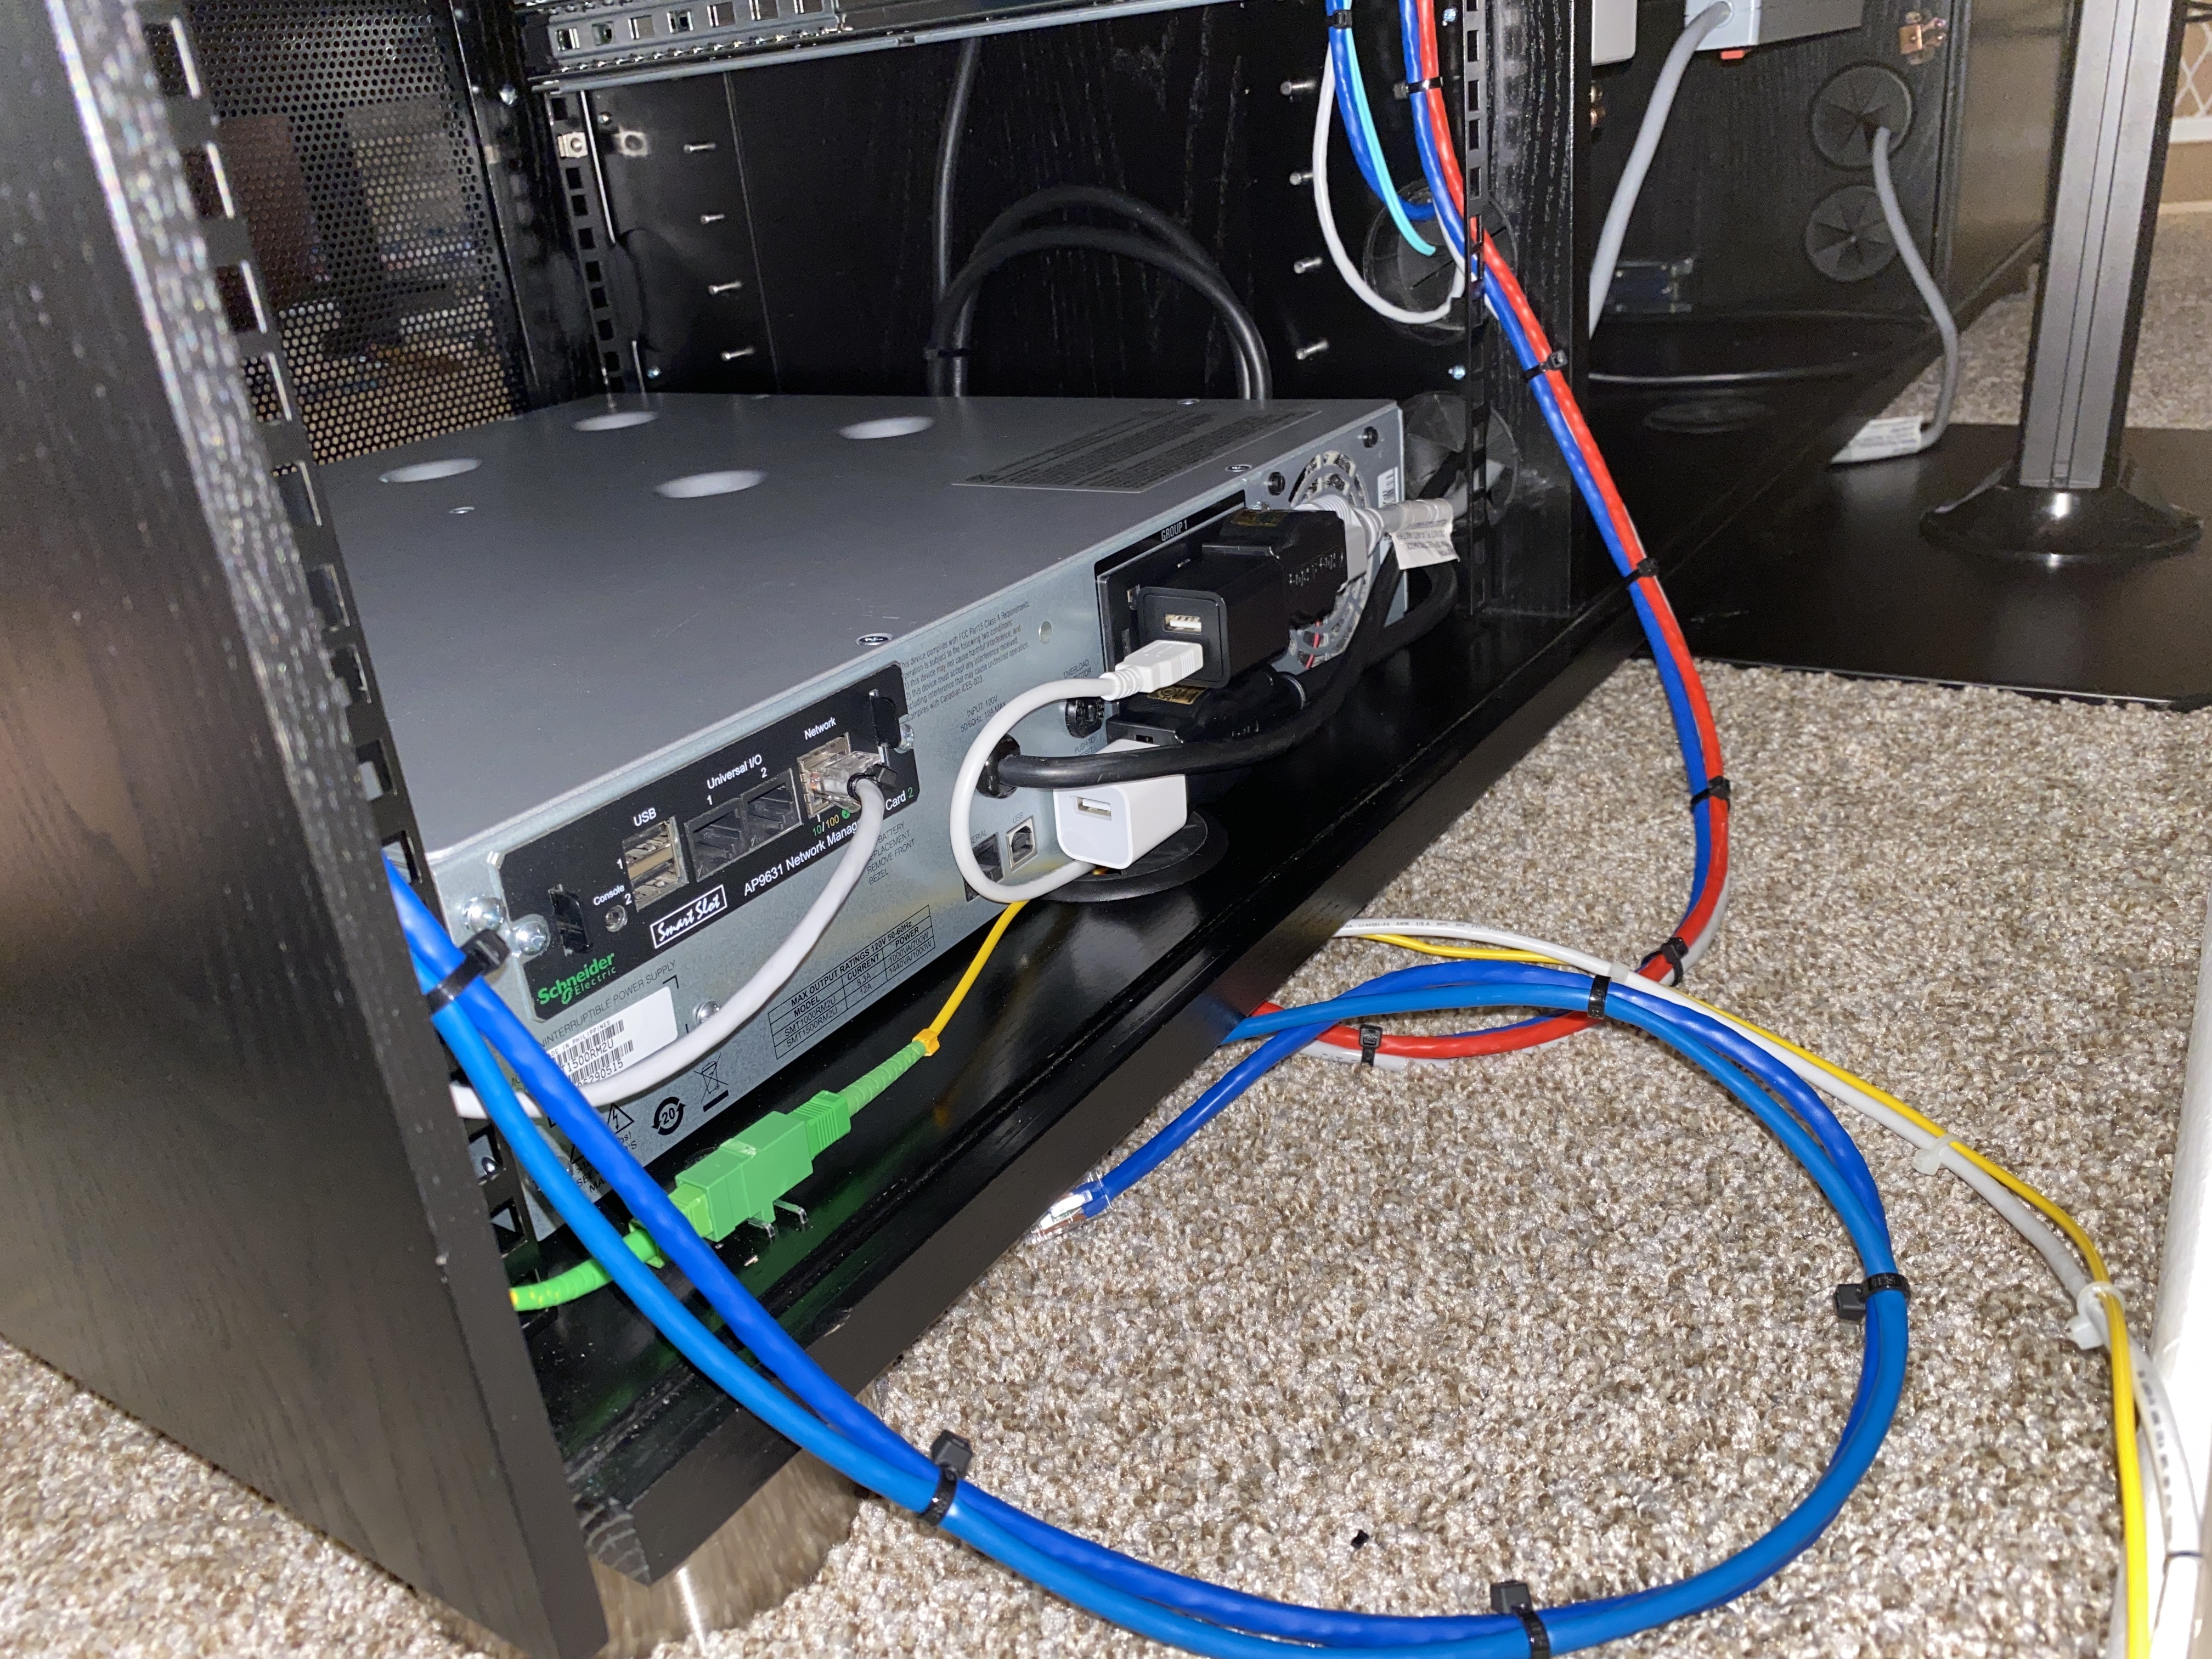
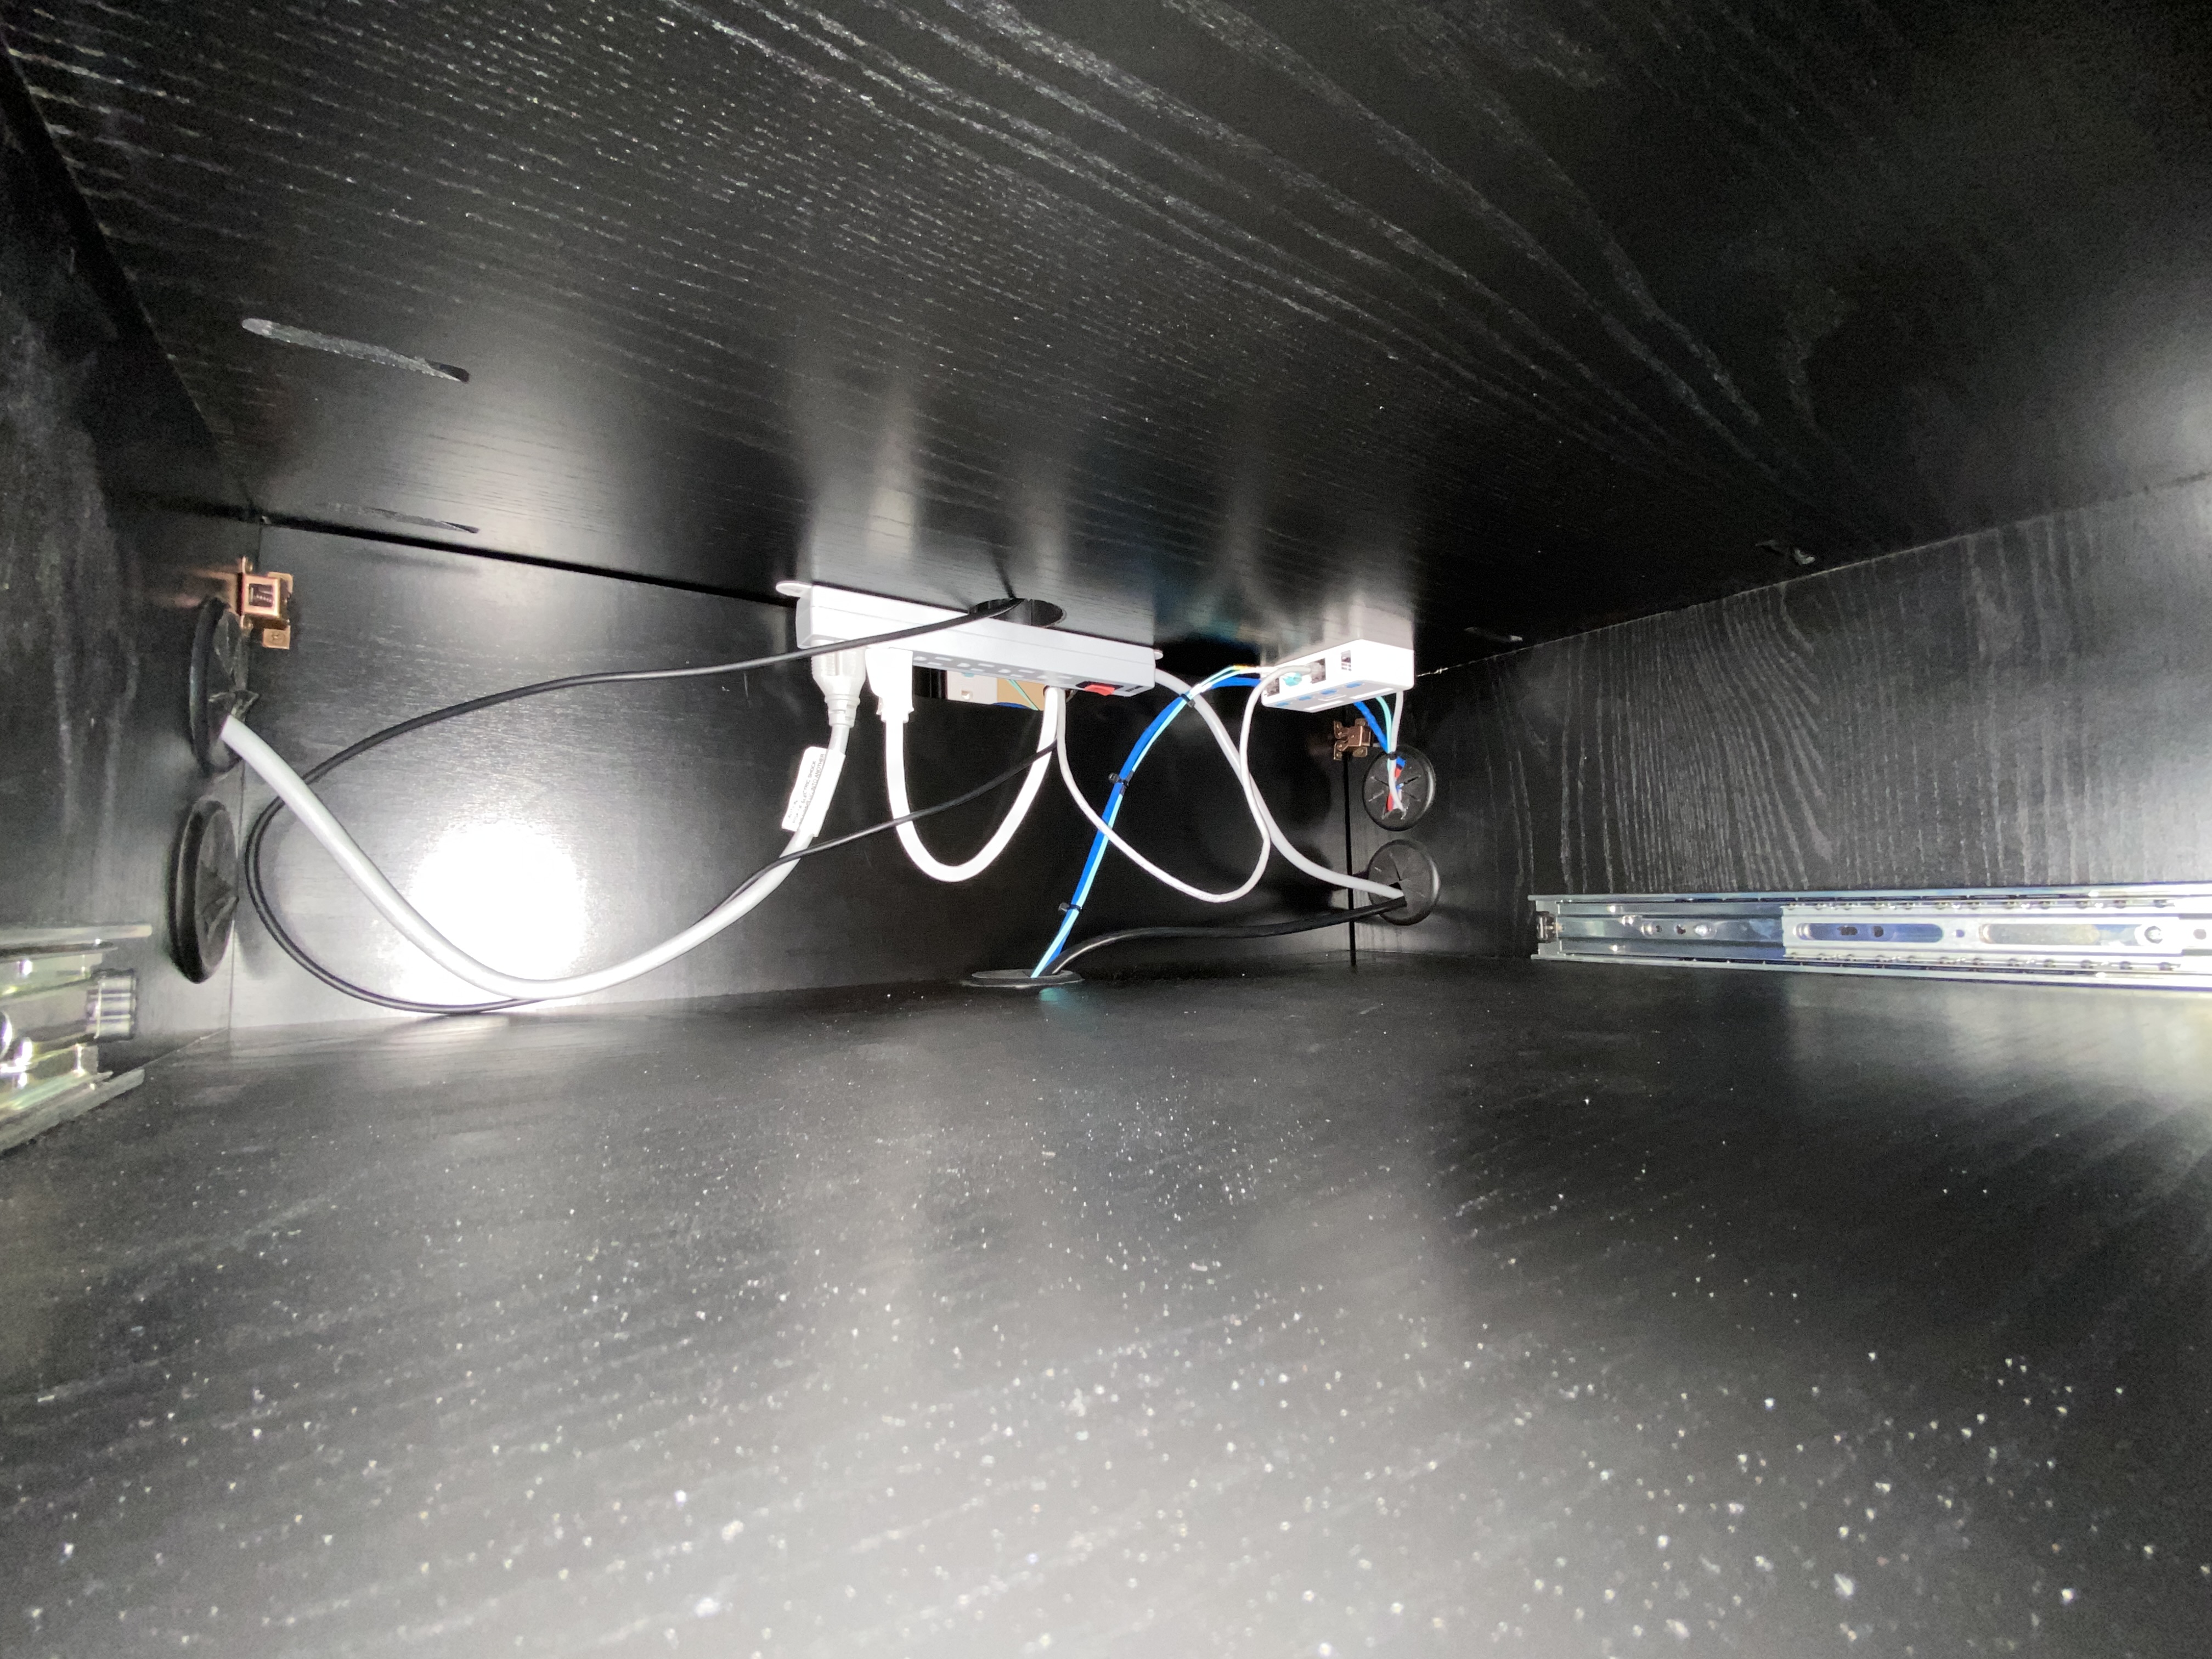
Installed UPS# Next I installed my UPS with some right-angle power adapters. The two USB power adapters are for the TV cabinet ventilation fans. Two fans and two power adapters for redundancy in case one is defective. The white USB cable going out of the cabinet is for a Nest camera. |
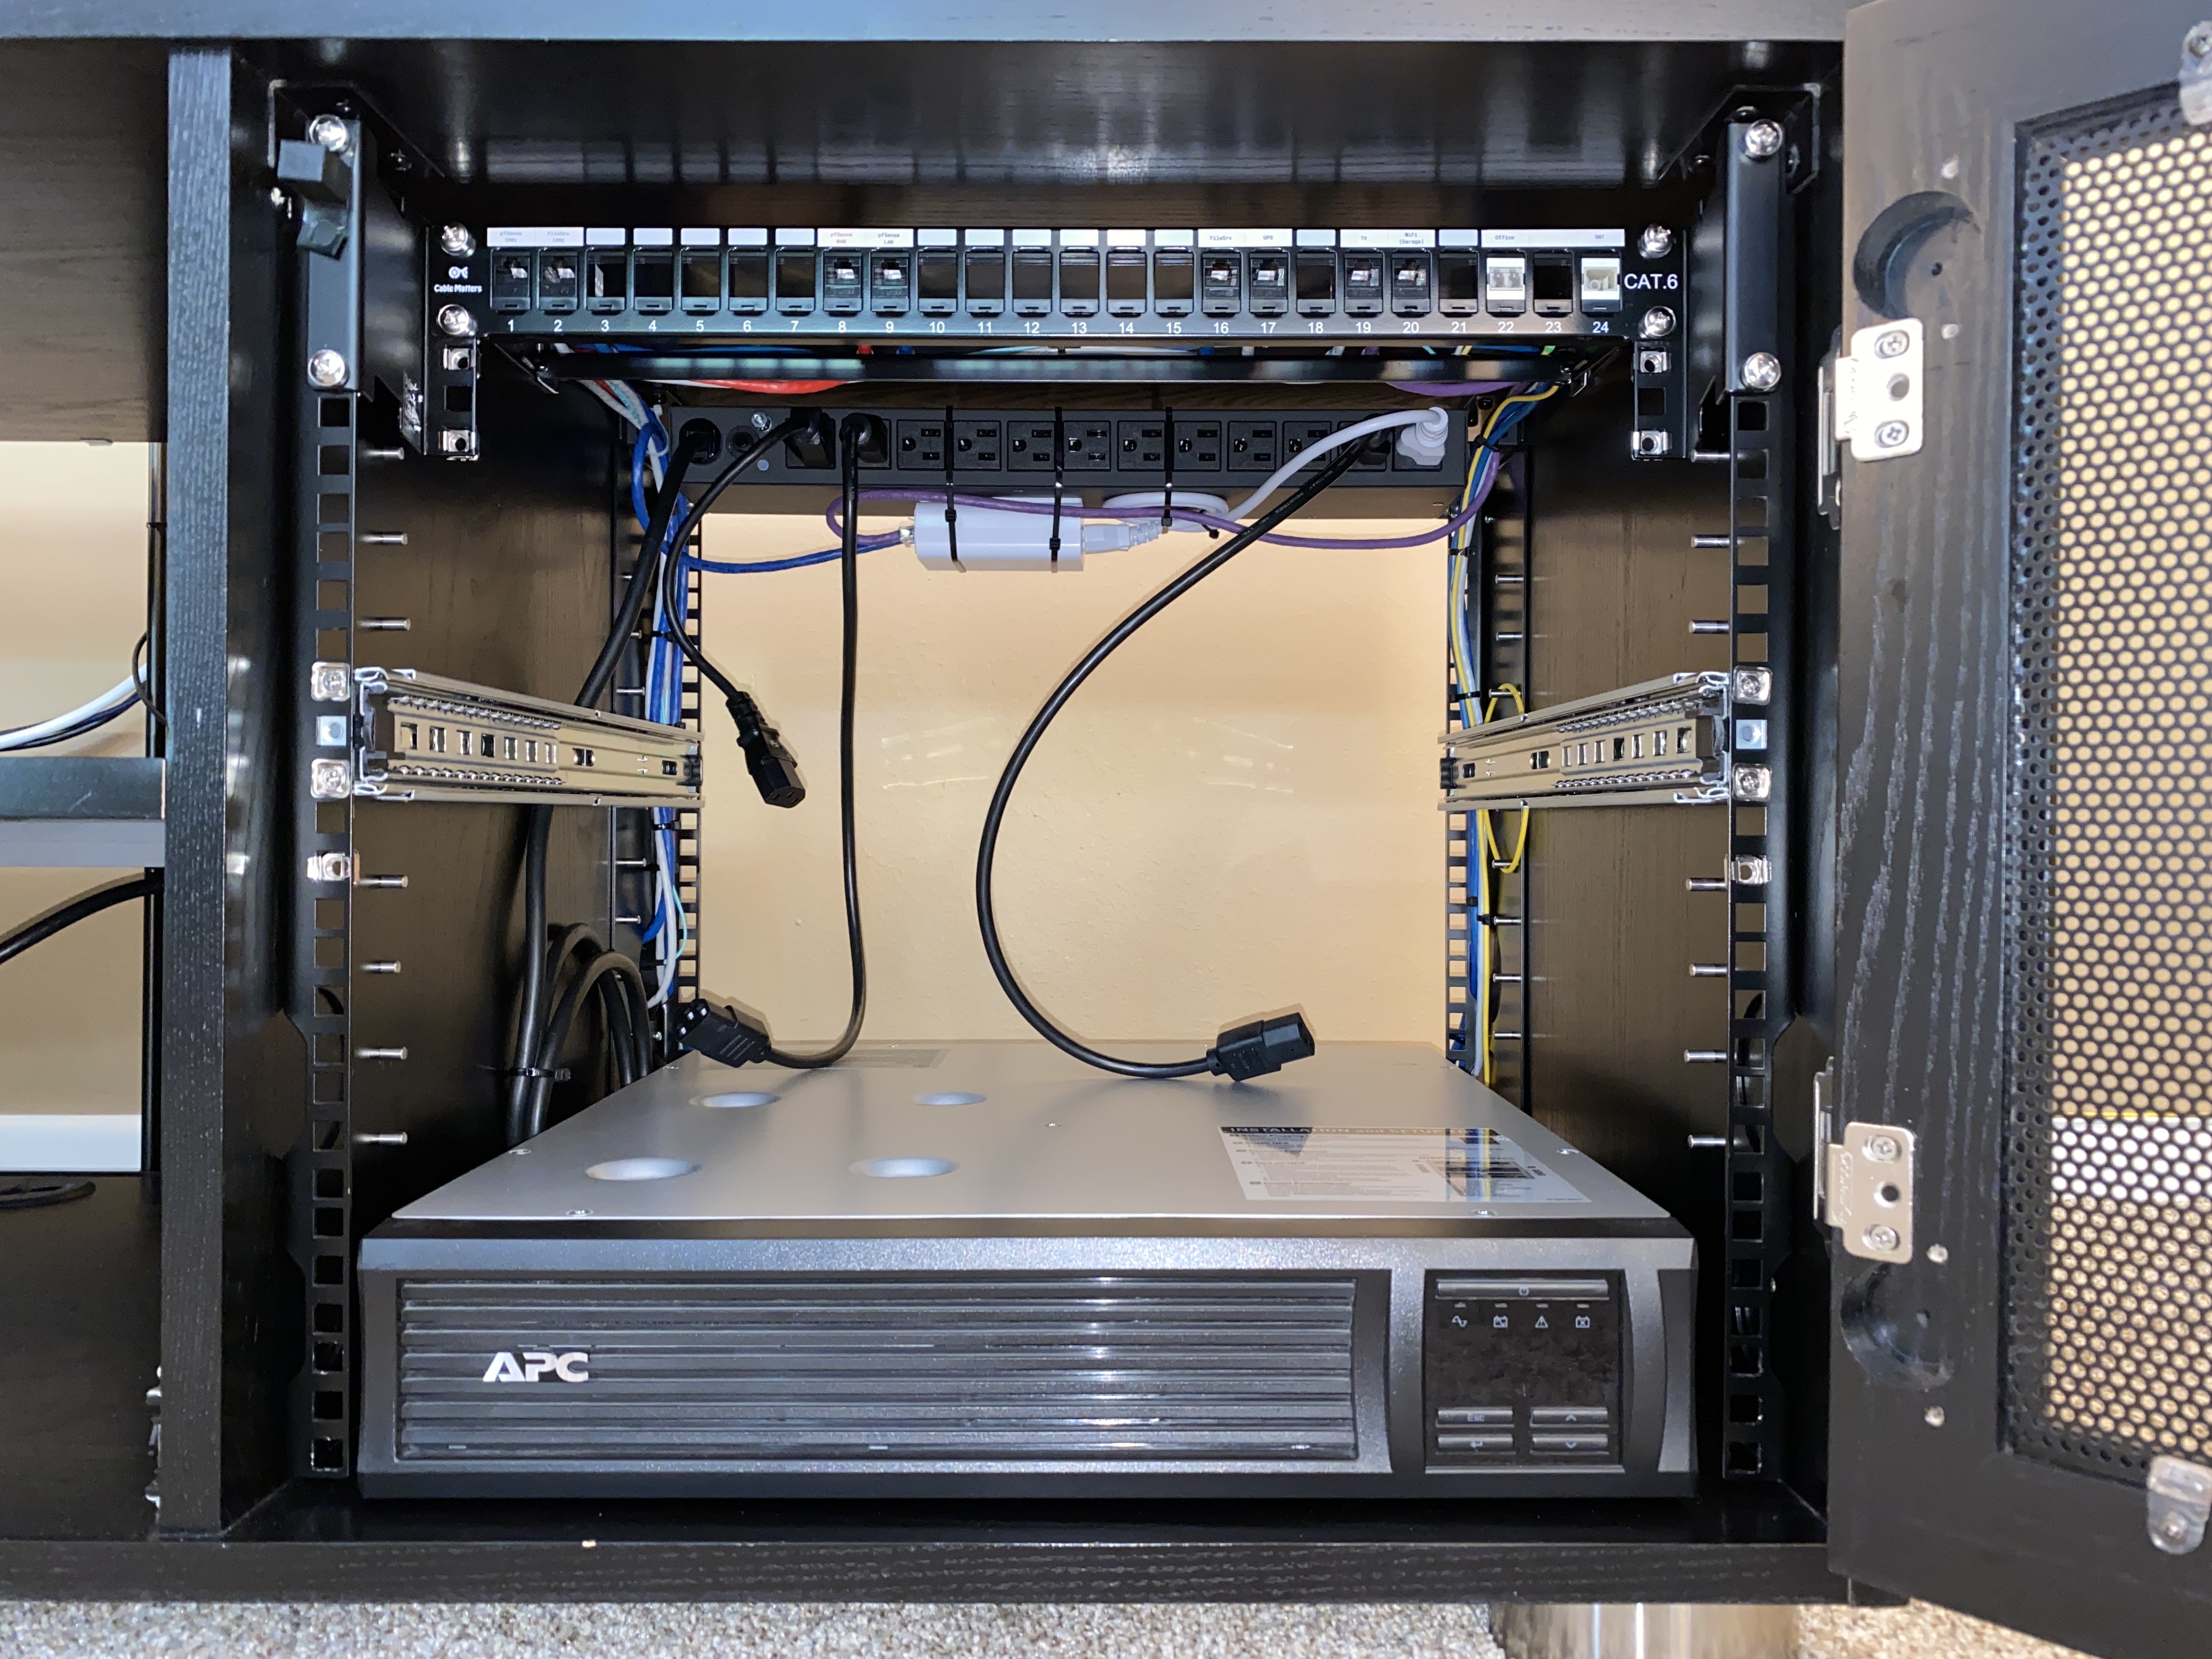
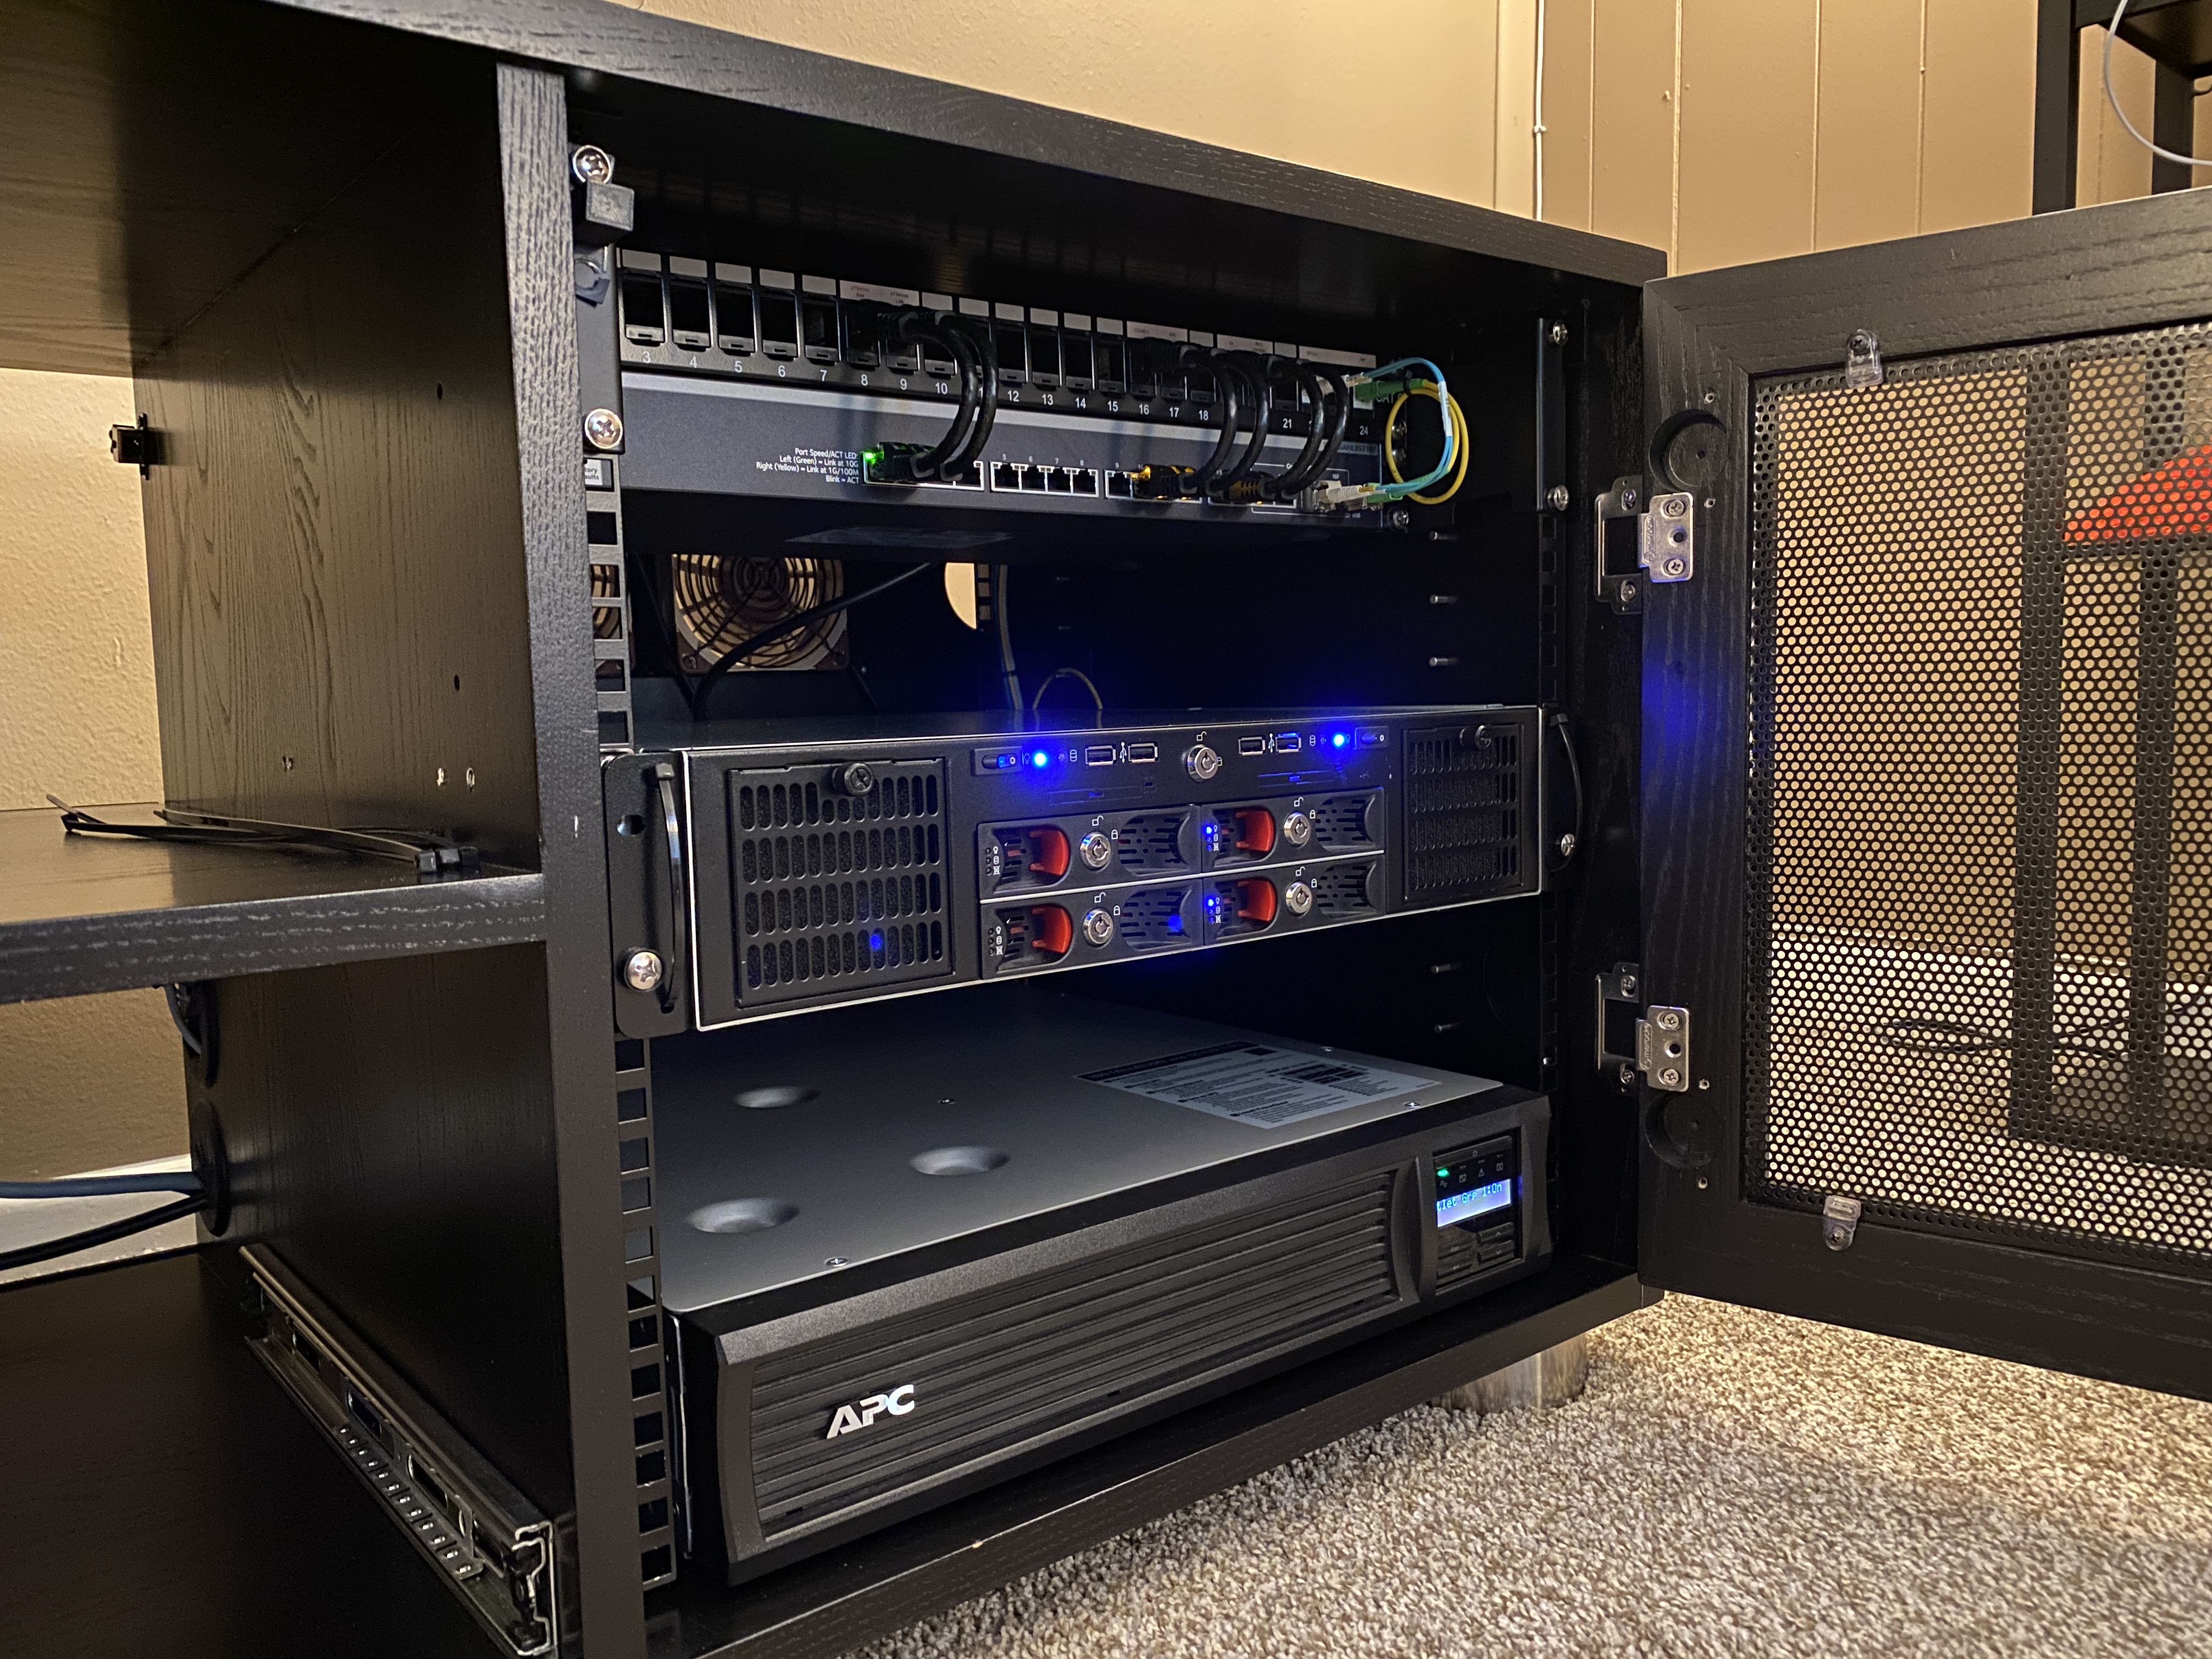
Installed PDU# Here I installed a PDU at the top of the rear posts with my UniFi PoE injector zipped tied to it. I made some magnetic labels for my patch panel and 3d printed a magnetic door stop, though it’s falling apart after a couple of years of adding and removing it lol. |
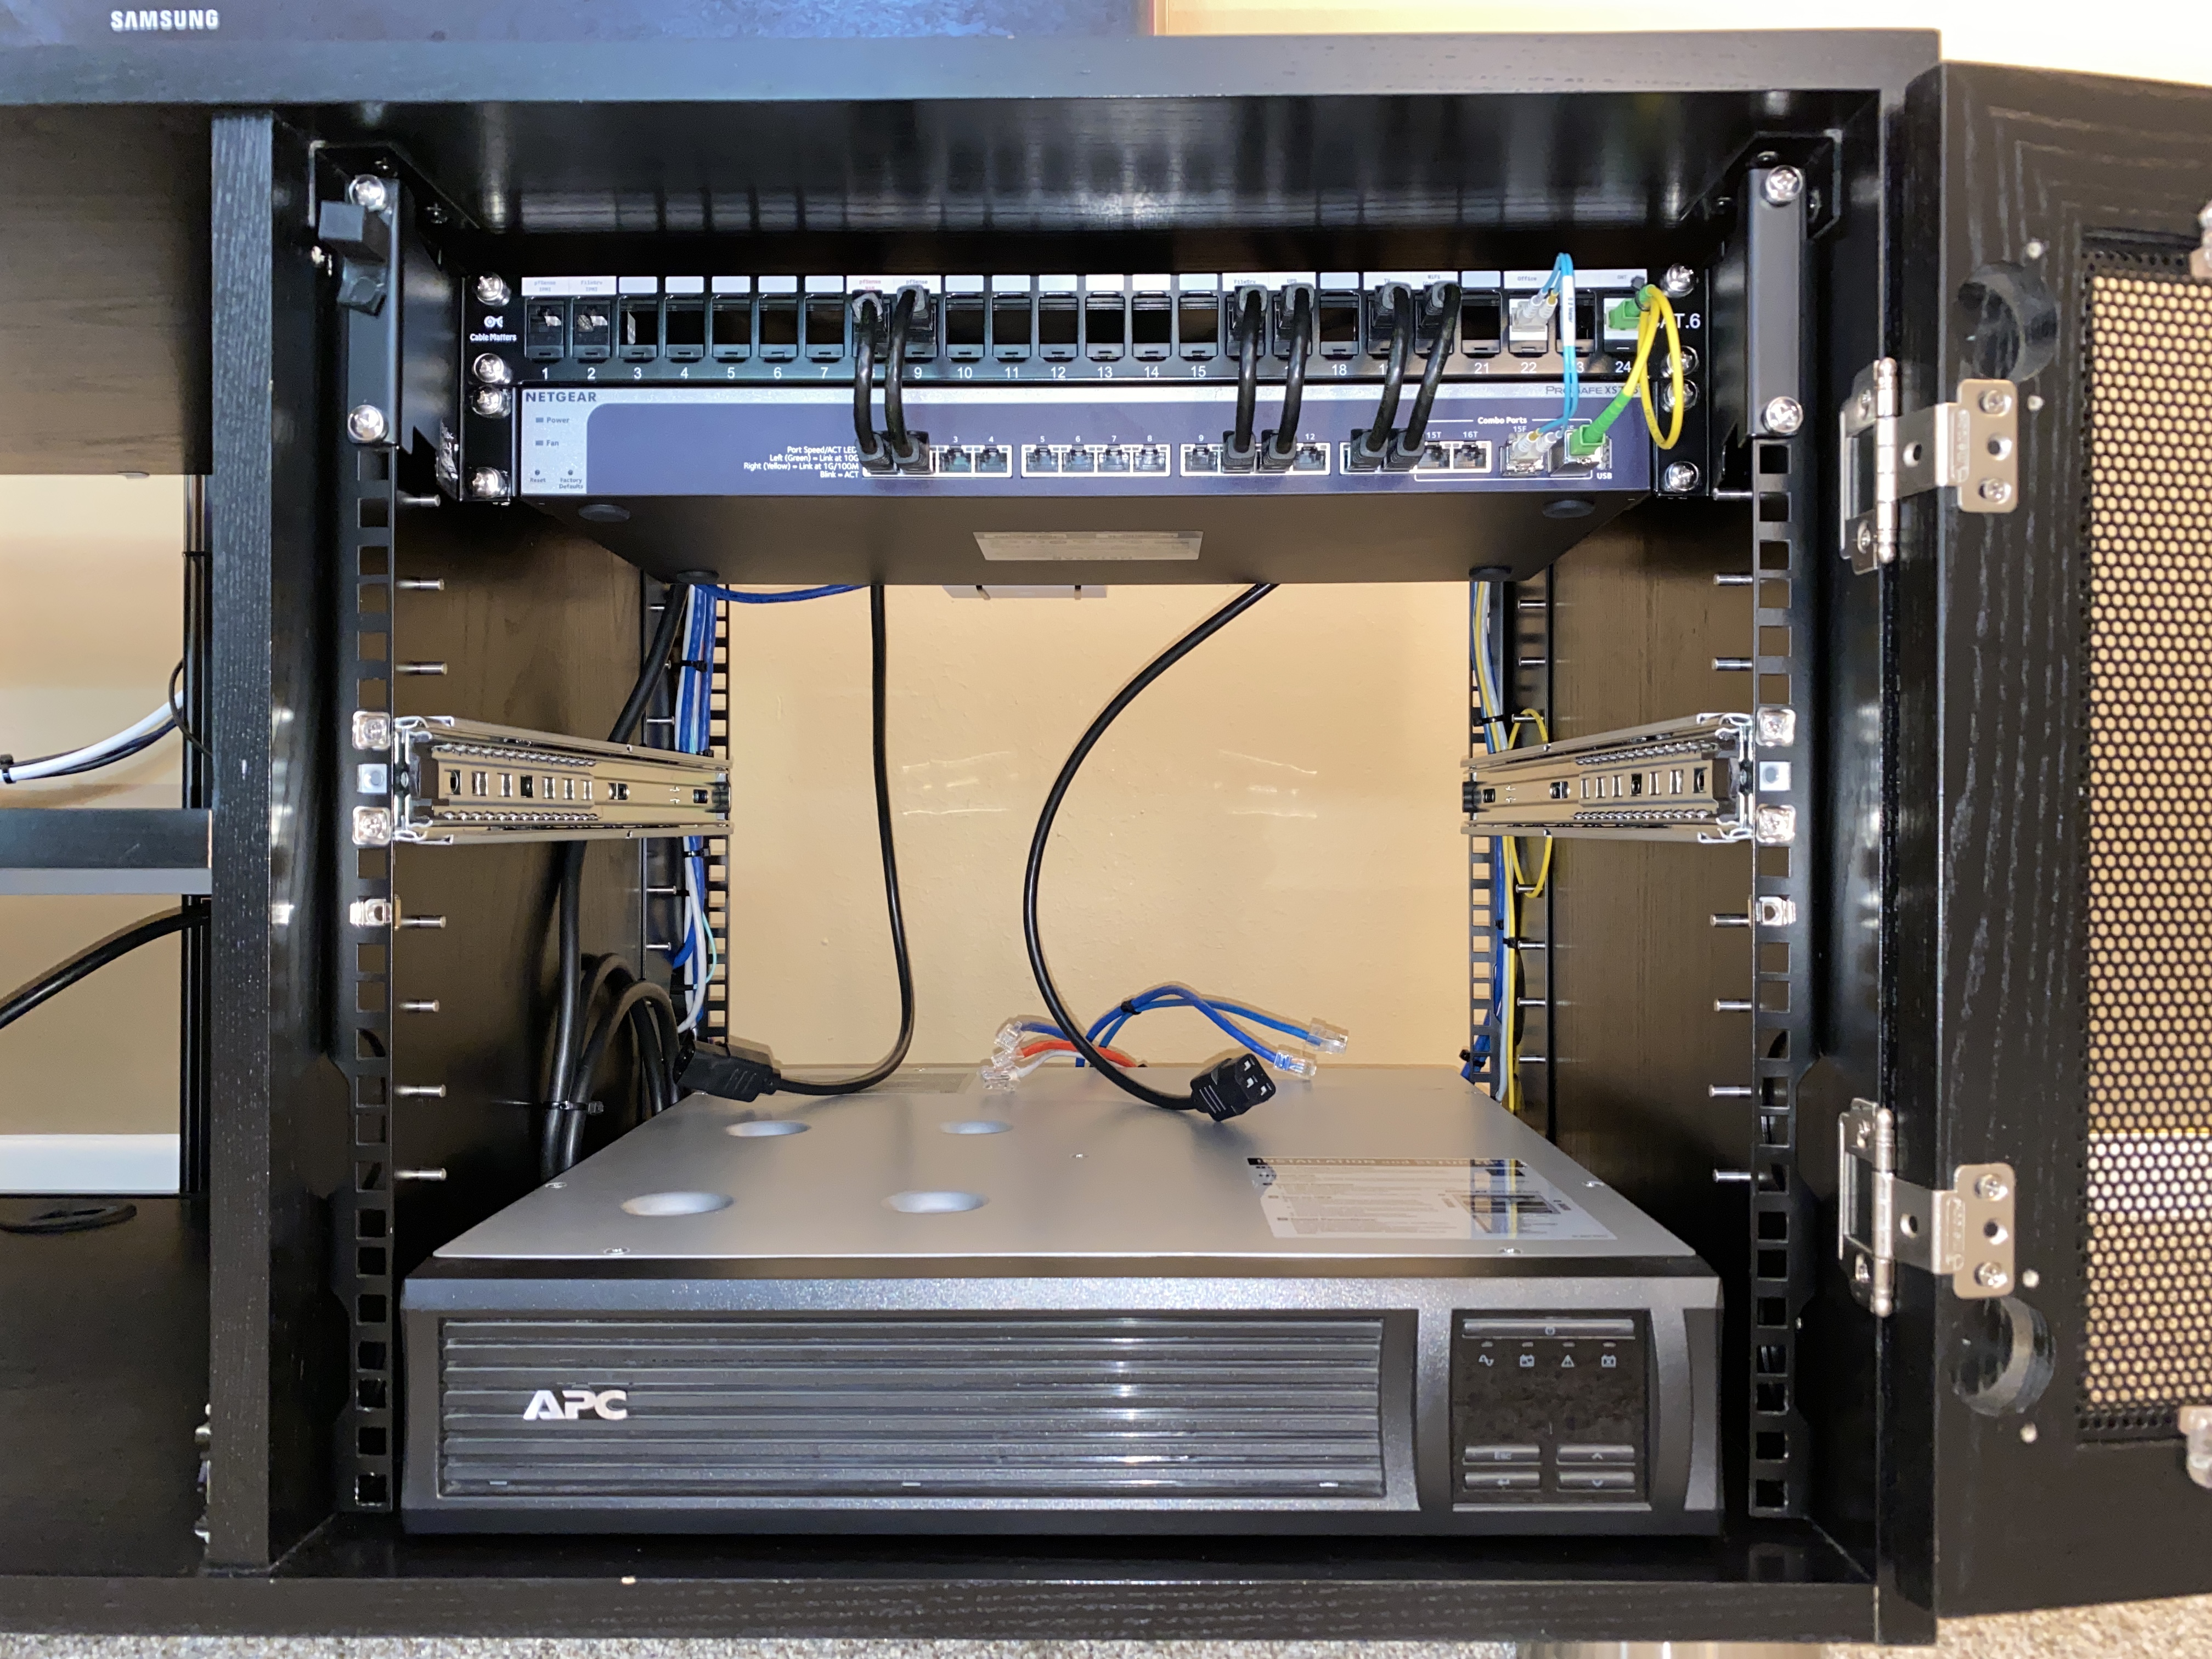
Installed Switch# Next I installed my trusty old 10 gig switch. I’m super excited that Google Fiber sent me a router with an SFP module that I could plug directly into my switch, it’s basically a “modem” on a stick! For those that are curious this only runs at 1 Gbps speeds so I’m currently just paying for Google’s 1 gigabit service instead of their 2 gig offering. |
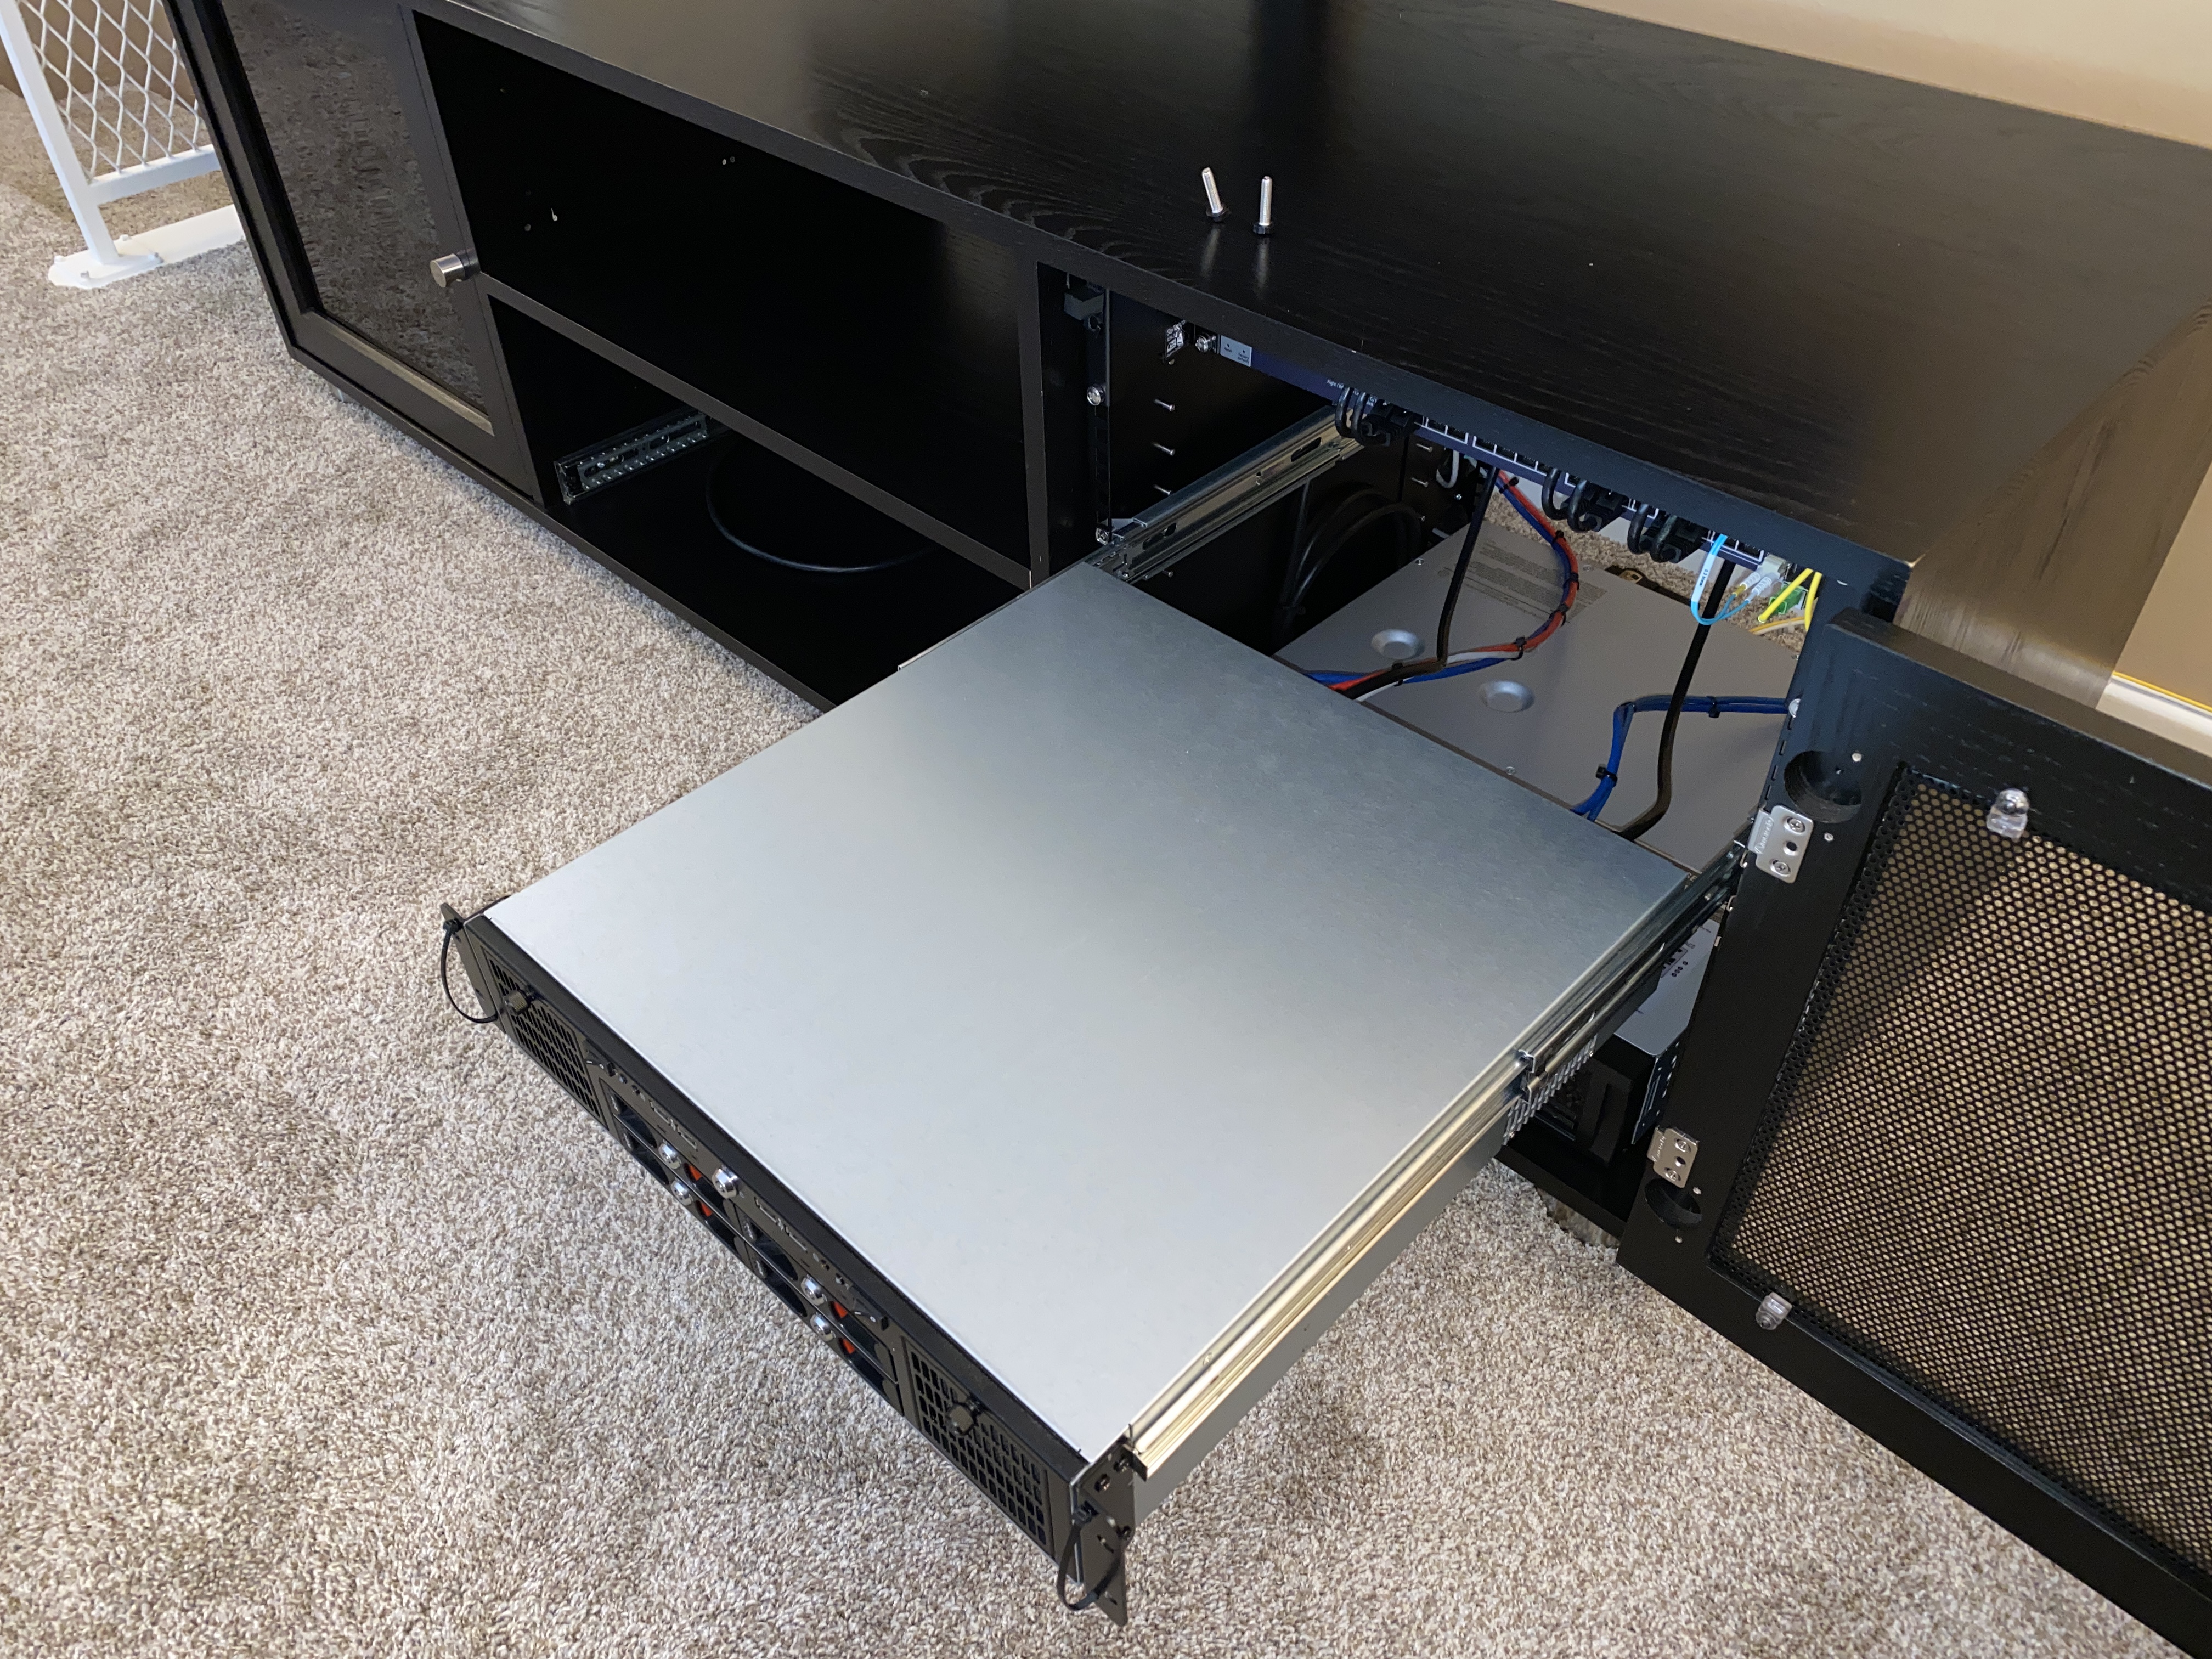
Installed Dual Server# Another thing I’m excited about is that I managed to finally find some slide rails small enough to fit in my shallow-depth rack. I got rid of my old shelf and have now properly racked my dual mini-ITX 2U server chassis. I made sure the network and power cables have enough slack so I can fully extend the server without having to power it down. |
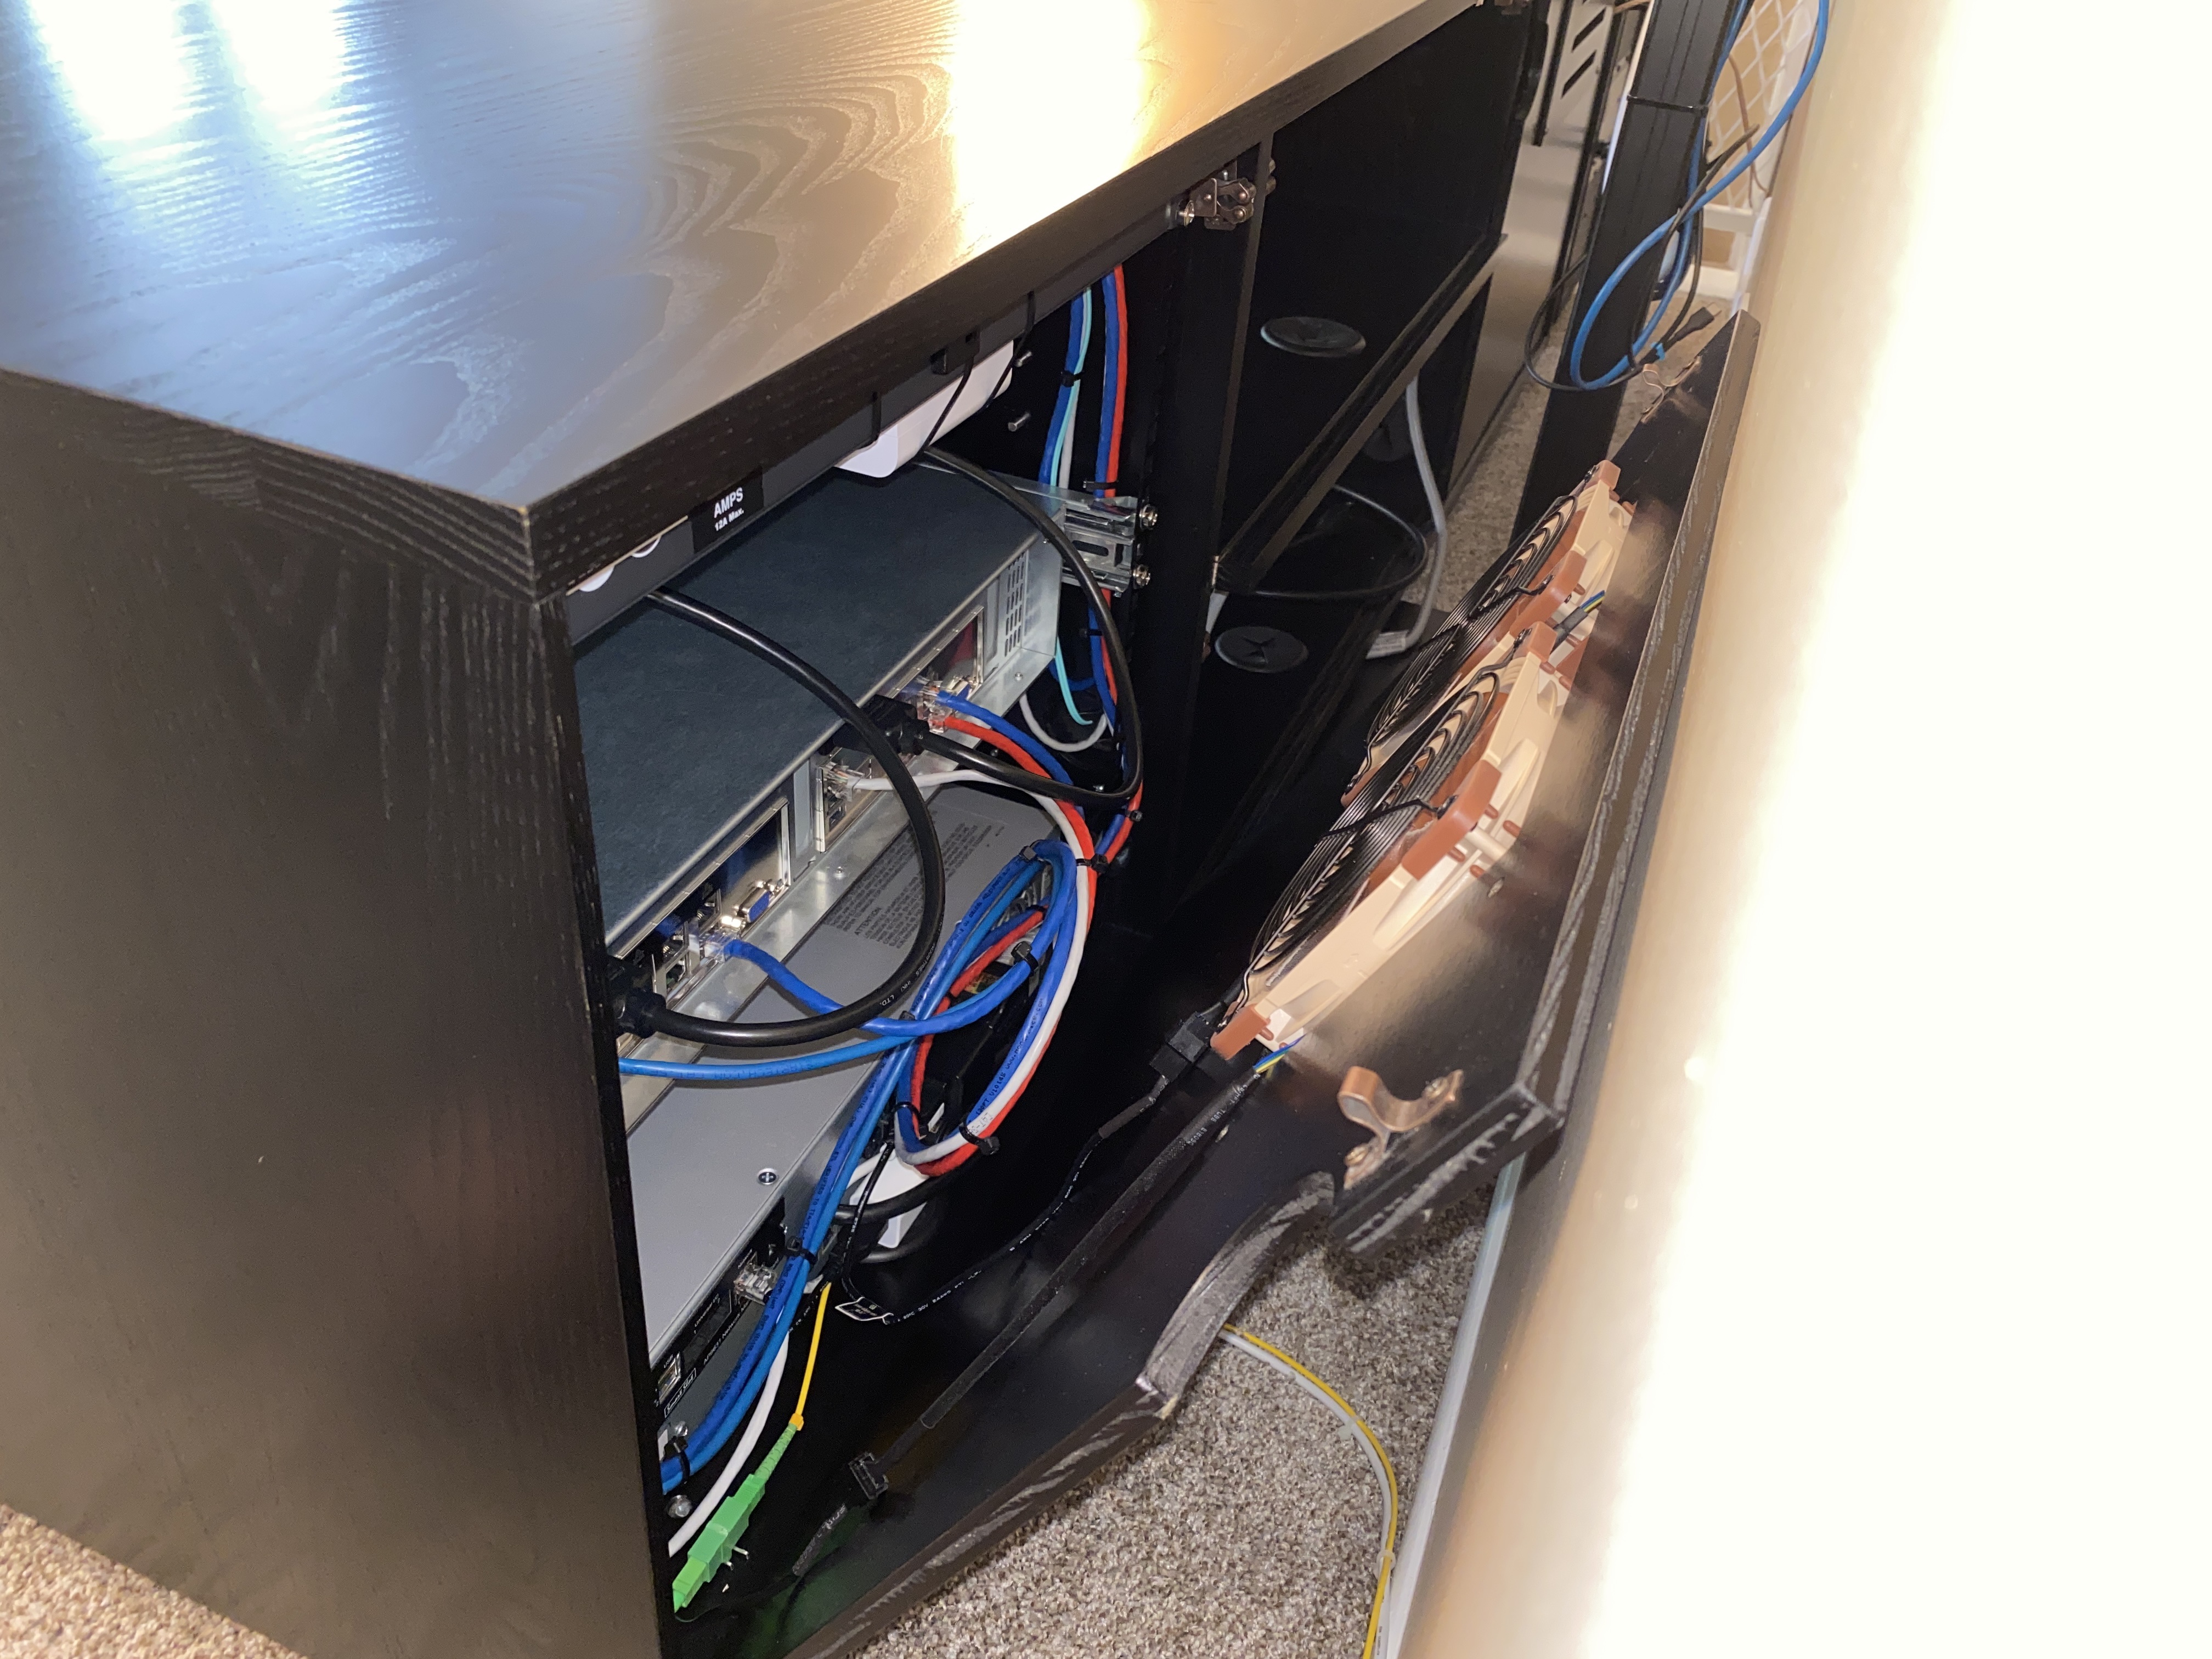
Rear Panel and Fan Assembly# Lastly I plugged in the two 5V Noctua fans into those USB power adapters. I don’t want anything to overheat and it does indeed get a bit warm in there what with my 6 spinning hard drives. |
Closed!# Like a glove. |
In All Its Glory# In the future I may add another 2U case. |
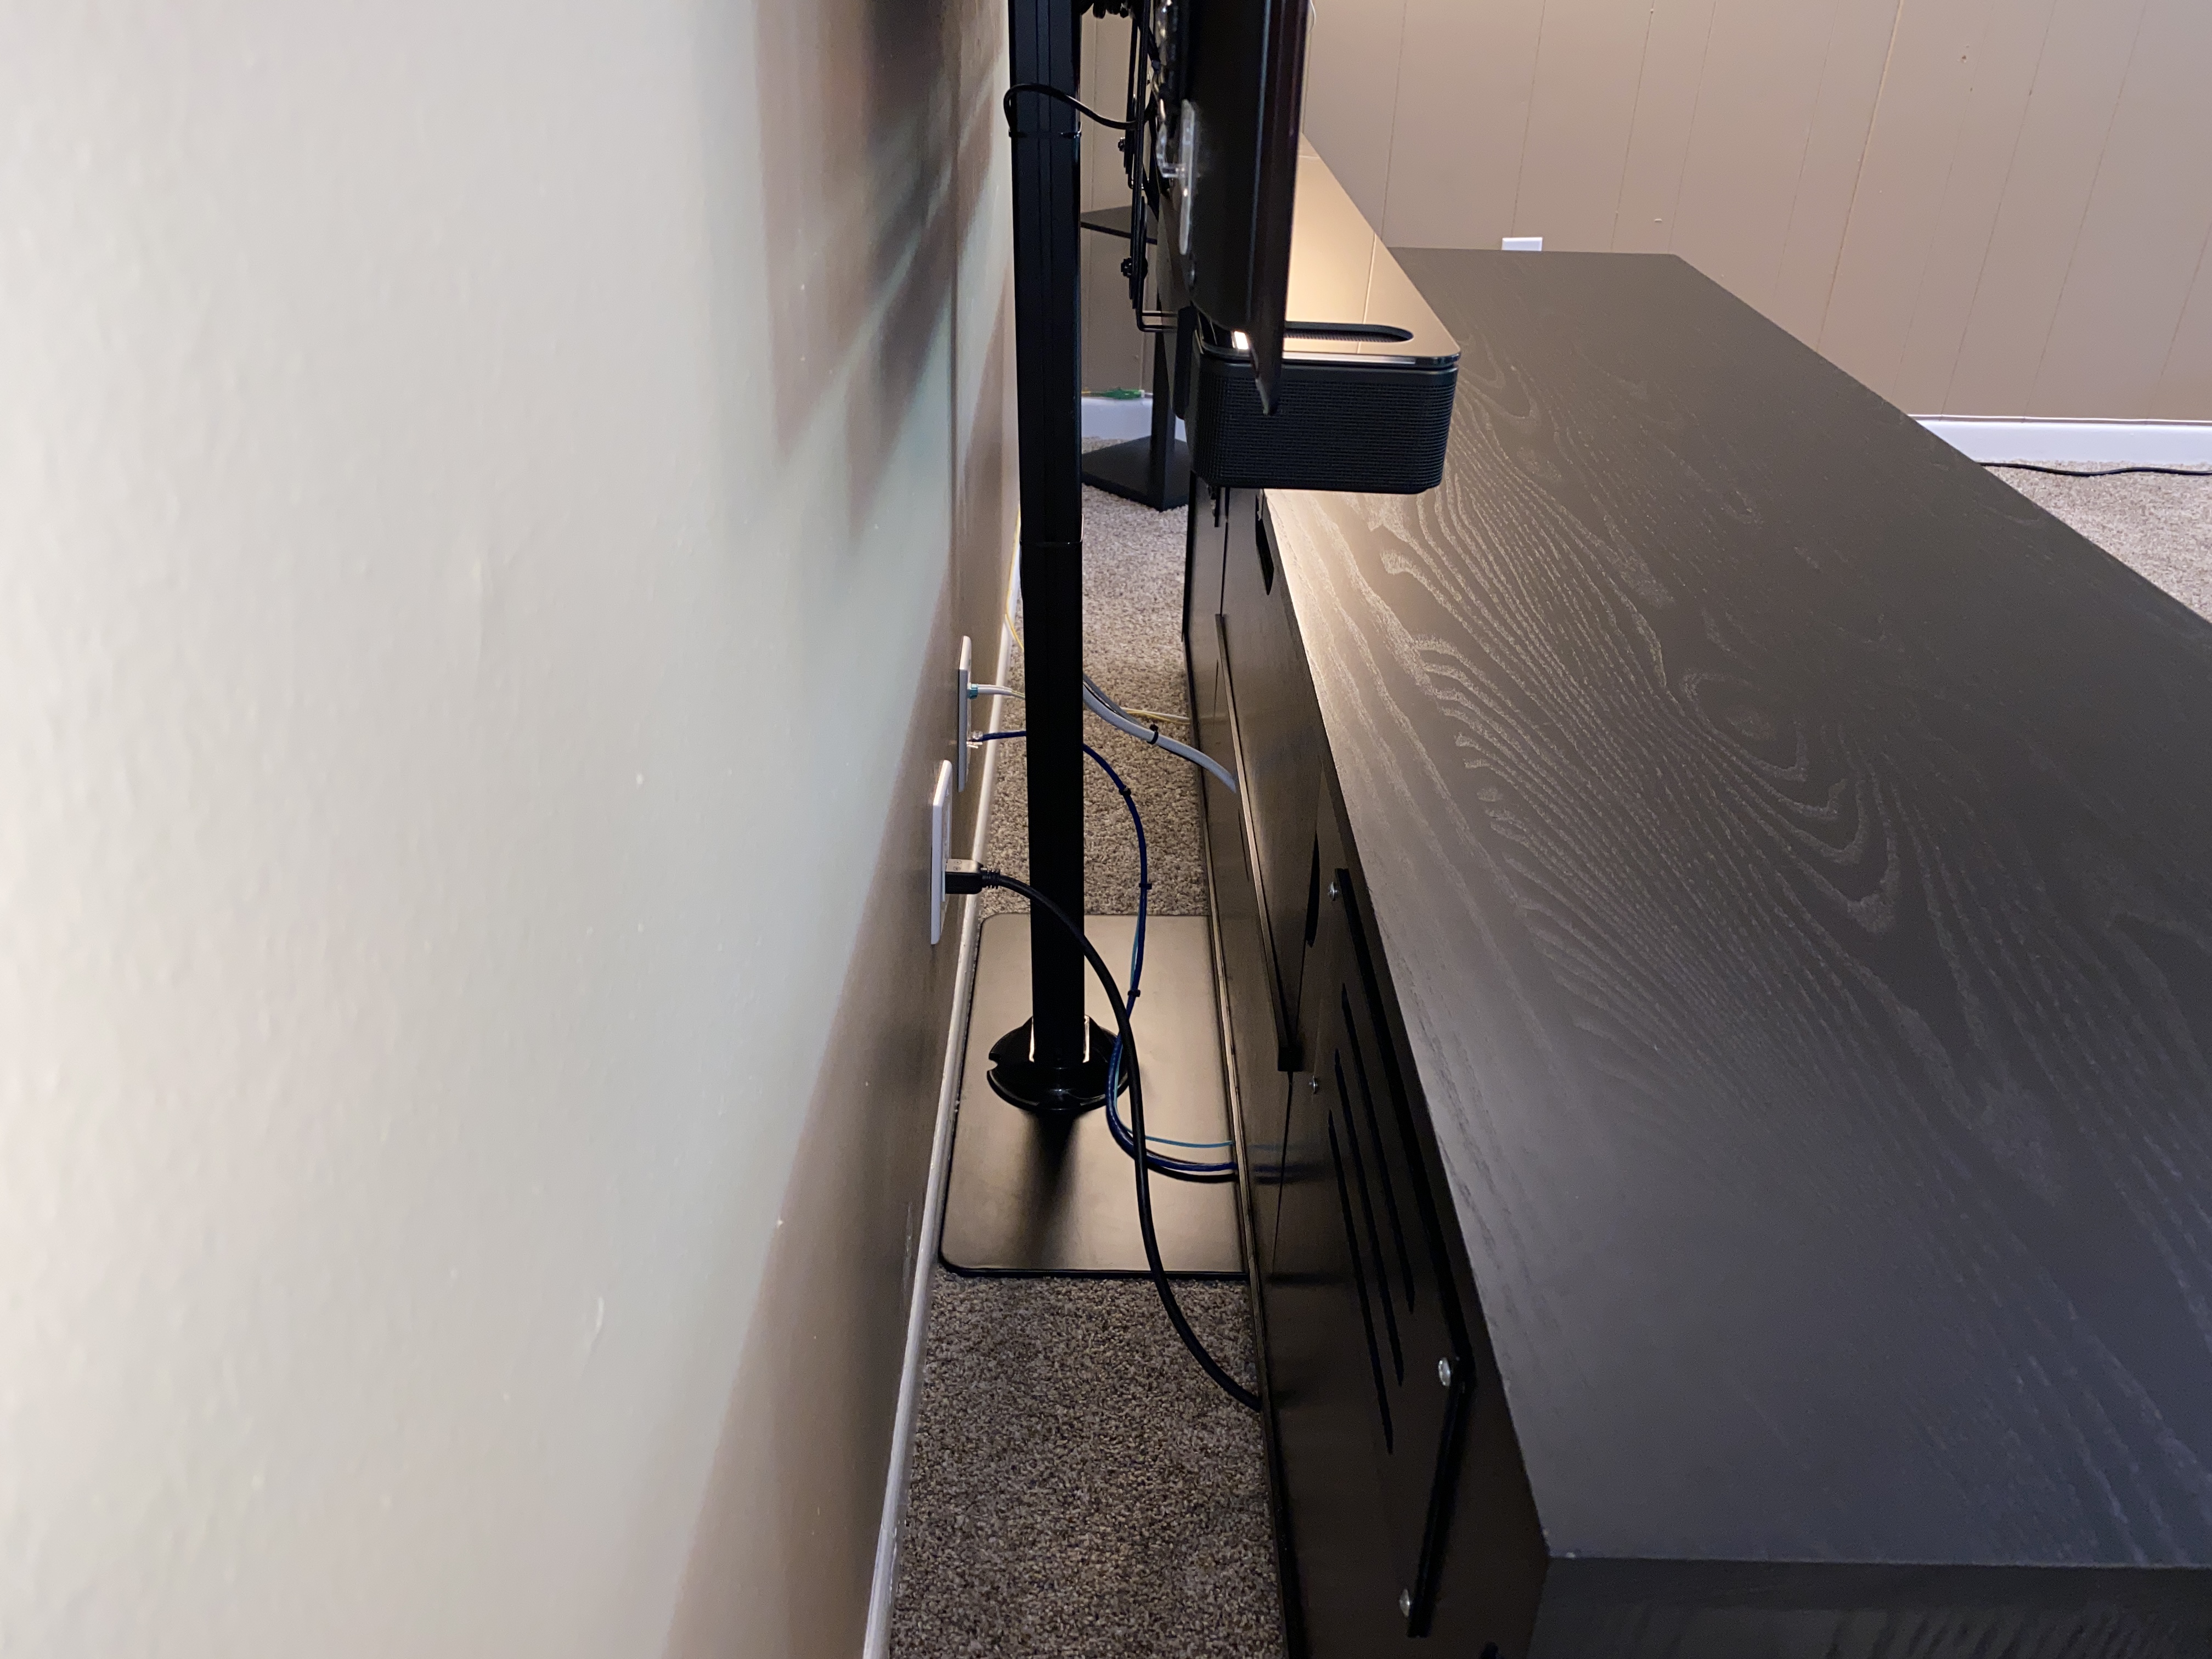
Center I/O# I added a keystone surface mount box to make plugging and unplugging wires easy, in case I rearrange my living room or something. The dark blue CAT6 cable goes to the garage for one of my UniFi access points, the light blue LC/UPC fiber cable goes to a switch in my office and the gray CAT5e cable goes up to my Chromecast behind the TV. The power strip is also for my TV and game consoles. |
Behind the Cabinet# Here’s what the back looks like. More keystones! |
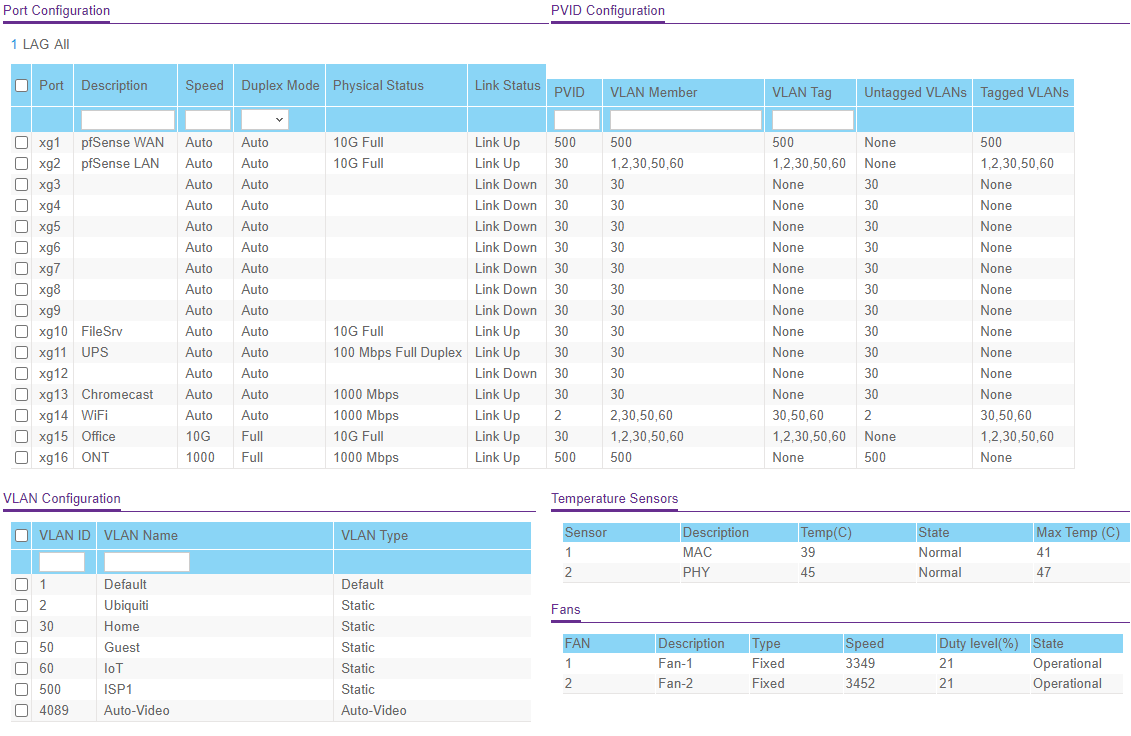
VLAN Configuration# This is how I configured the VLANs on my Netgear switch. So glad I took the Cisco CCNA class in high school. |
Imgur mirror: https://imgur.com/a/gePnvYN
Comments
comments powered by Disqus