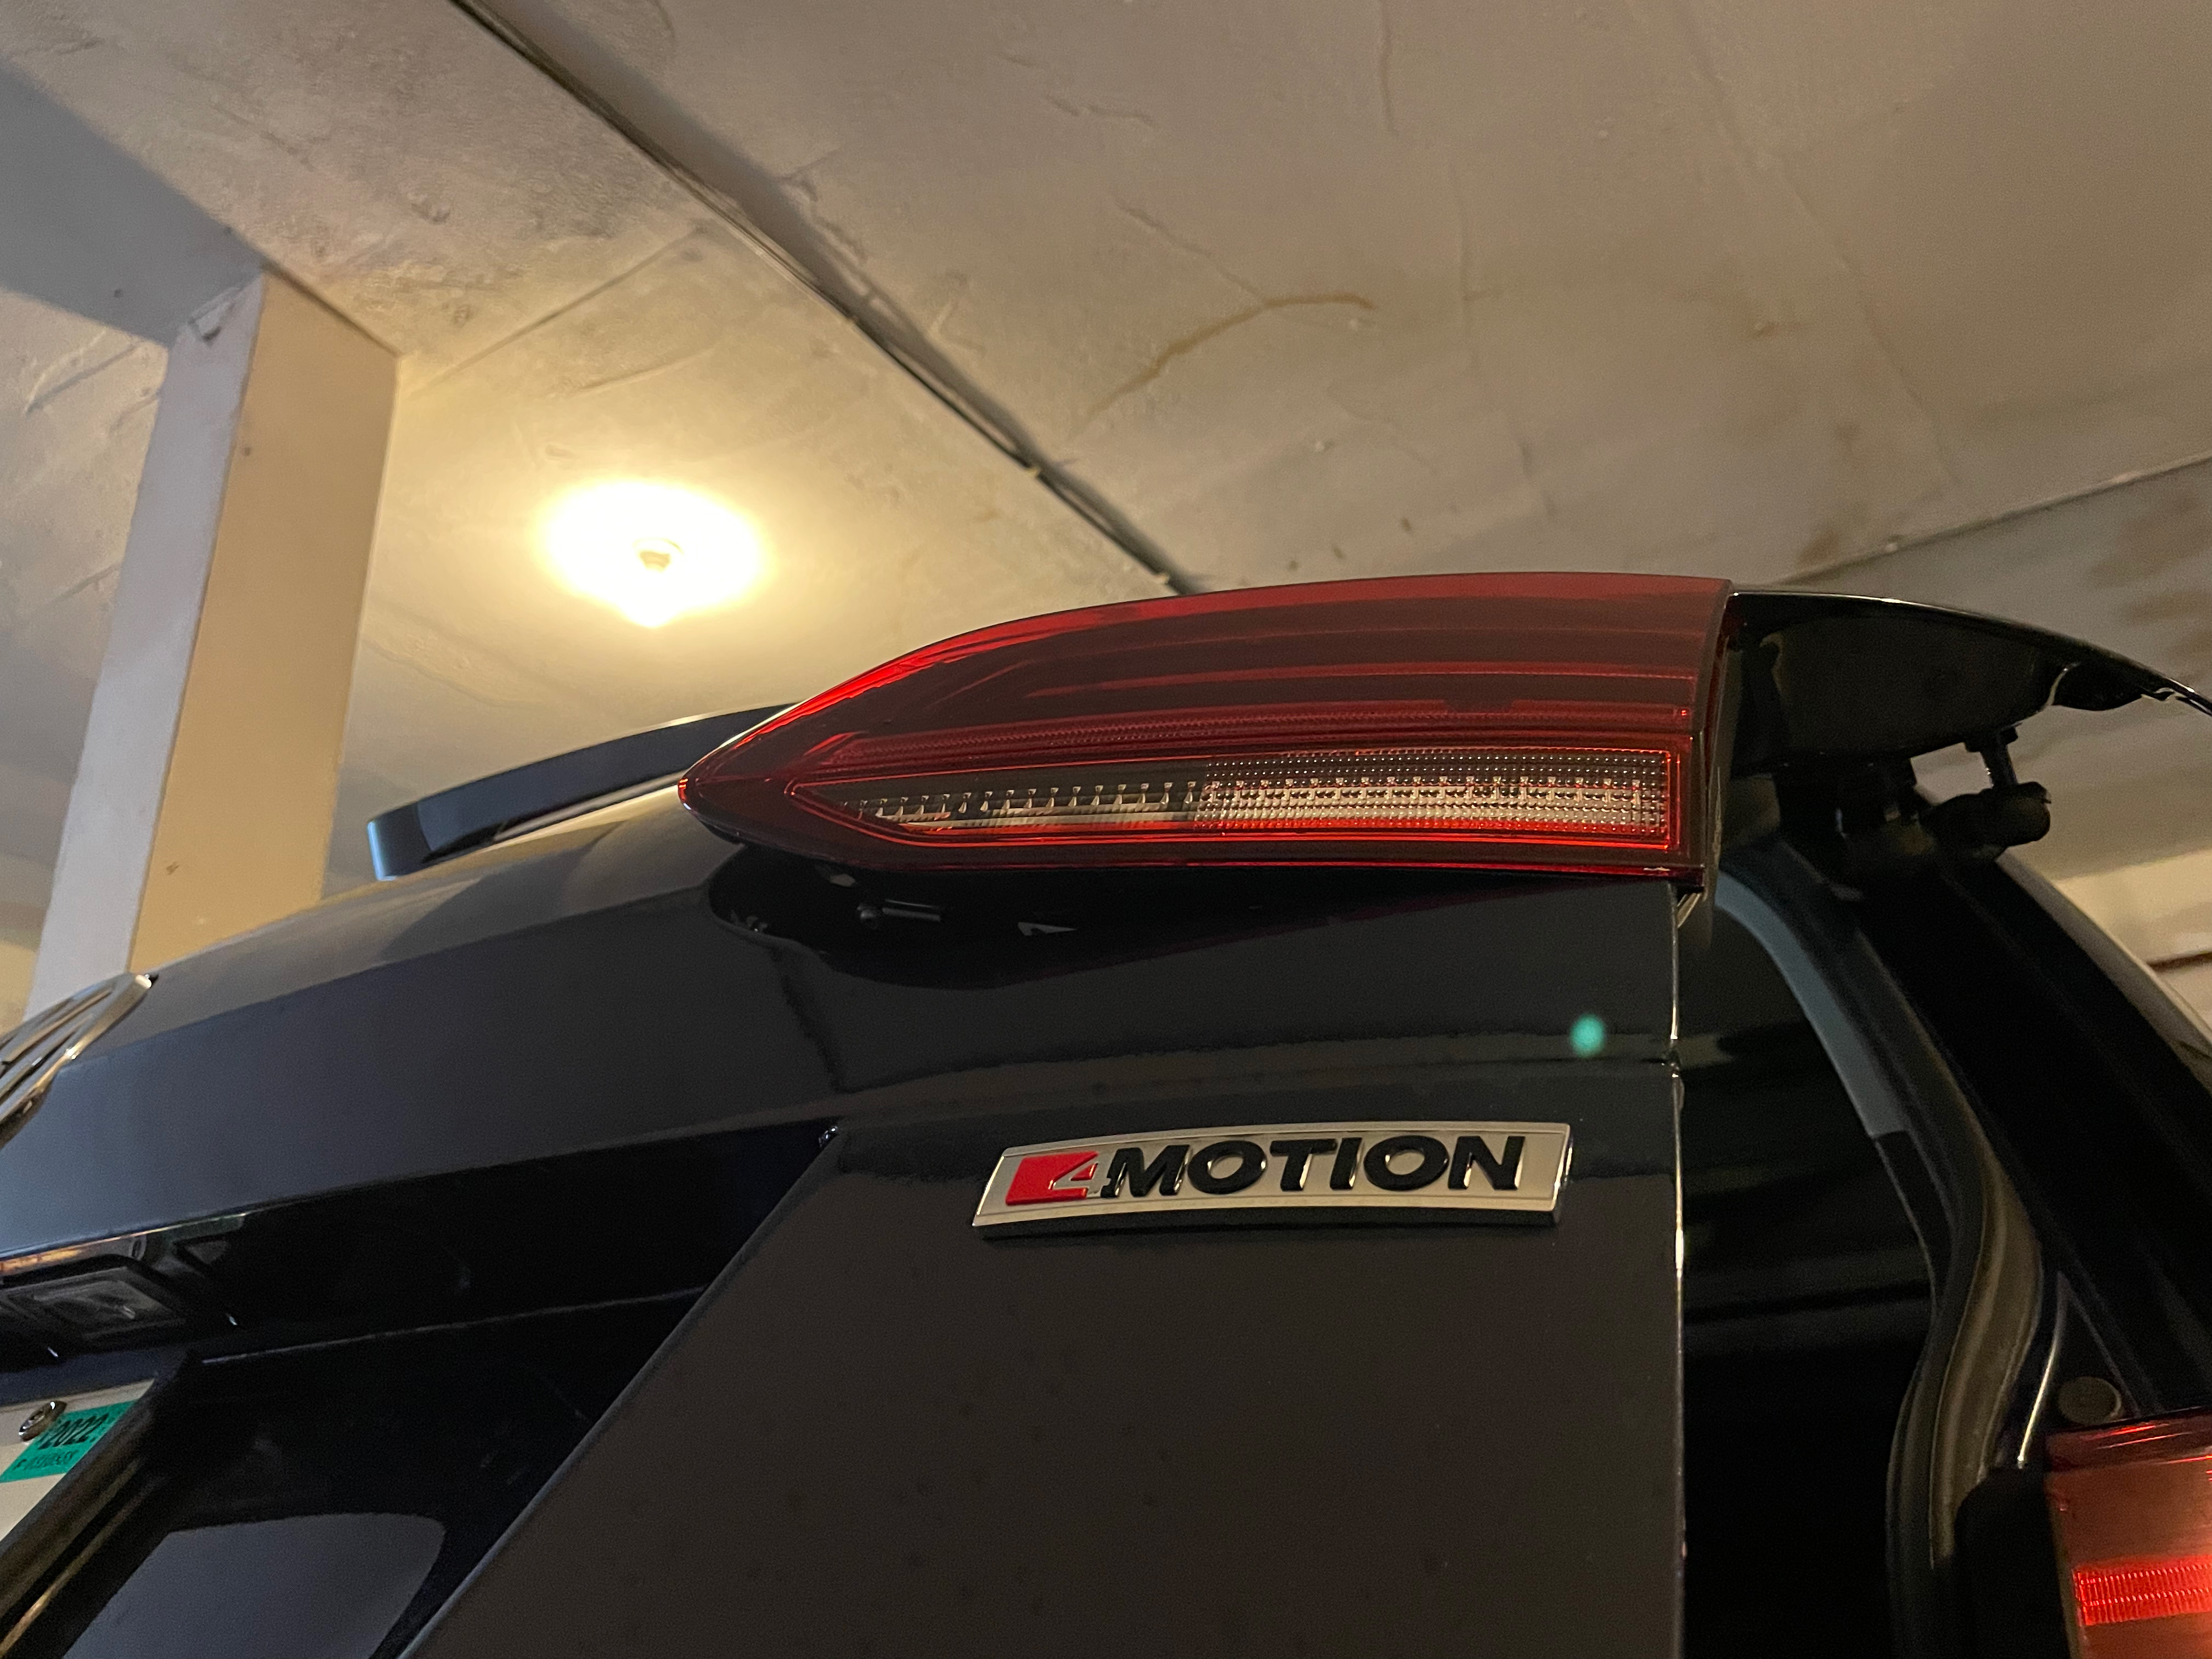
Euro Tail Lights#
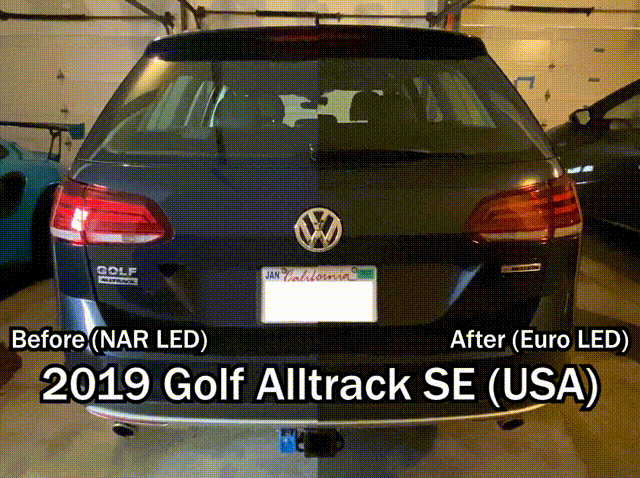
I’ve always preferred amber turn signals over flashing brake lights in my vehicles. My 2010 JSW had them but my 2019 Alltrack lacked the amber turn signals.
I bought my 2019 Golf Alltrack SE with the Driver Assistance and Appearance Package. It came with North American Region LED tail lights (not sure if this is a standard feature of 2019 models or only for vehicles with the appearance package) so when I bought the EUR LED kit I had to take this into account when choosing the wiring harness. Even with this choice I still had to make modifications to the harness before installing, which I’ll go over below.
Items purchased:
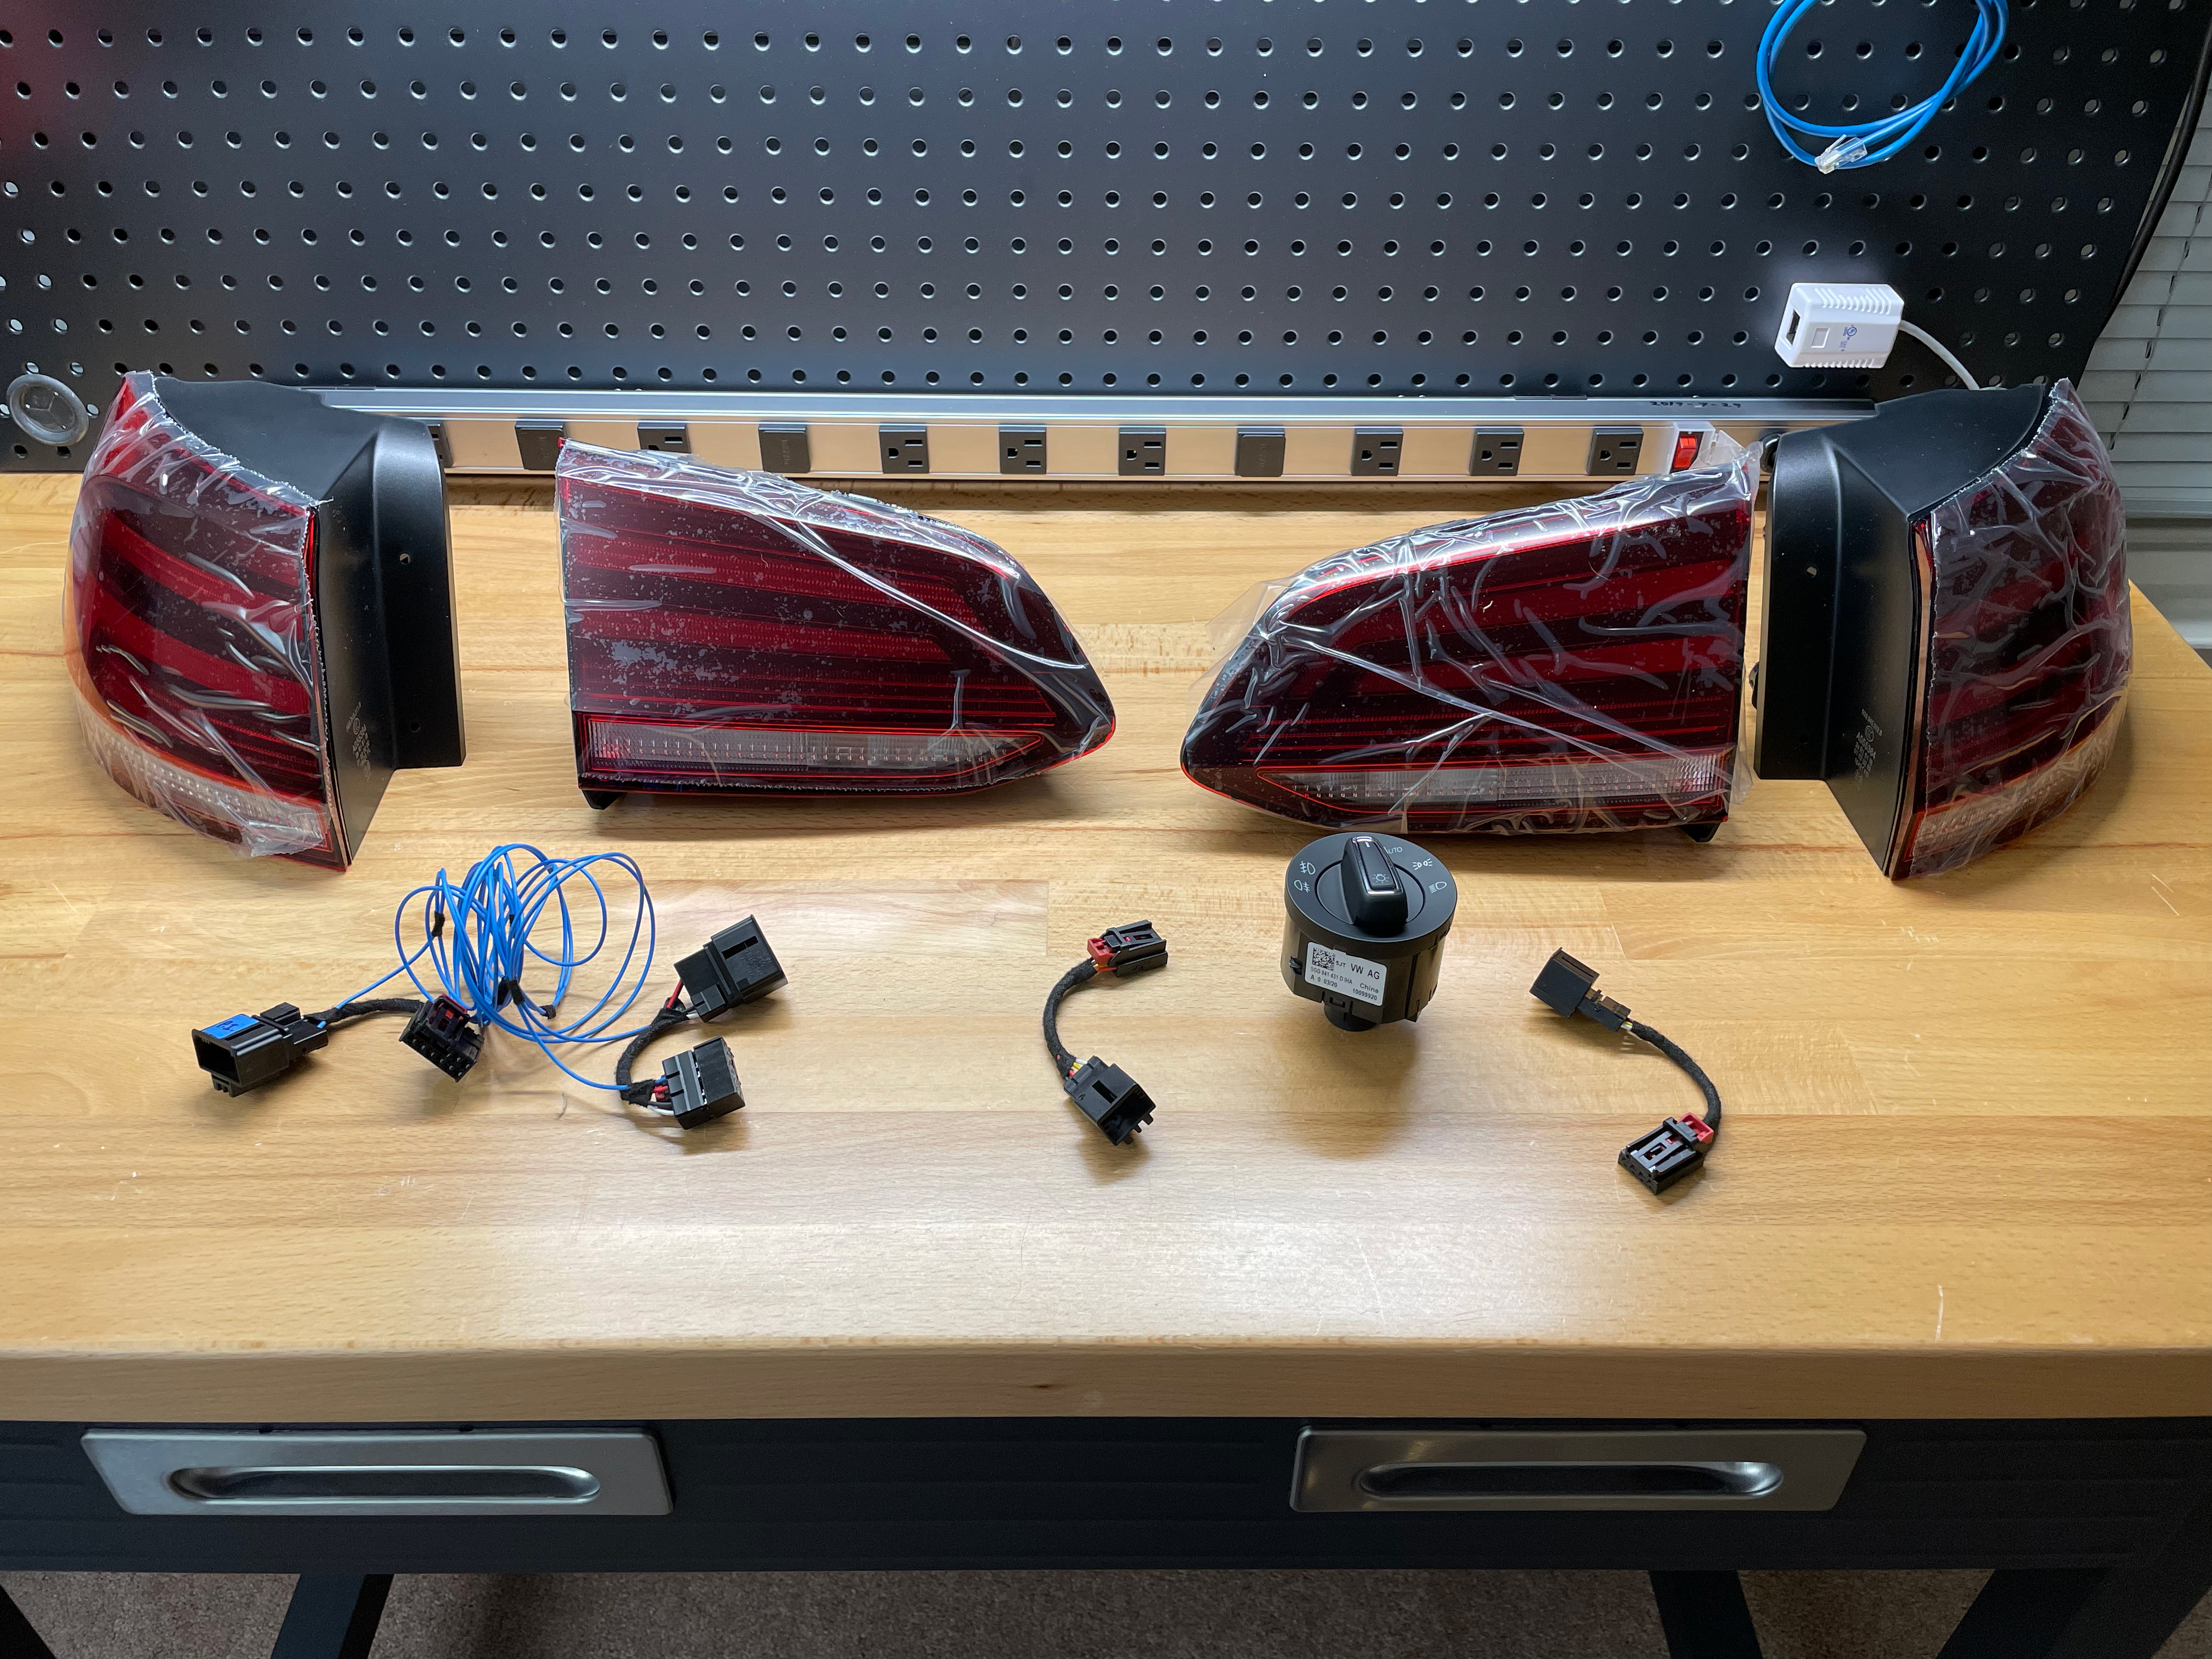
Mk7 European Light Switch 5GG941431D
Chinese switch (works fine)
Auto Lights: Yes
Front Fogs: Yes
Rear Fog: Yes
OEM Euro LED Tail Lamps 5G9945095G 5G9945093L 5G9945094K 5G9945096G
Do you need an adapter harness?: Tail lamps and adapter harness
Rear Fog: 2
Style: 2018+ NAR LED to Euro LED, tinted
Euro Switch#
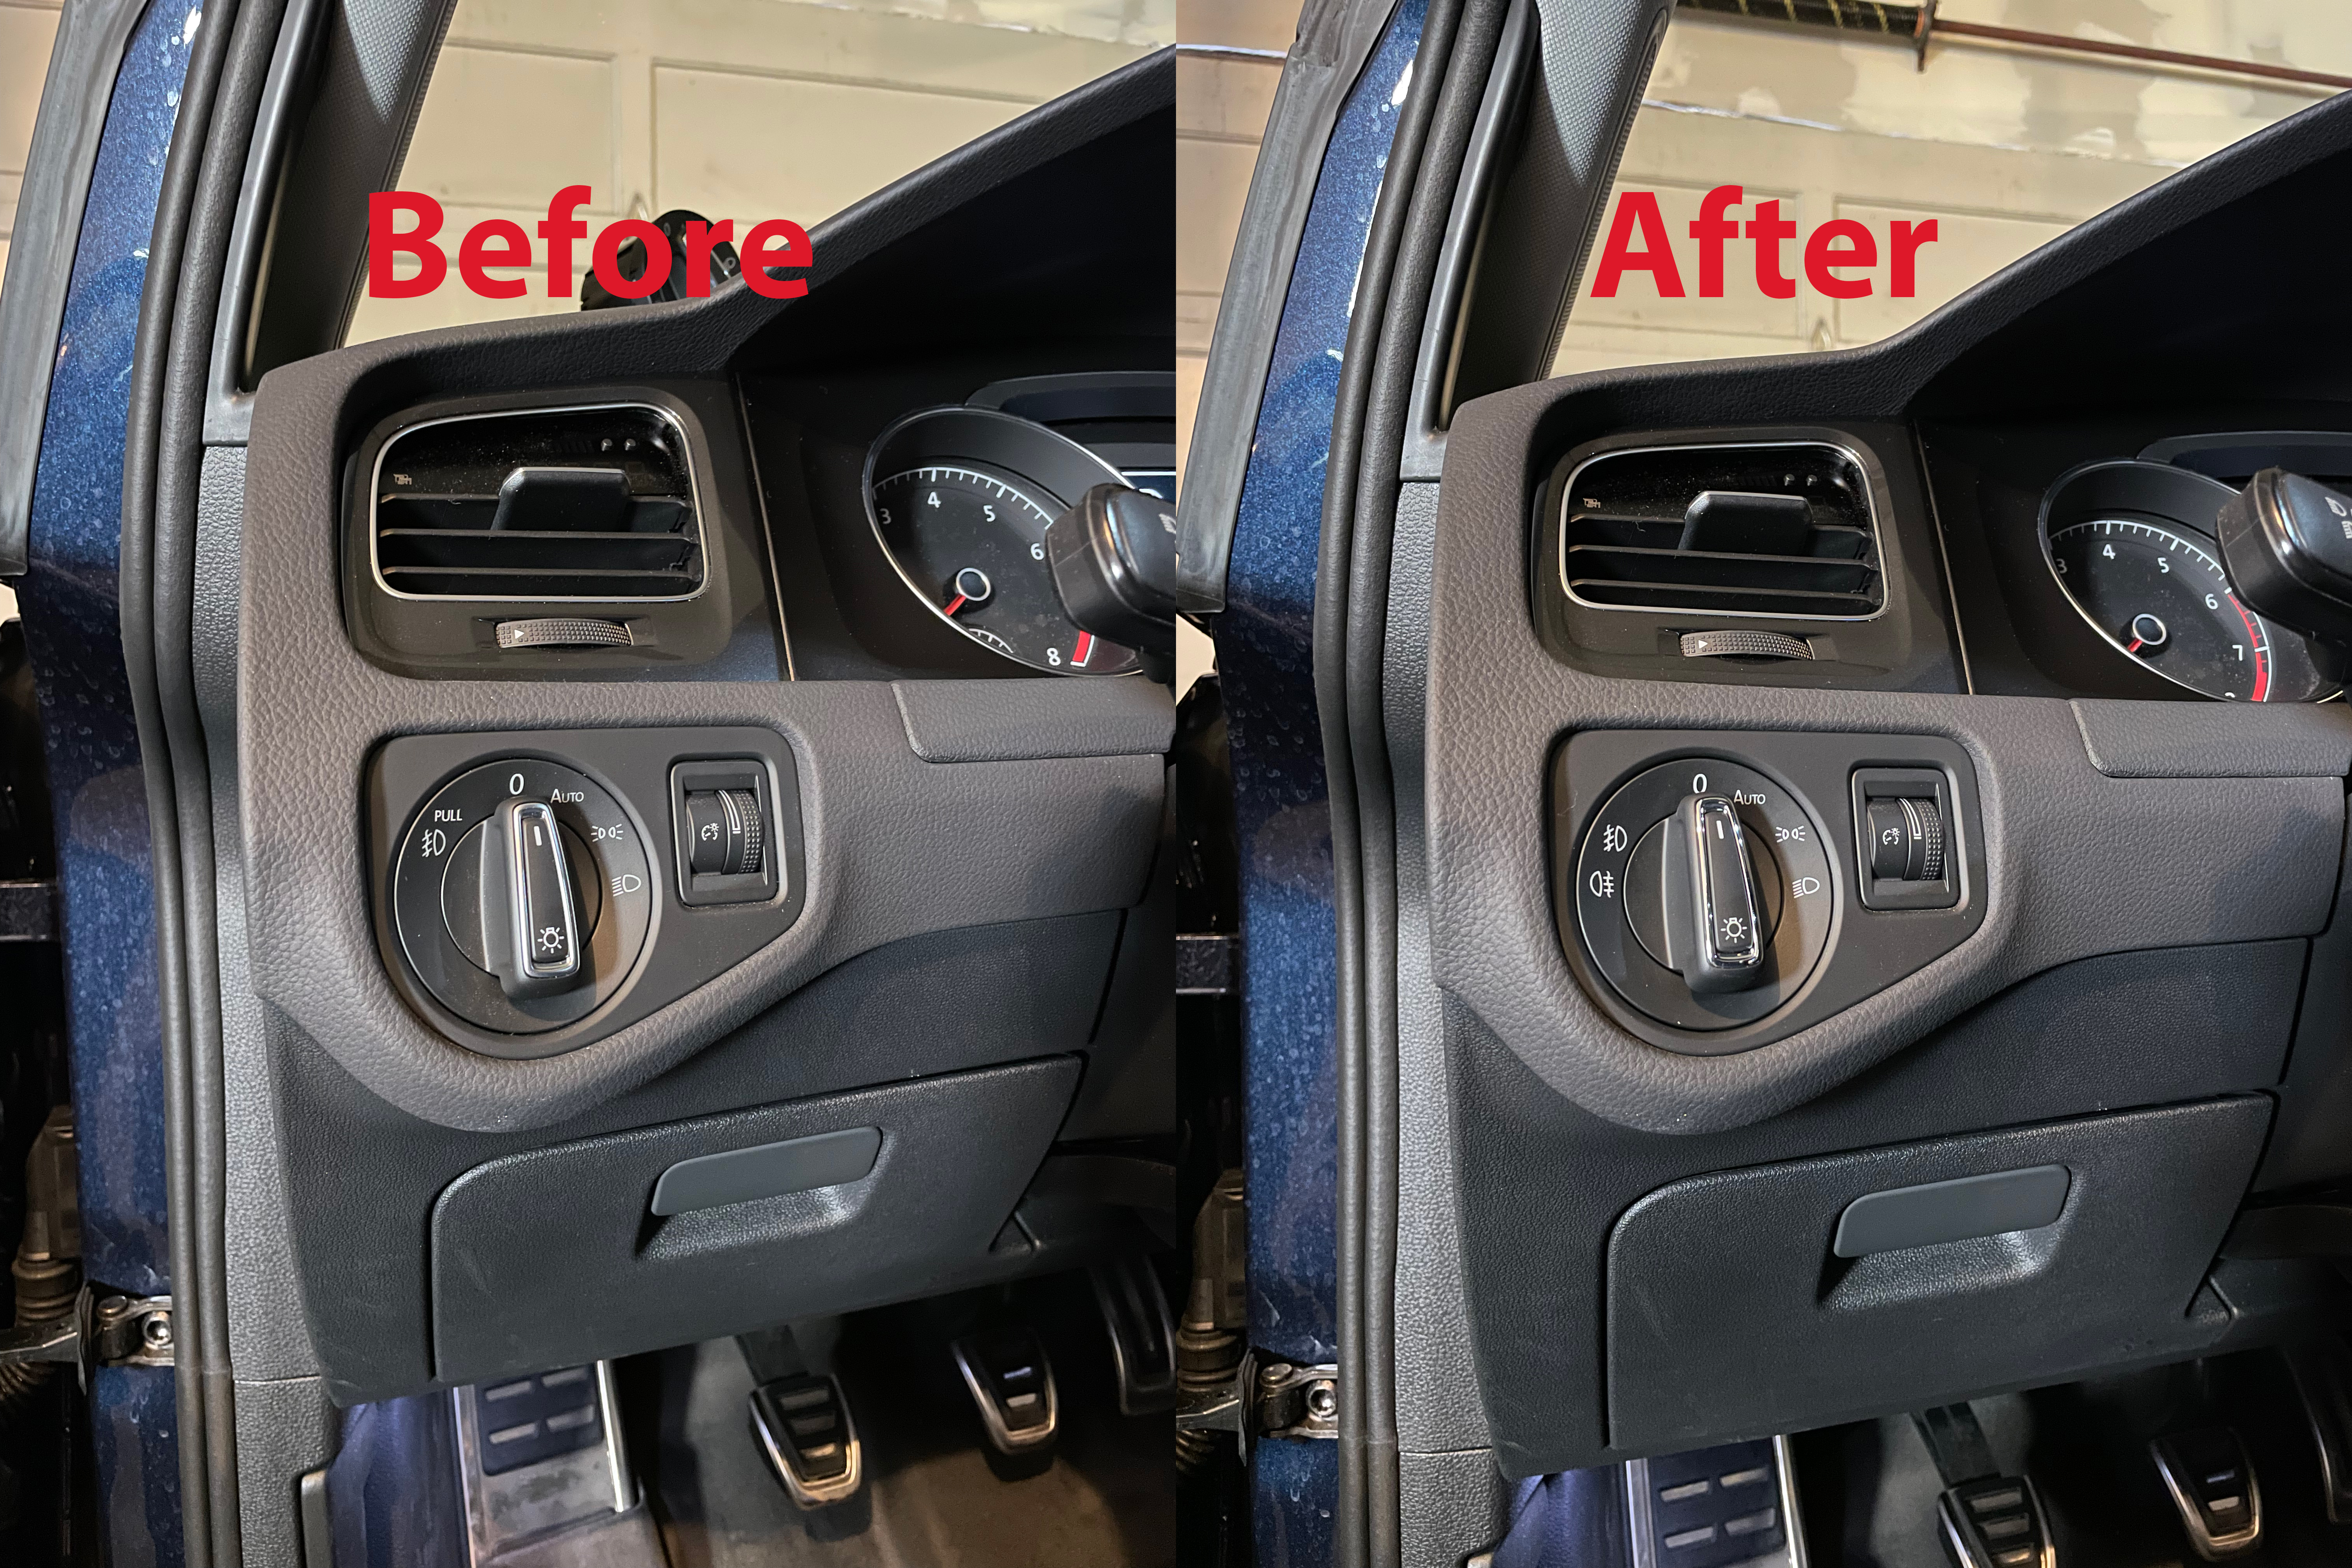
Since I’ll be installing new tail lights with fog lights I had to purchase the Euro light switch. Installation is very easy, at position 0 push in the switch and turn it towards Auto then pull it out.
Modify Harness#
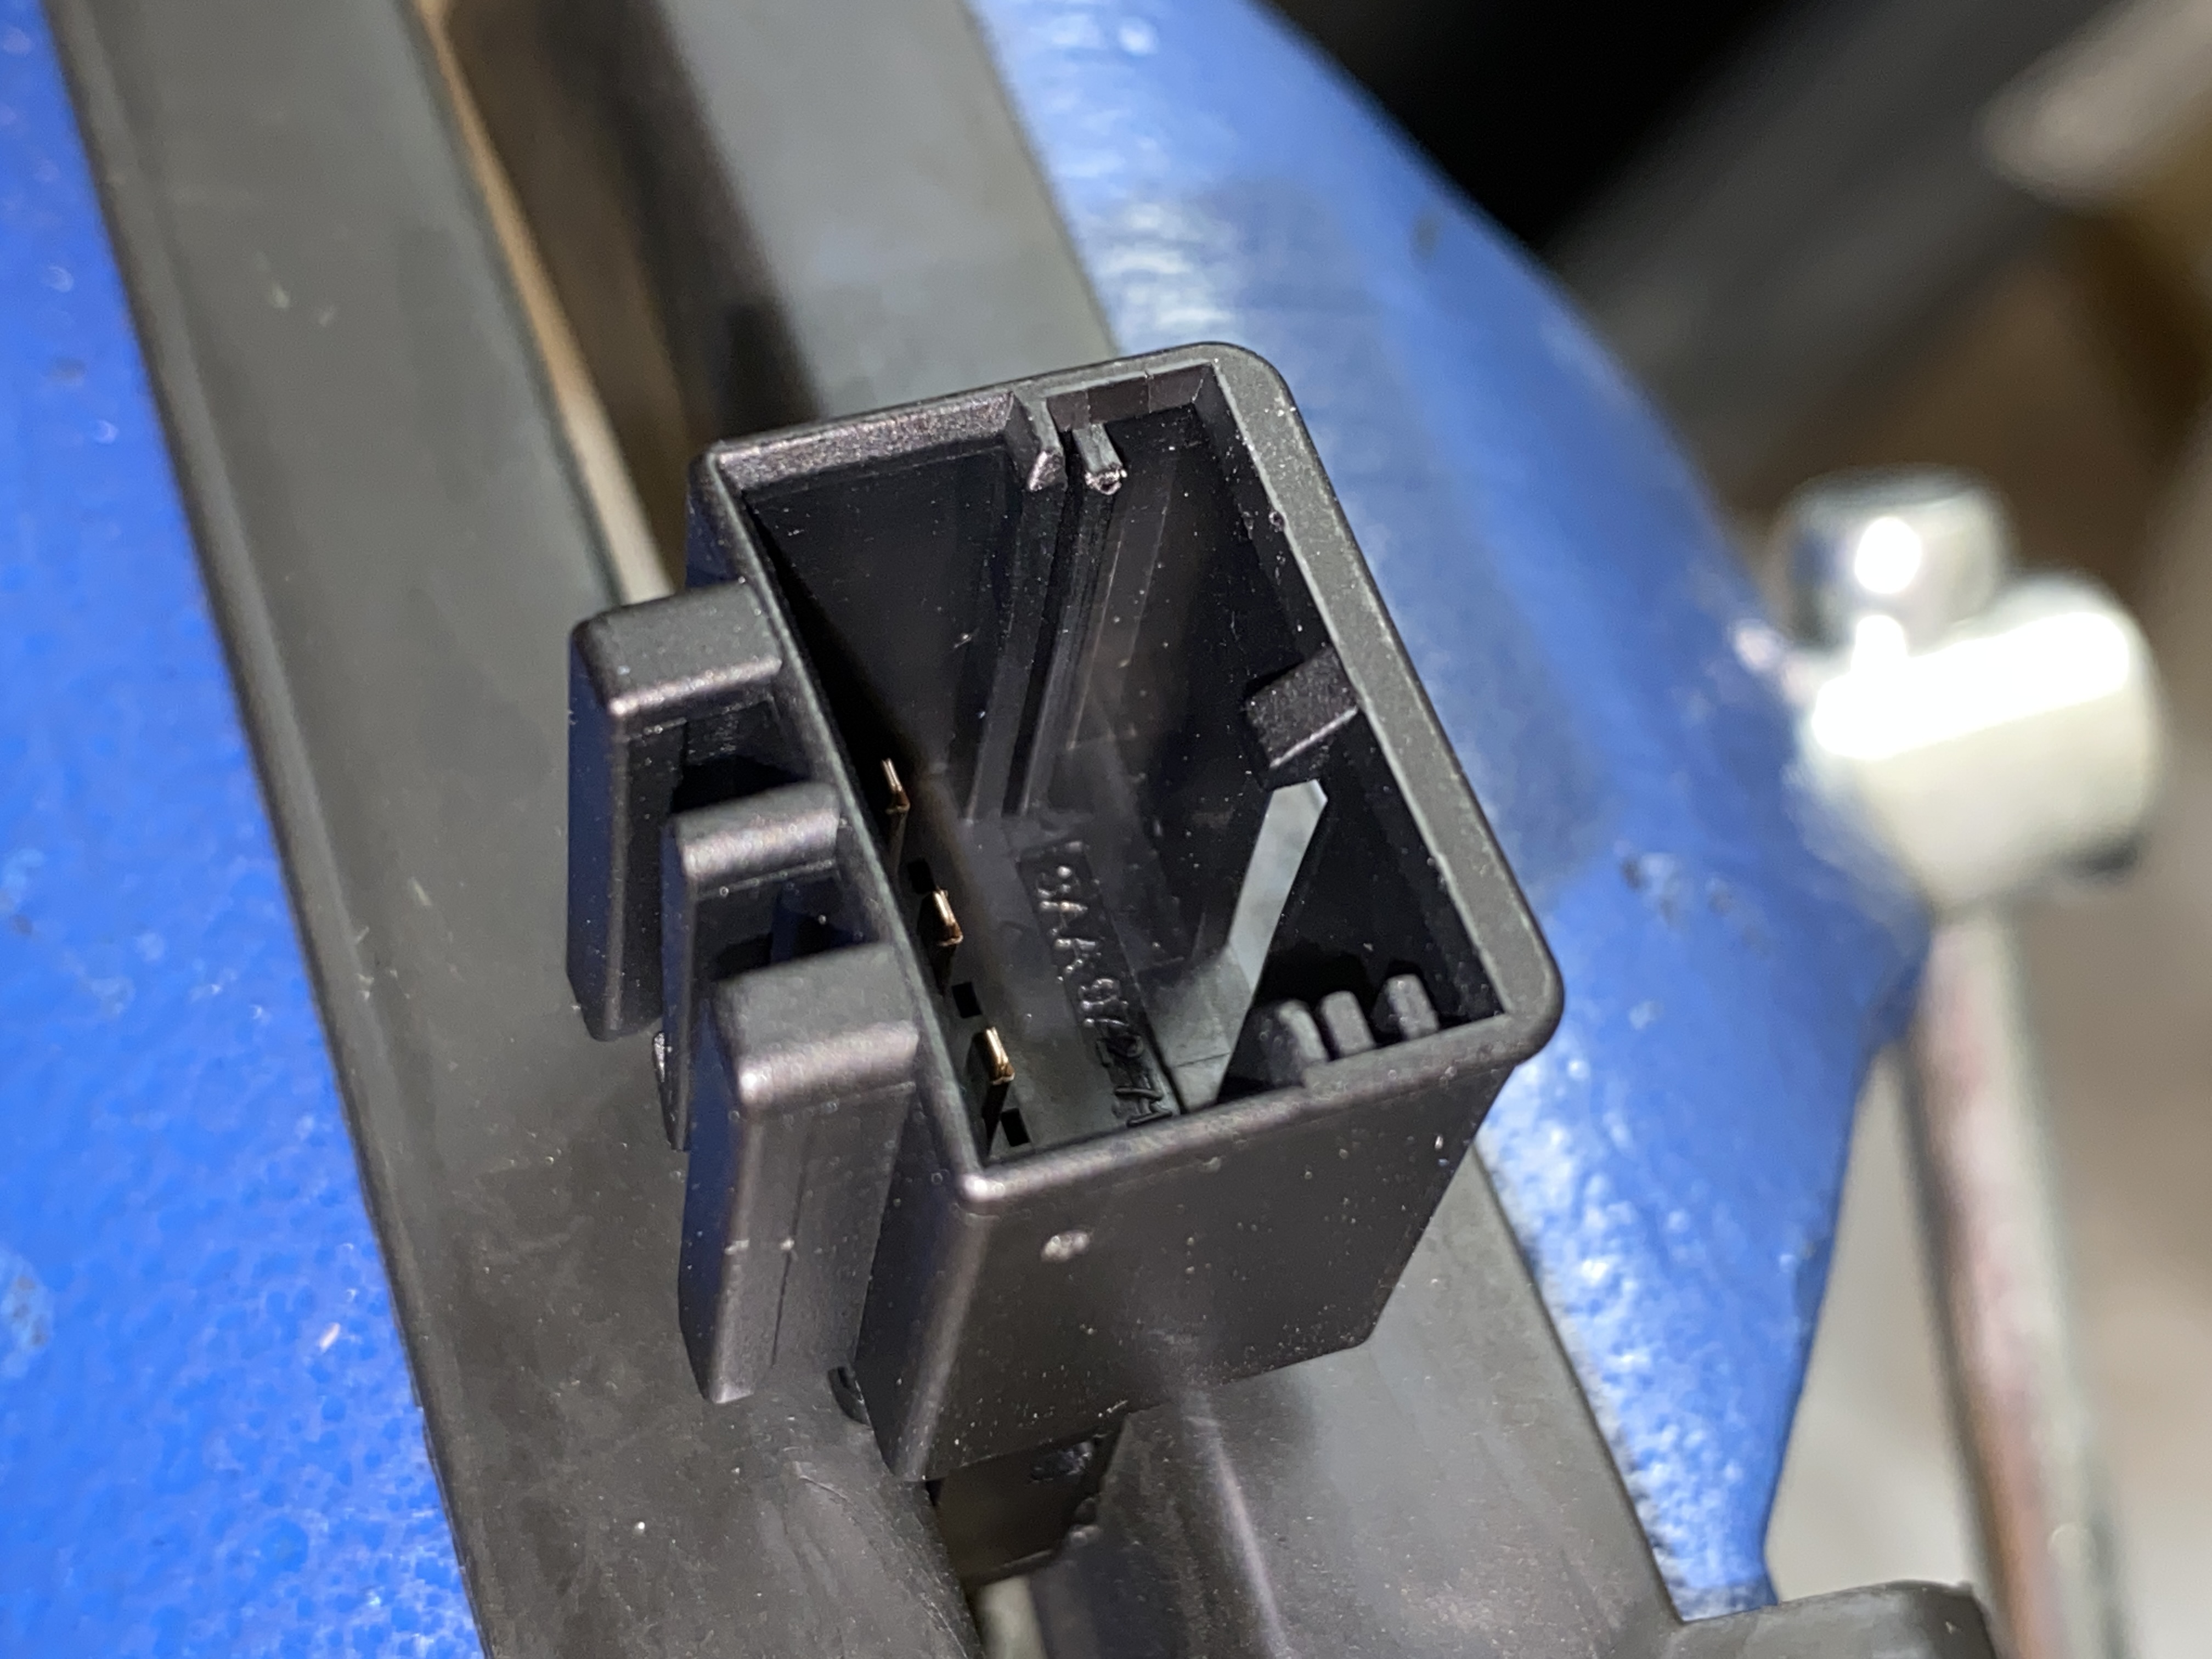
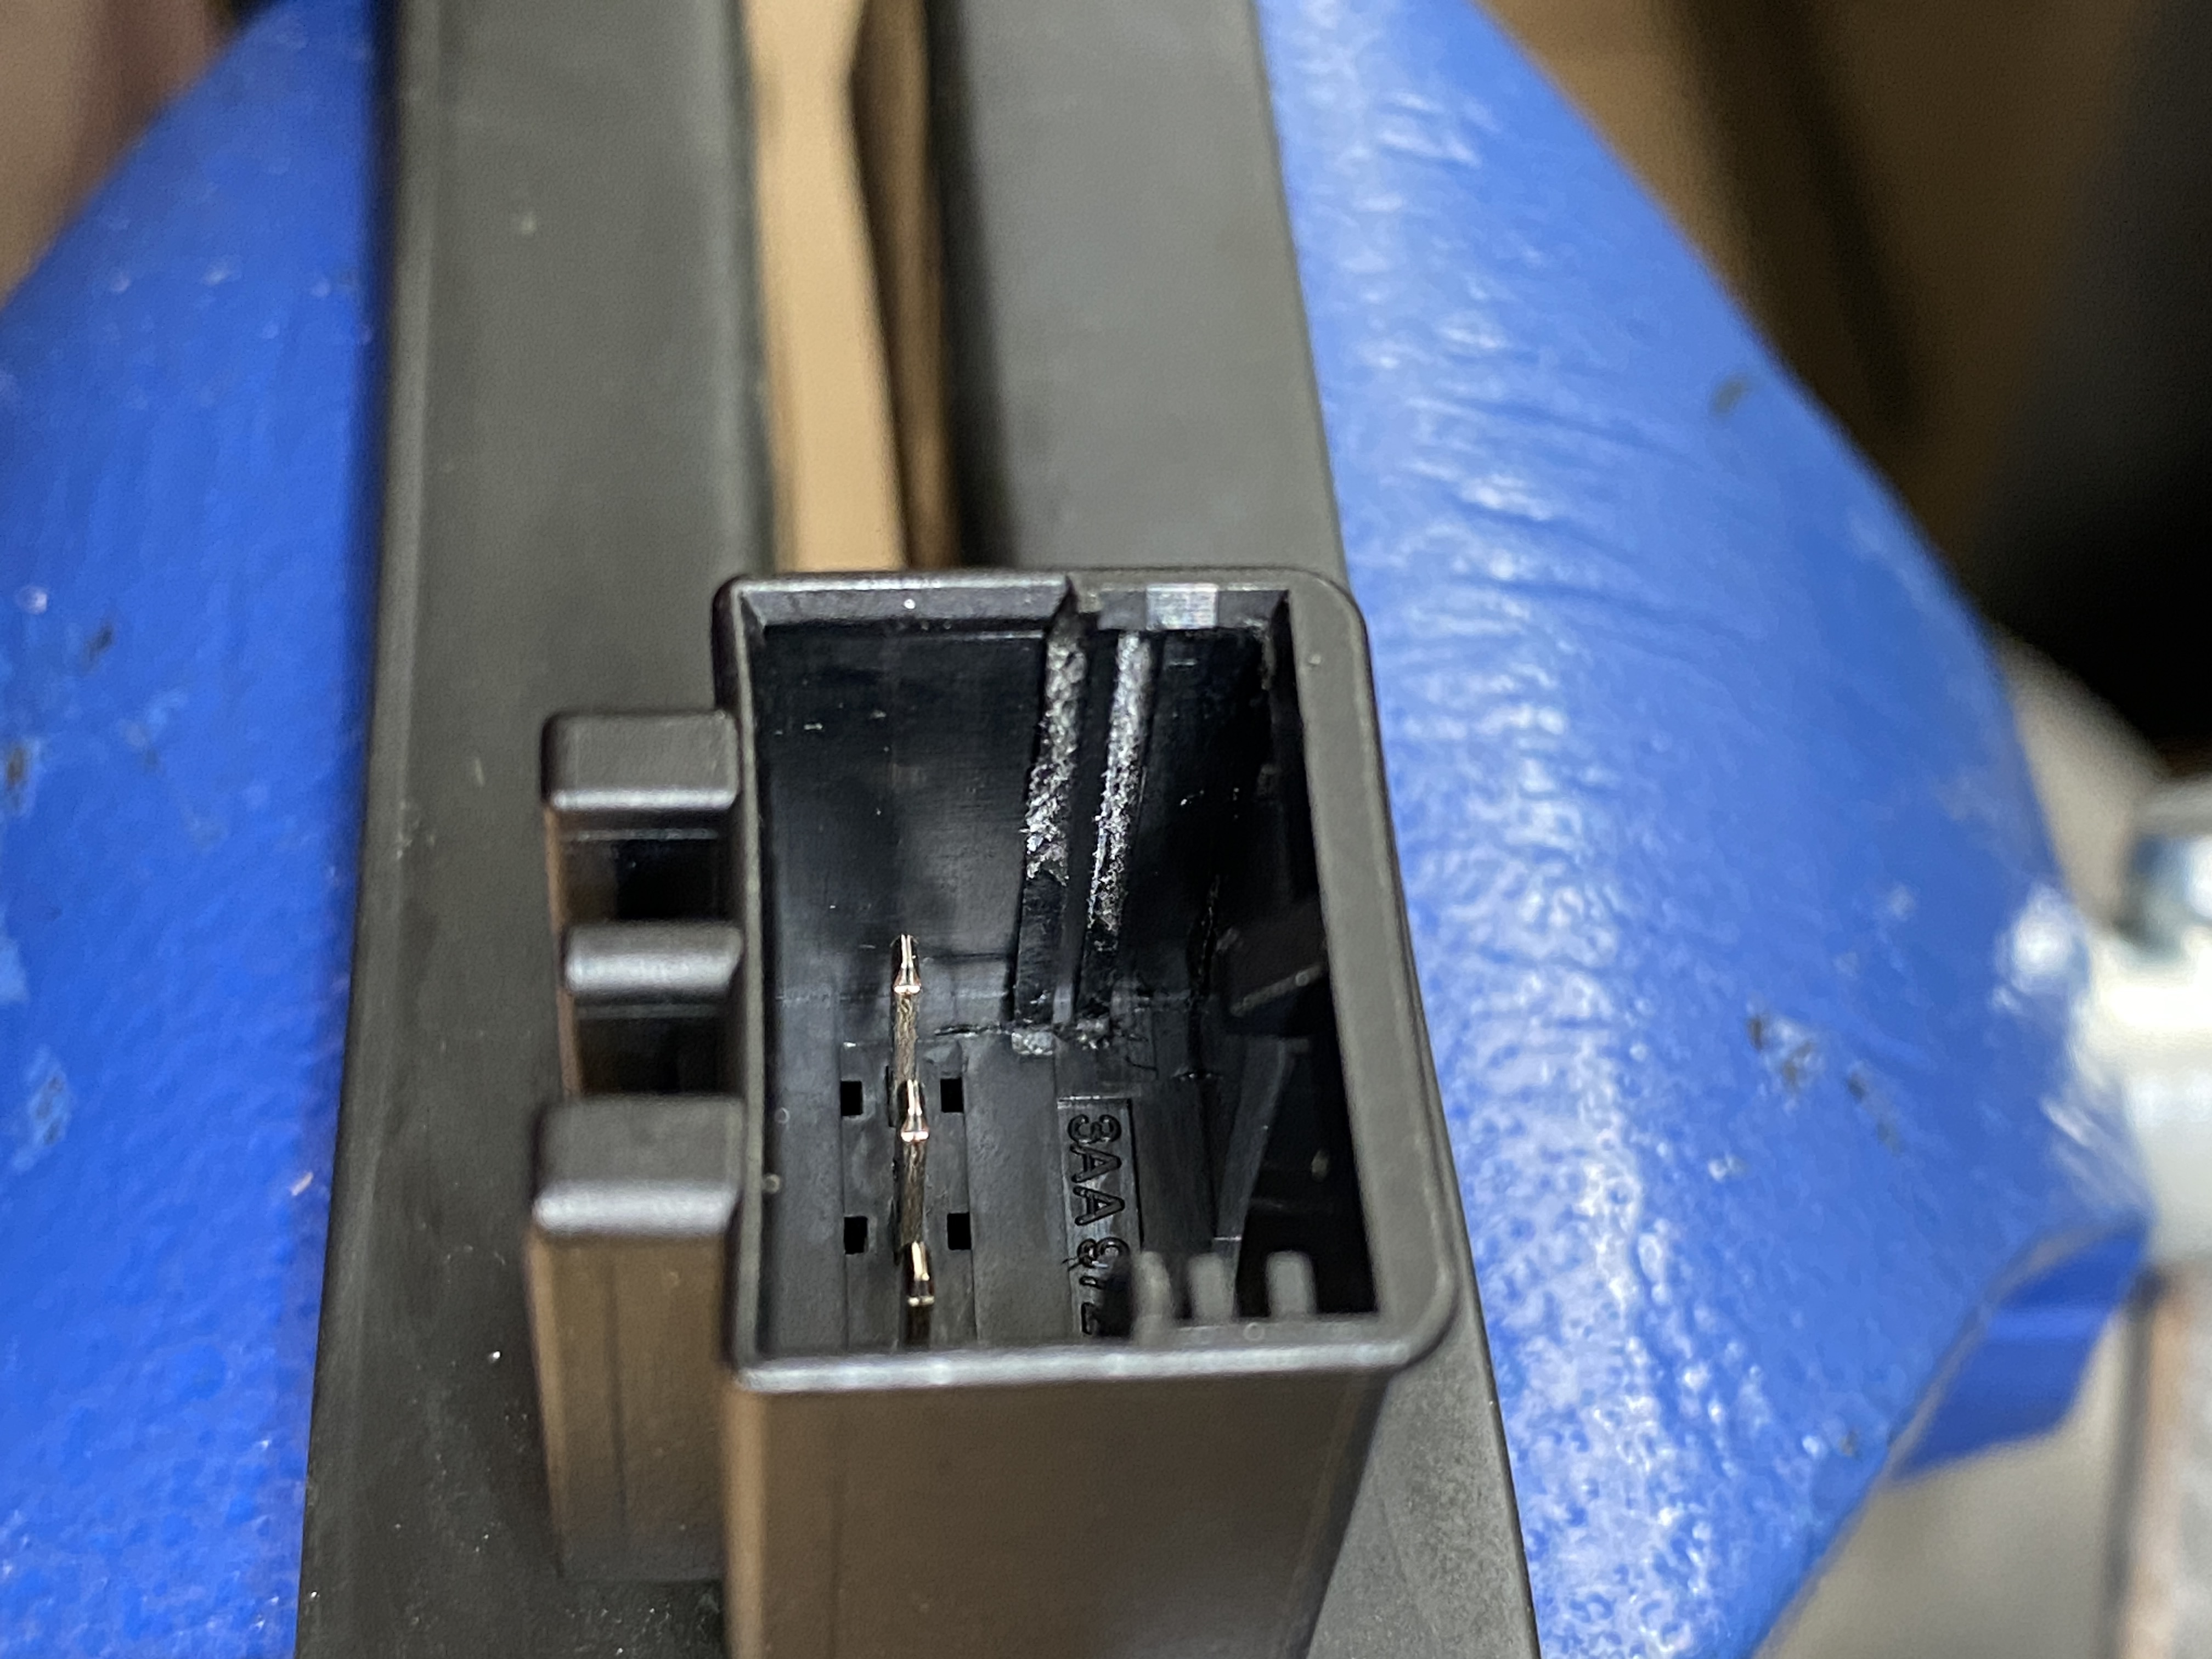
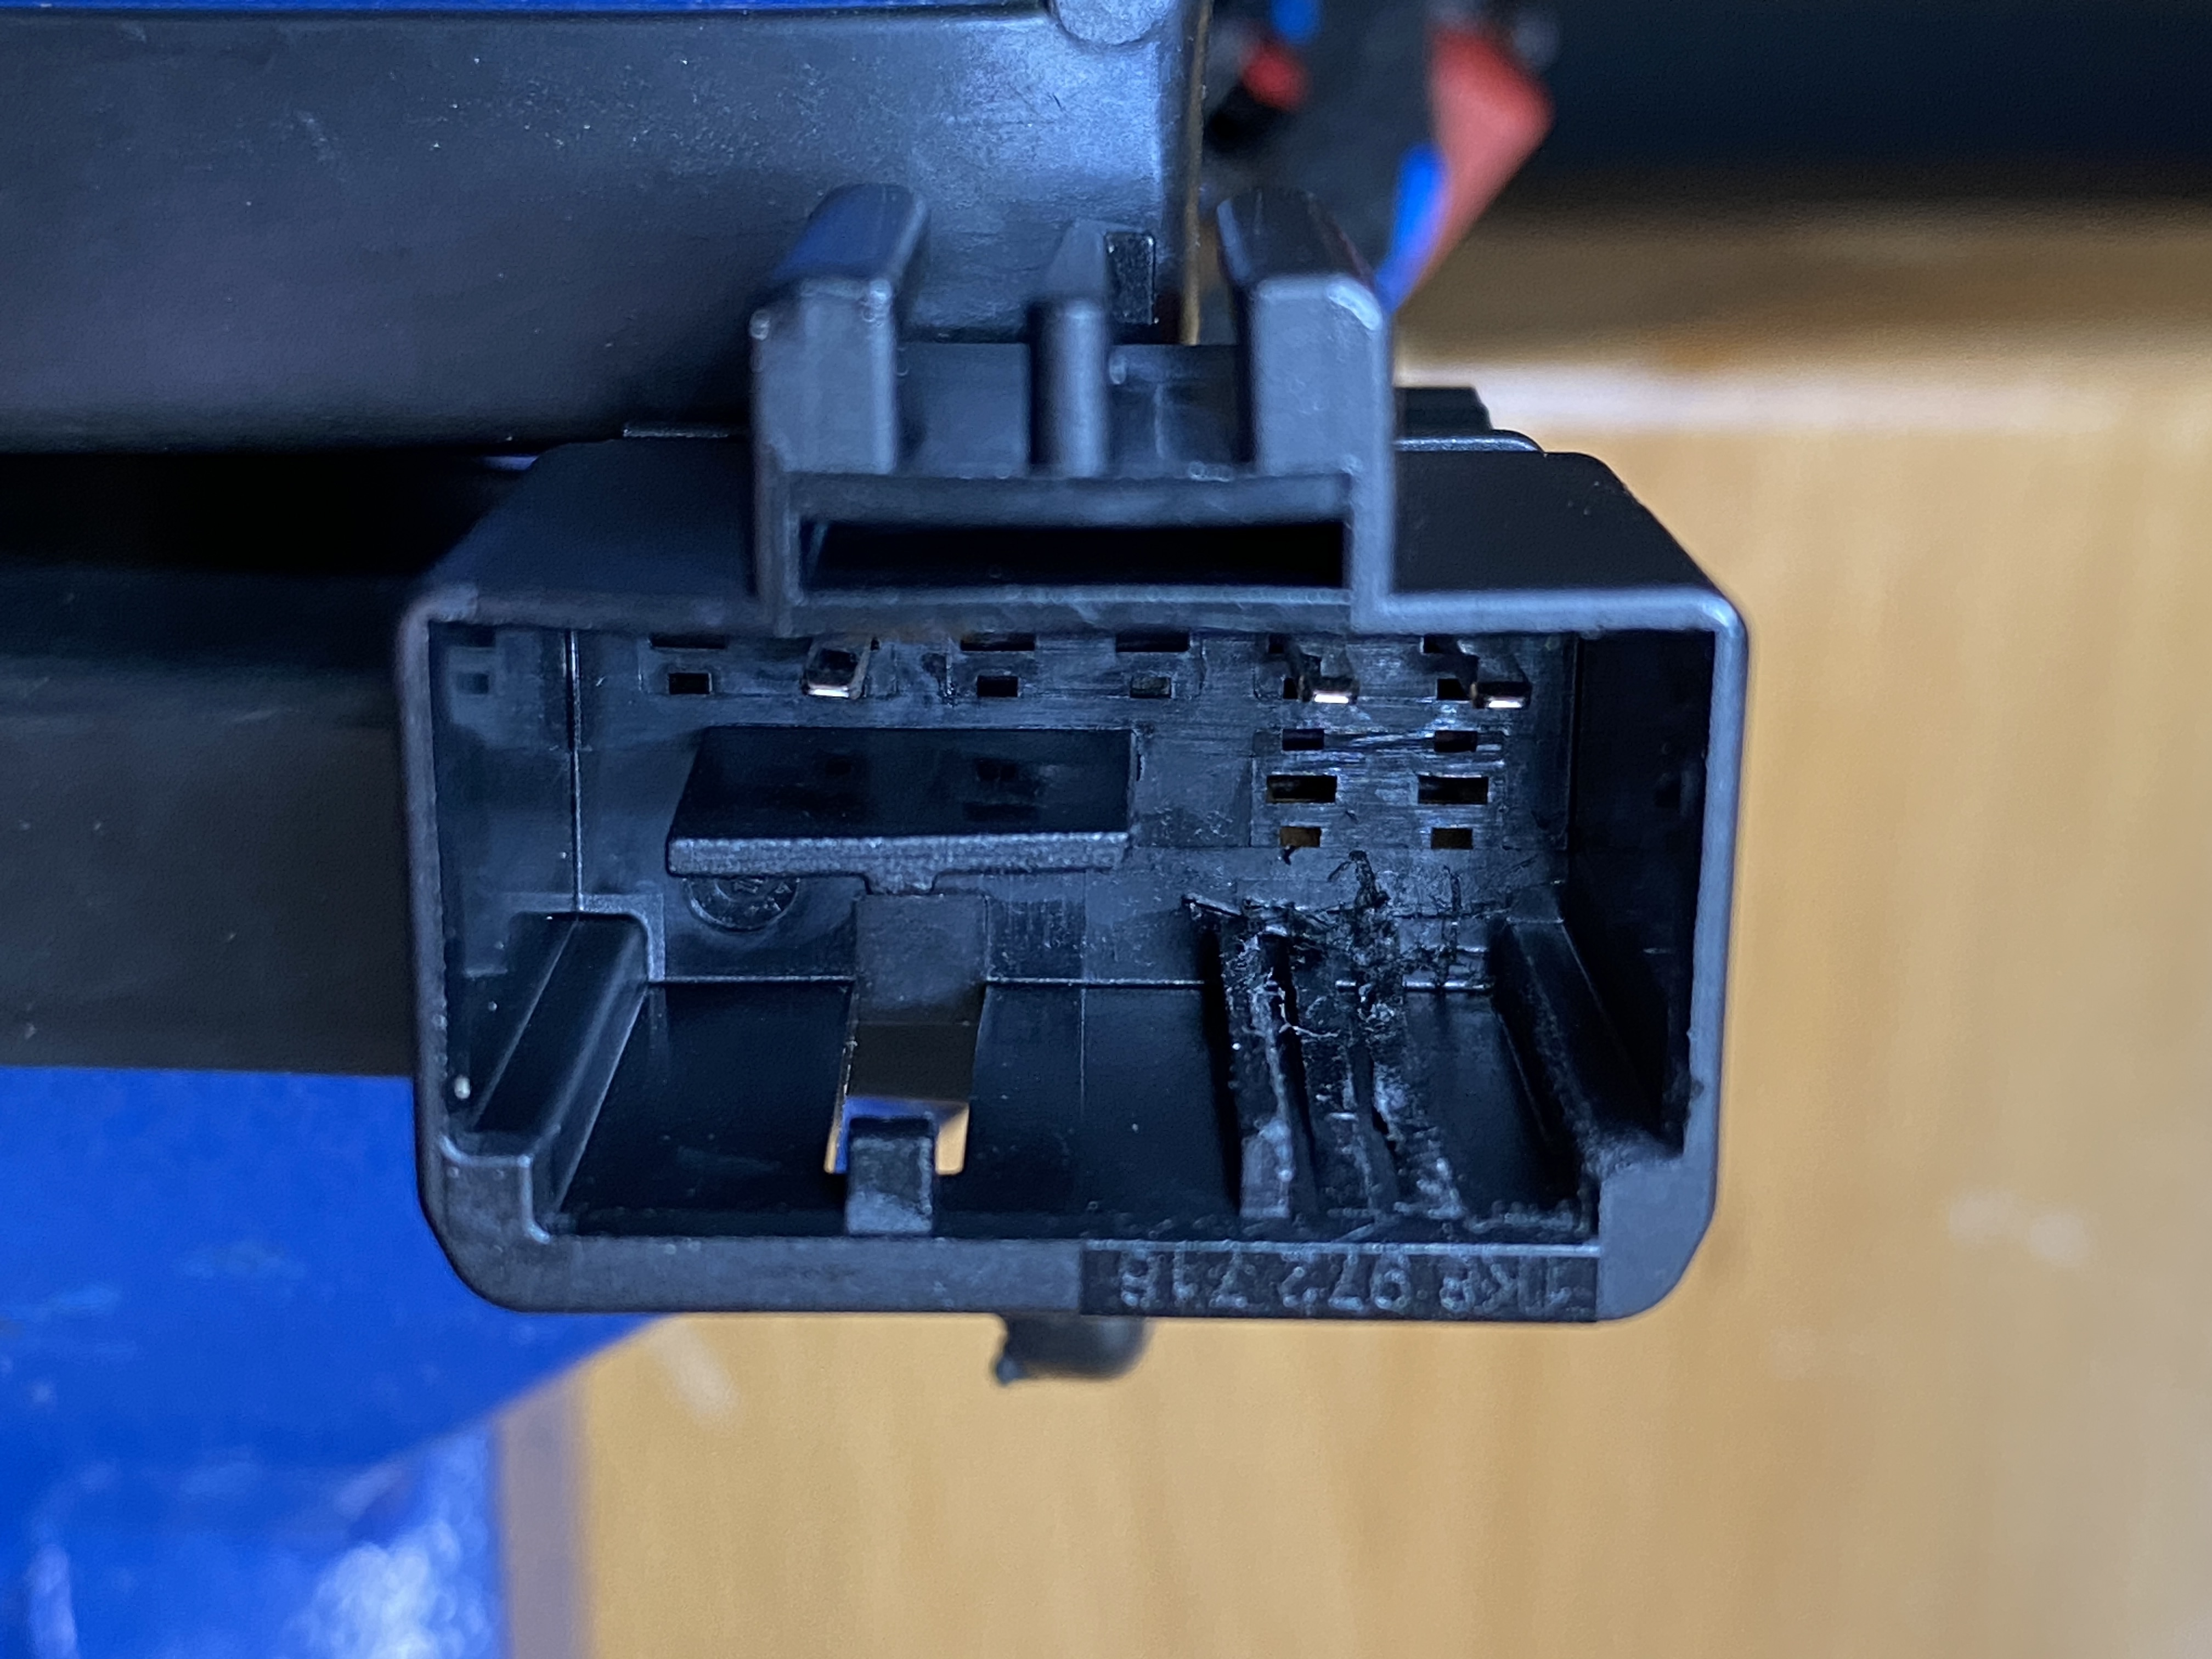
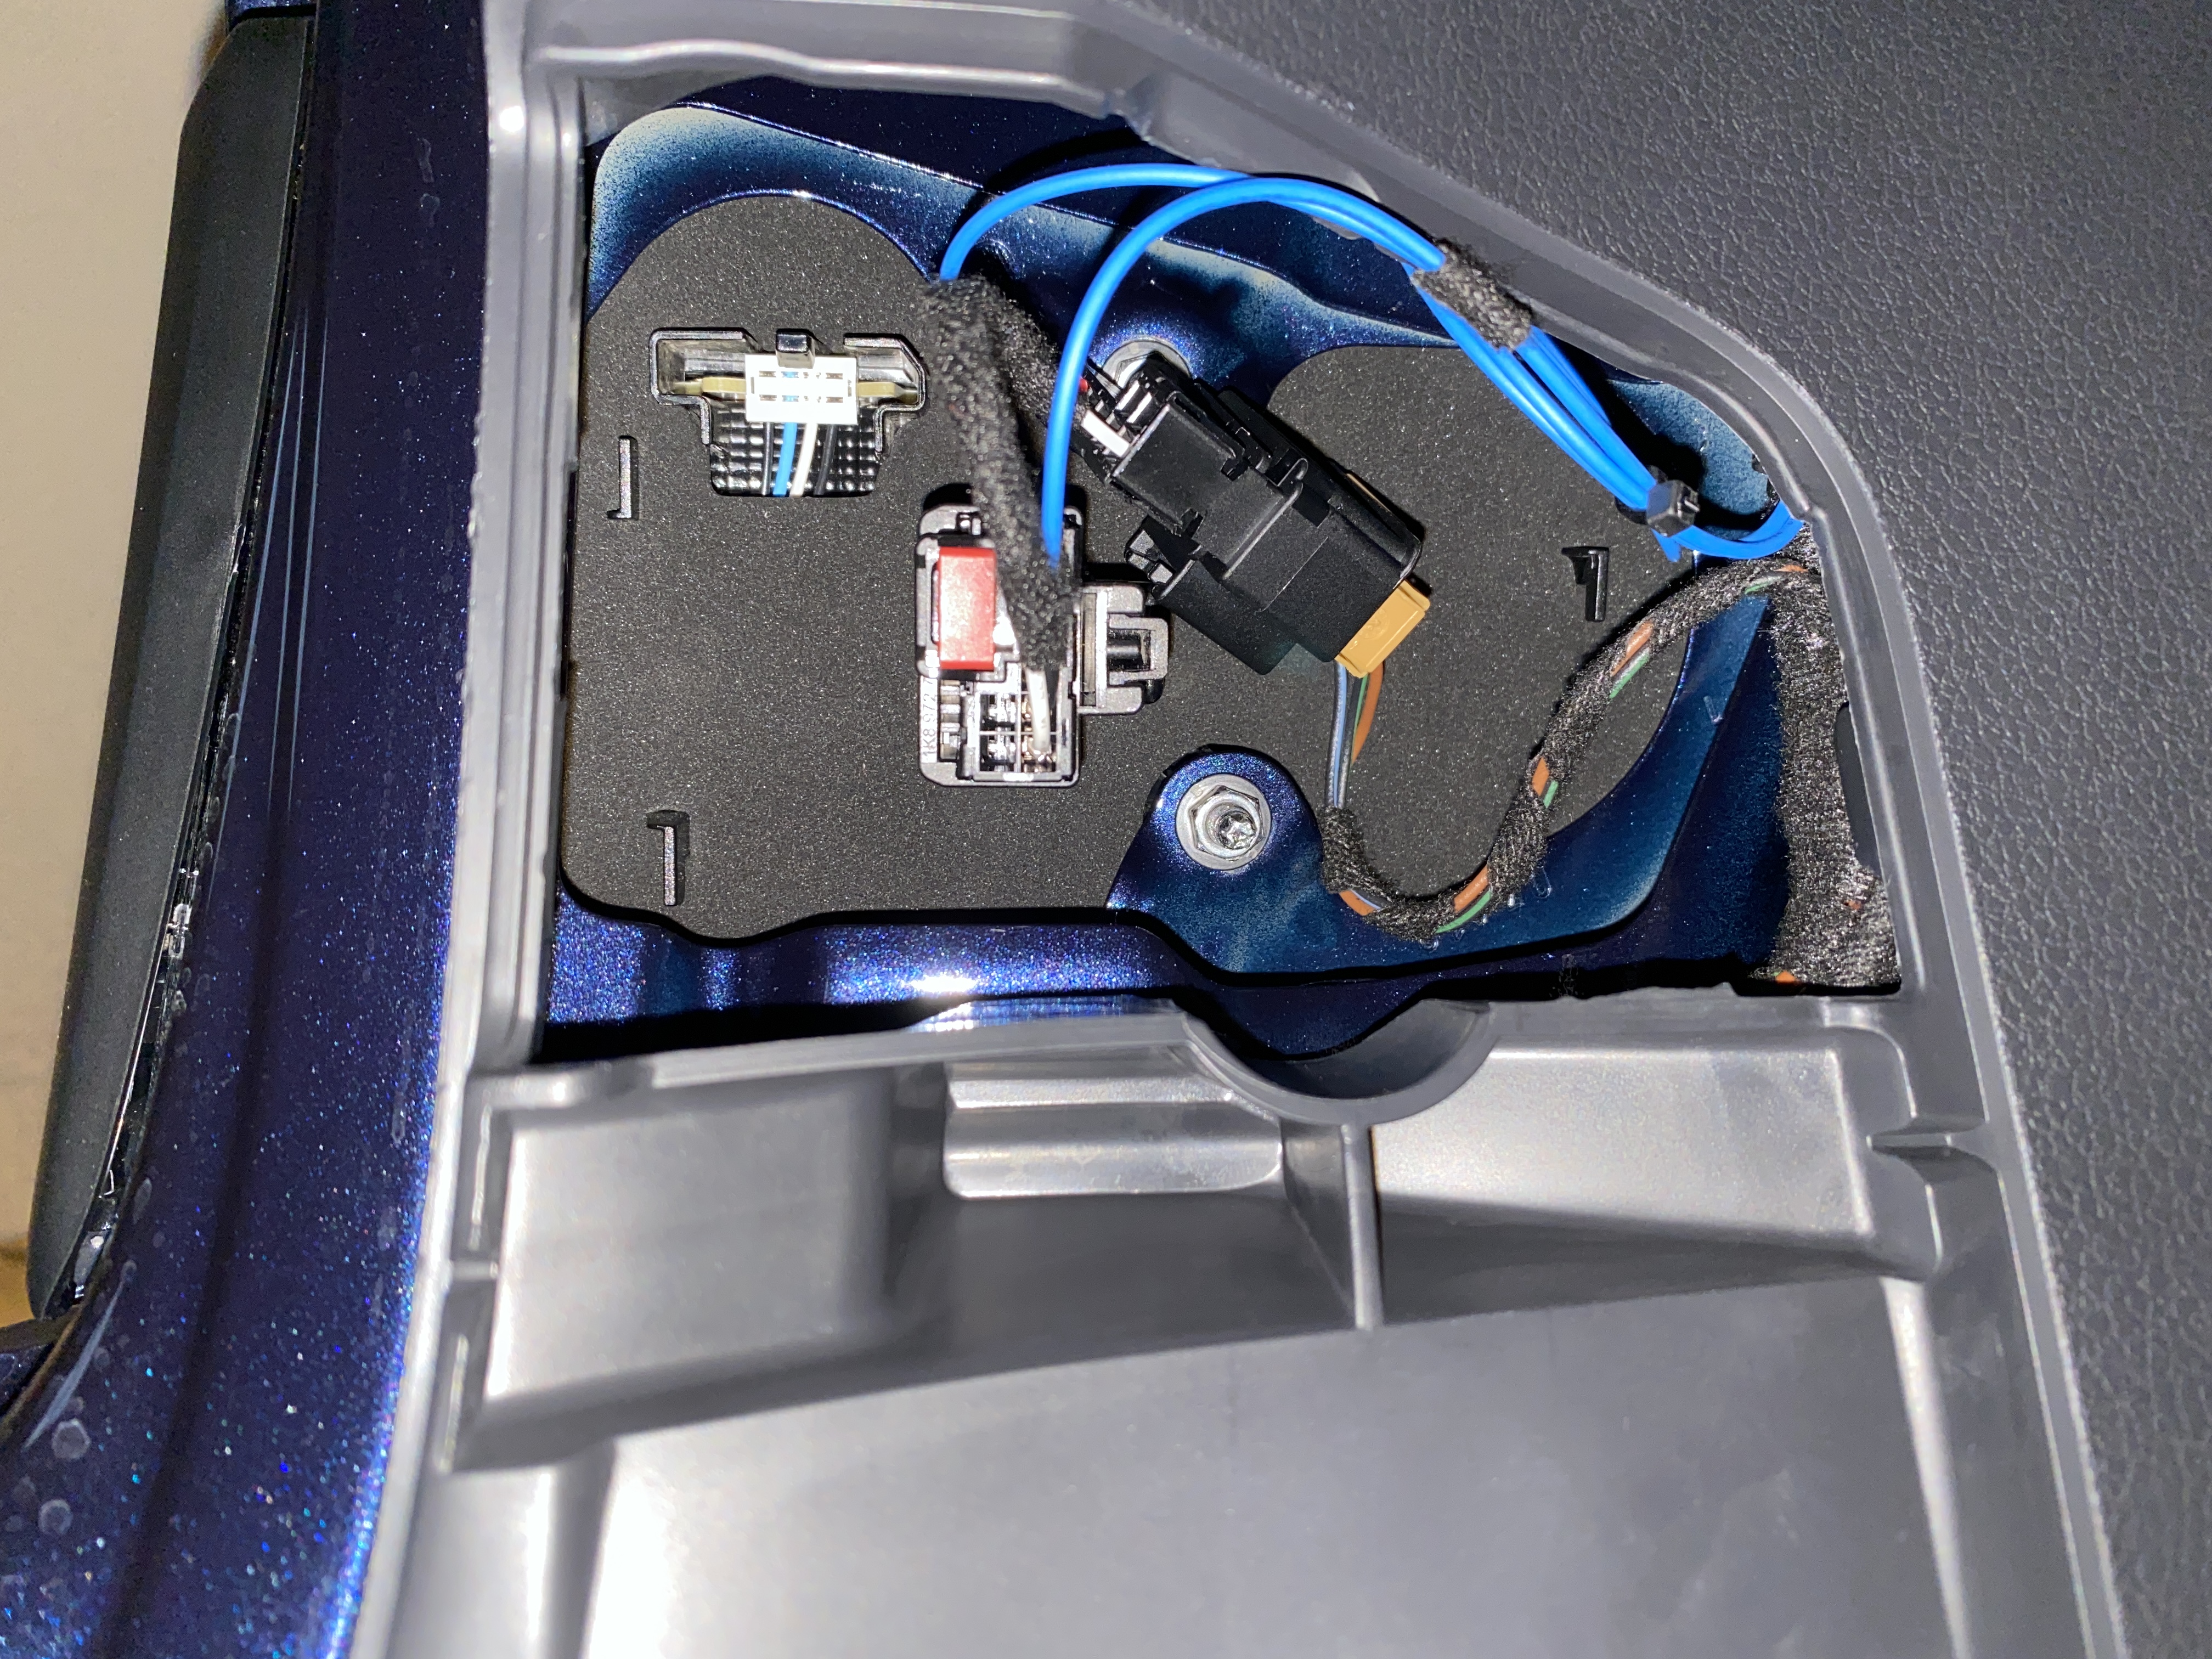
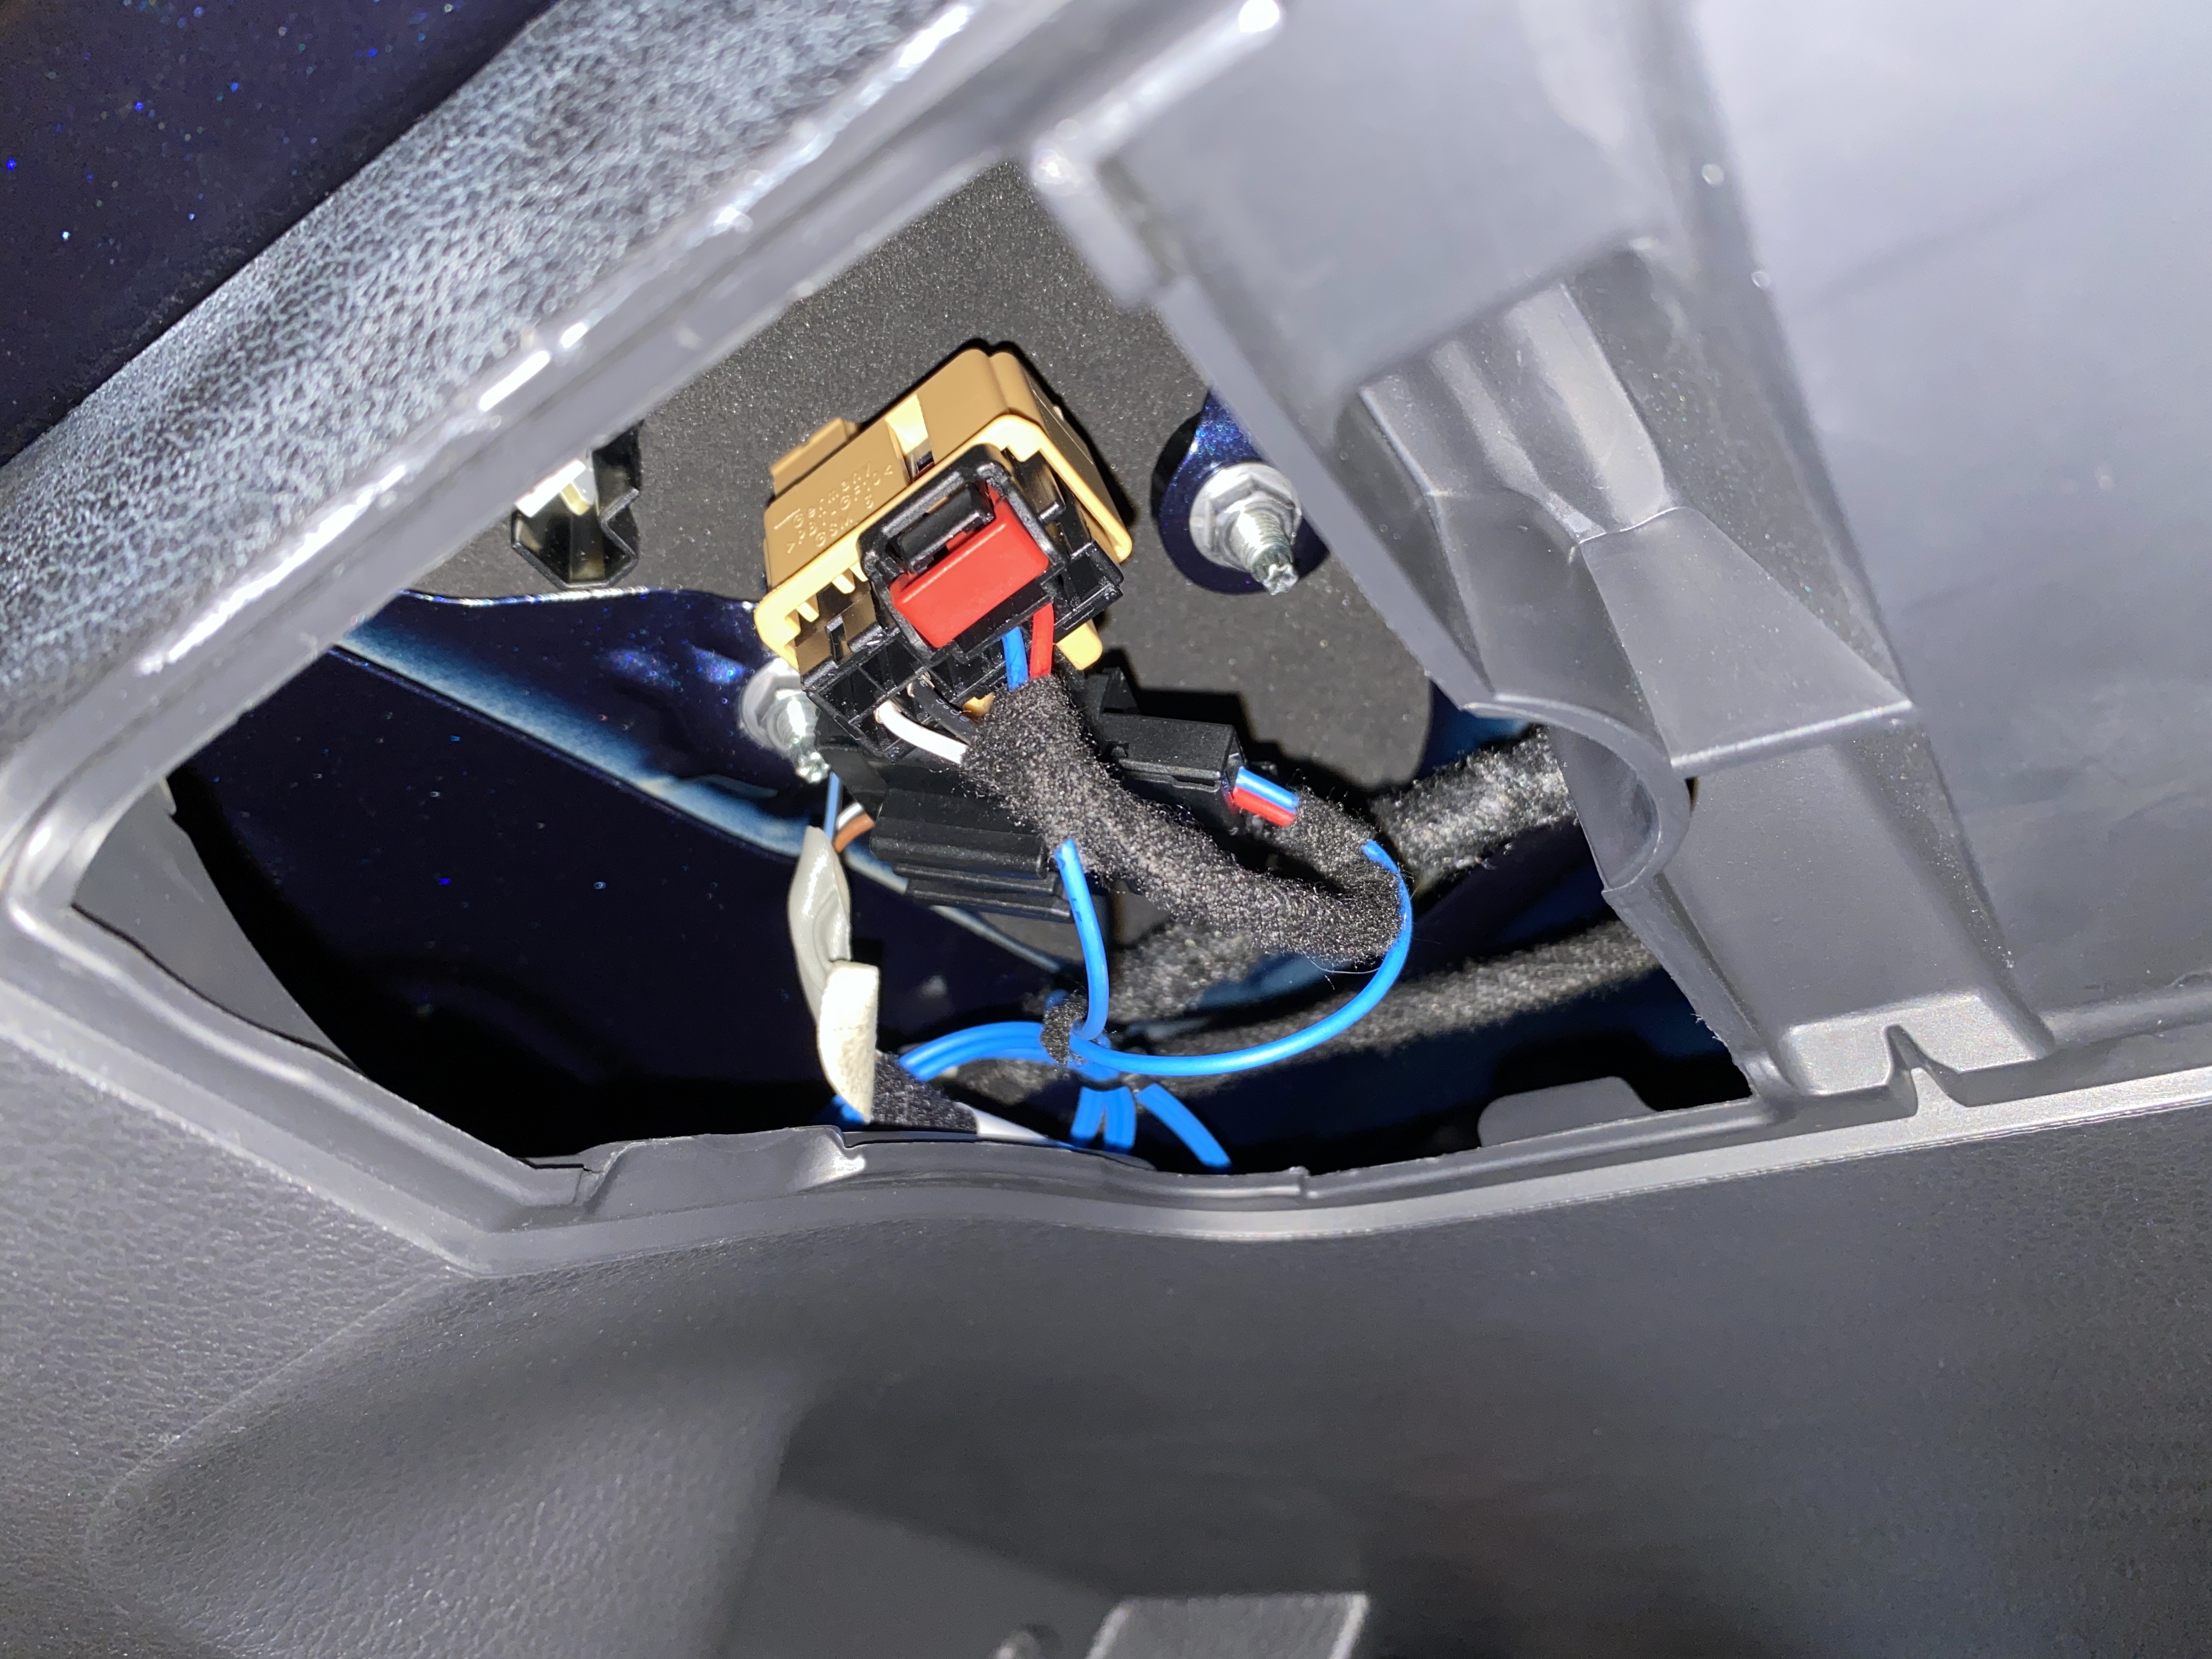
Before getting to my car I had to make some modifications to four wiring harness connectors with an X-ACTO knife. It would have been easier to trim off plastic from the connectors in my car but I wanted to avoid irreversibly modifying anything in my car if I could help it.
On both outer taillight wiring harnesses I had to trim off a plastic key rail that was in the way. Since I didn’t have X-ACTO blades narrow enough I had to sacrifice the guiding rail right next to the key rail. Thankfully the connector still fit snugly with no play. For the inner harness connectors I had to remove one key rail but ended up having to sacrifice a second key rail.
Tip
Before removing any taillight I suggest checking if all the wiring harnesses connect to the new lights and your car’s connectors.
Outer Taillights#
|
|
This is the easy part. Installing the outer lights is as easy as:
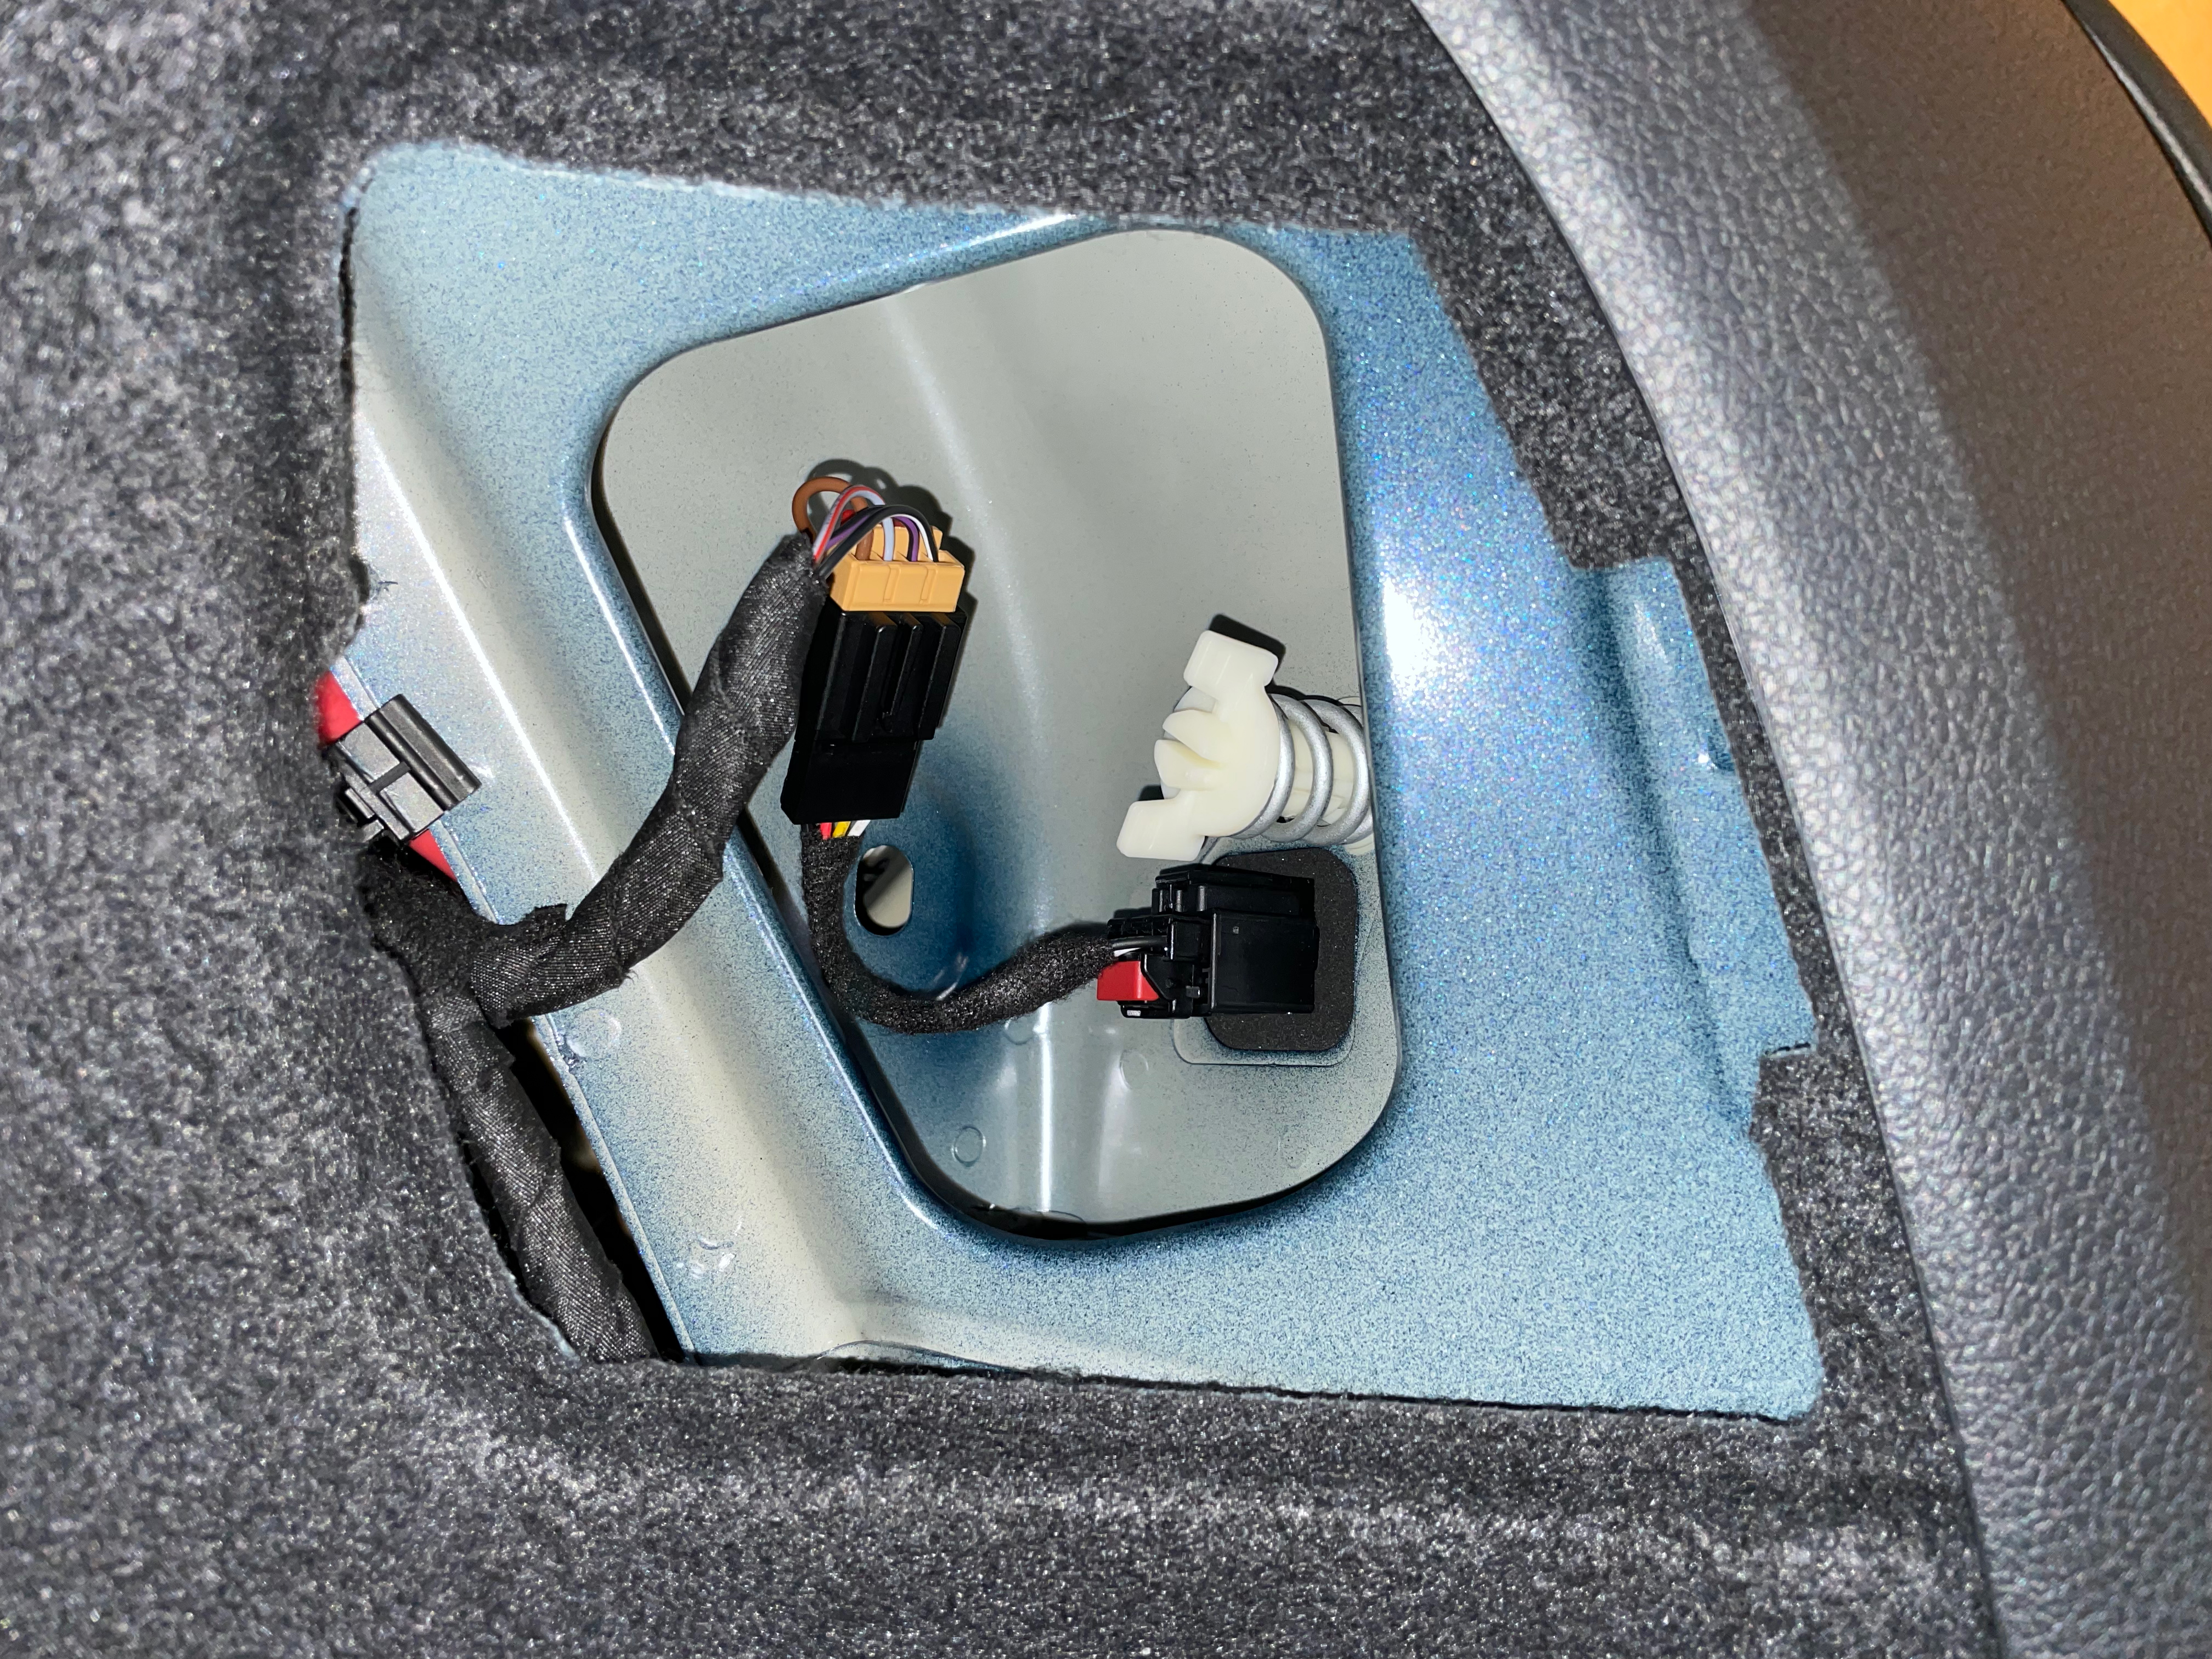
Access the taillight connectors by removing the felt covers in the cargo area.
Unplug the existing connectors.
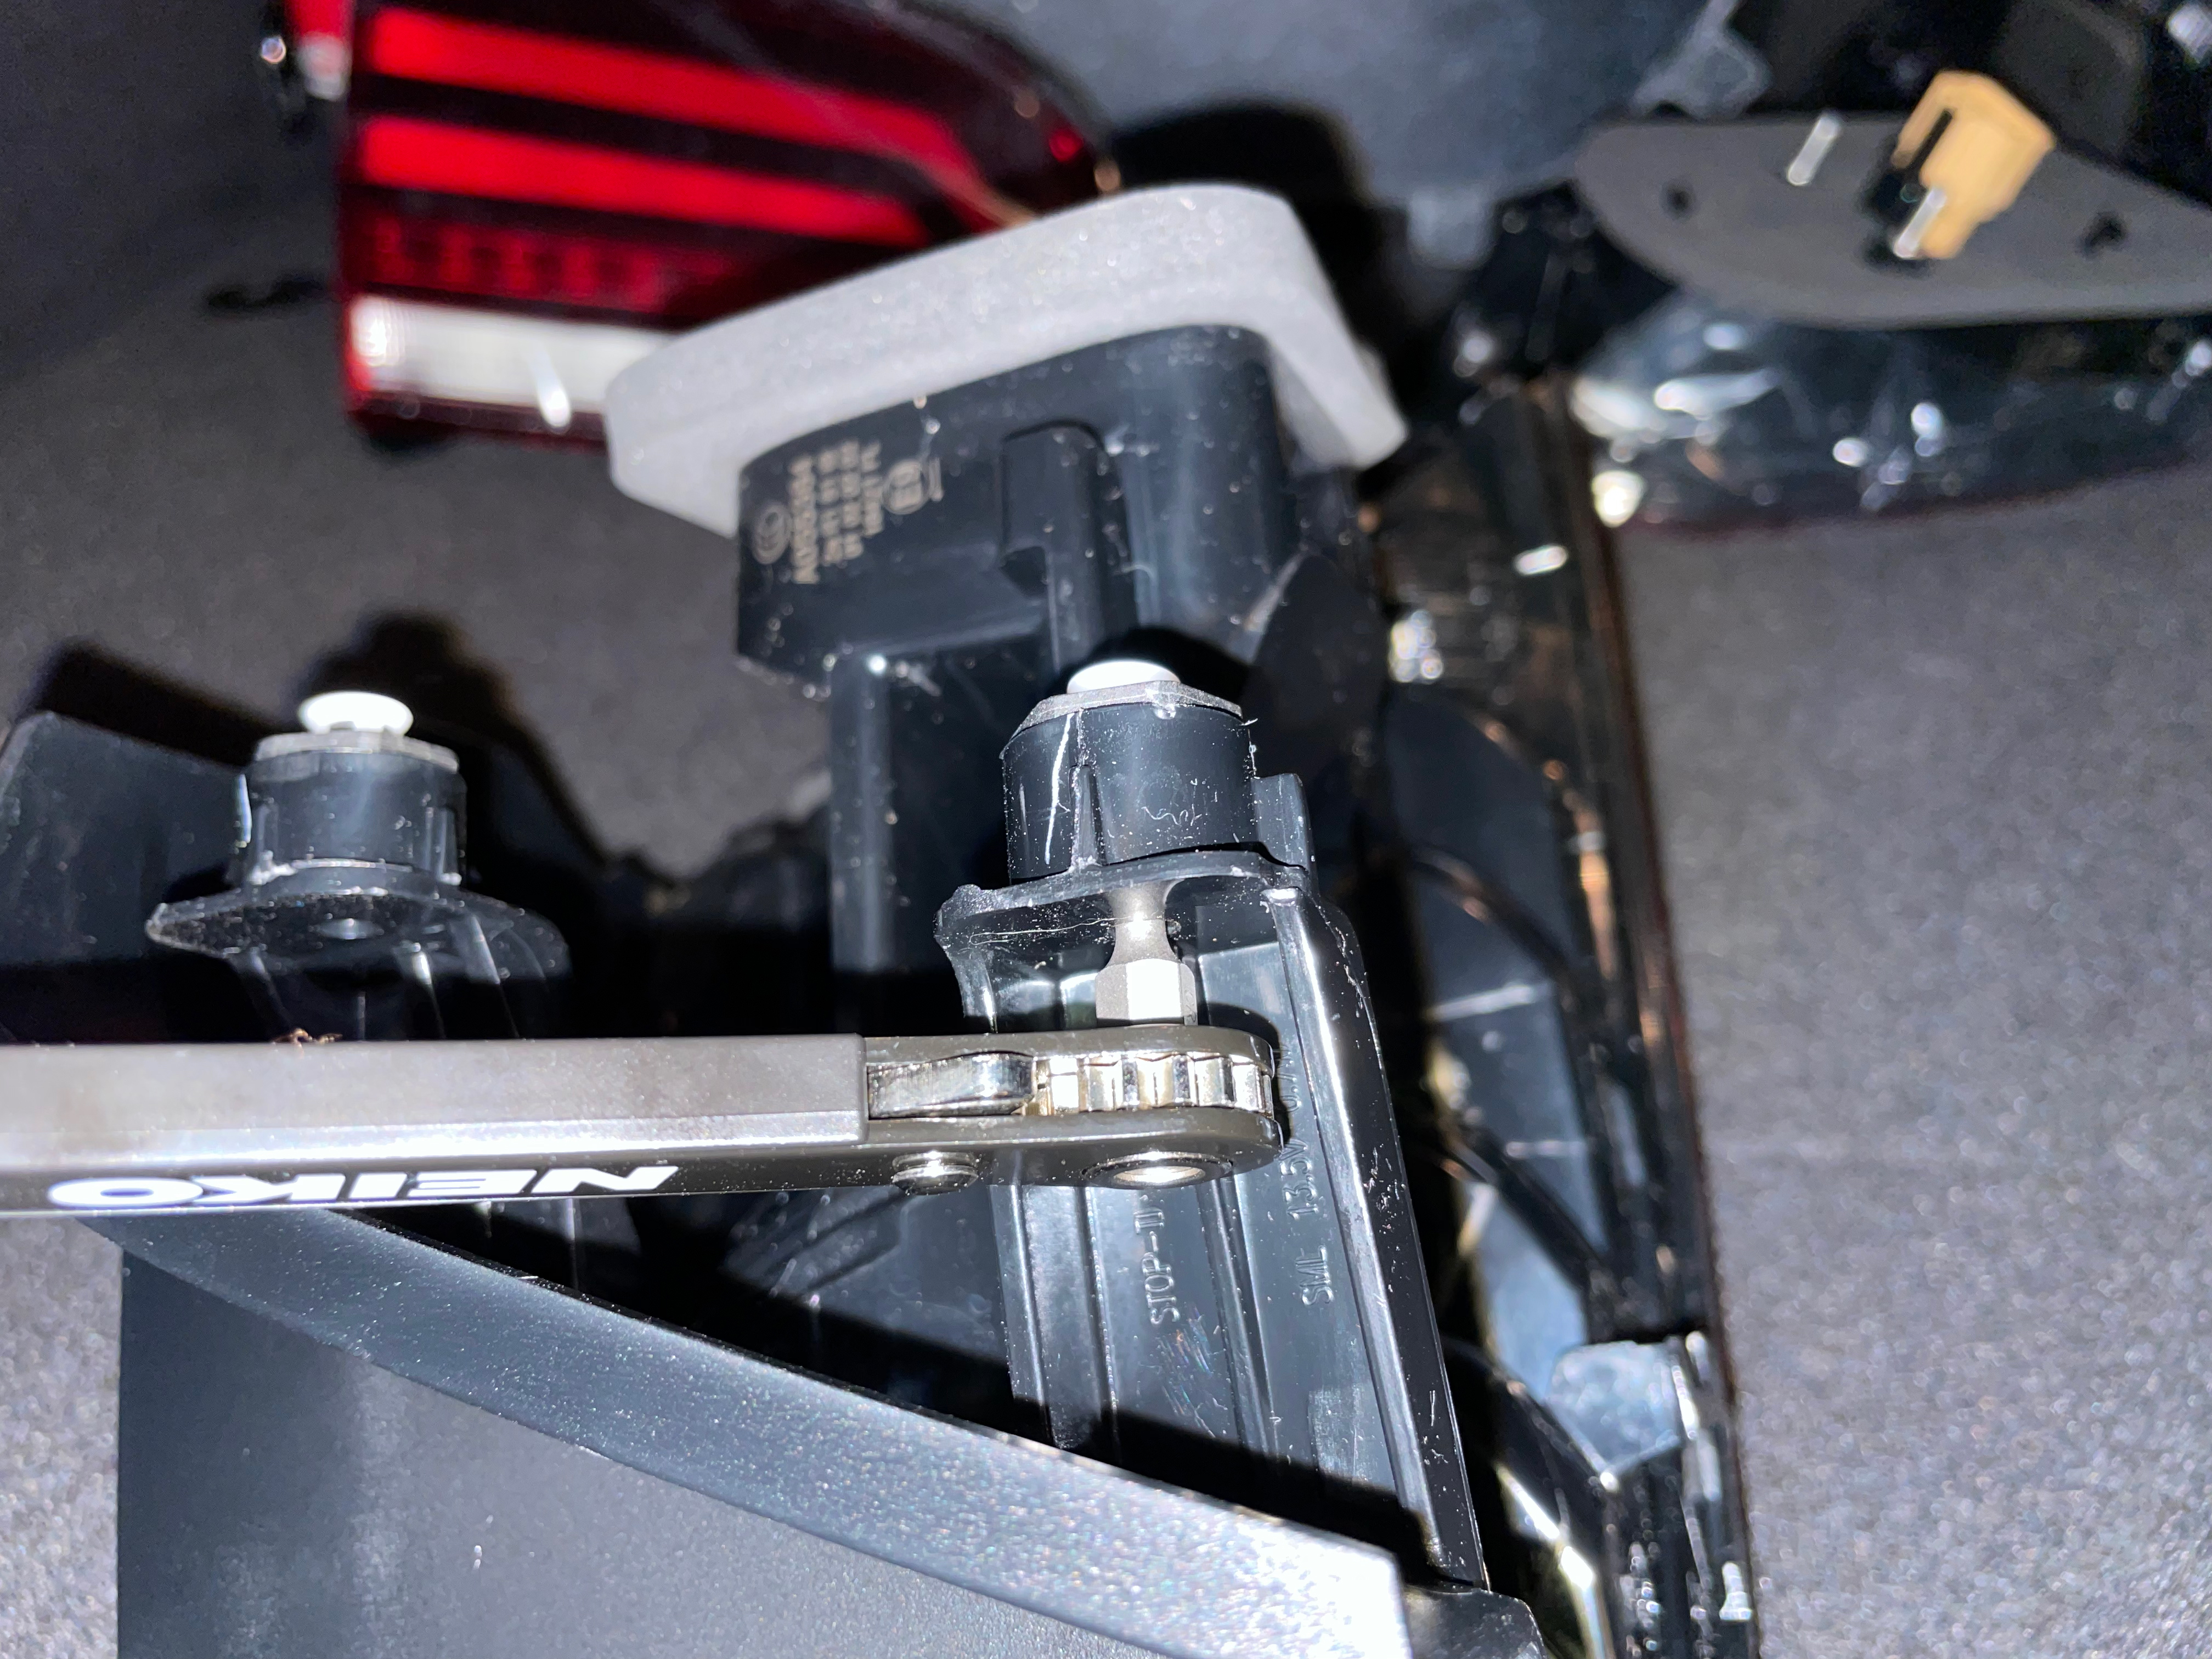
Remove the plastic screw with your hands by twisting them off.
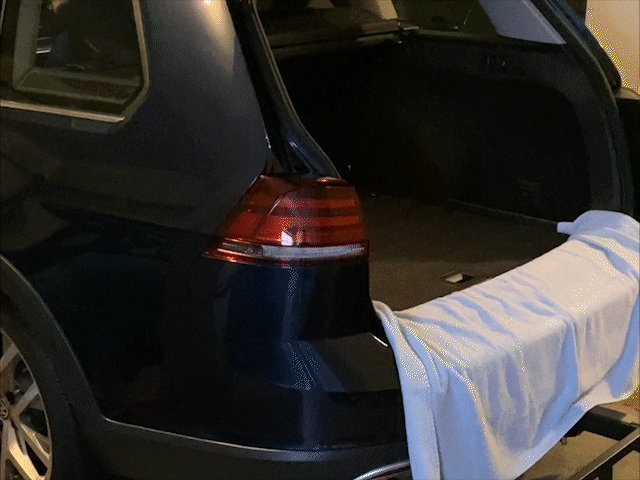
Pull out the old taillights and install the new lights.
Connect them using the modified outer wiring harnesses.
My passenger side taillight fit fine and flush but the driver side seemed to stick out a bit. I fixed this by turning the plastic adjustment screw with a T15 bit and ratchet.
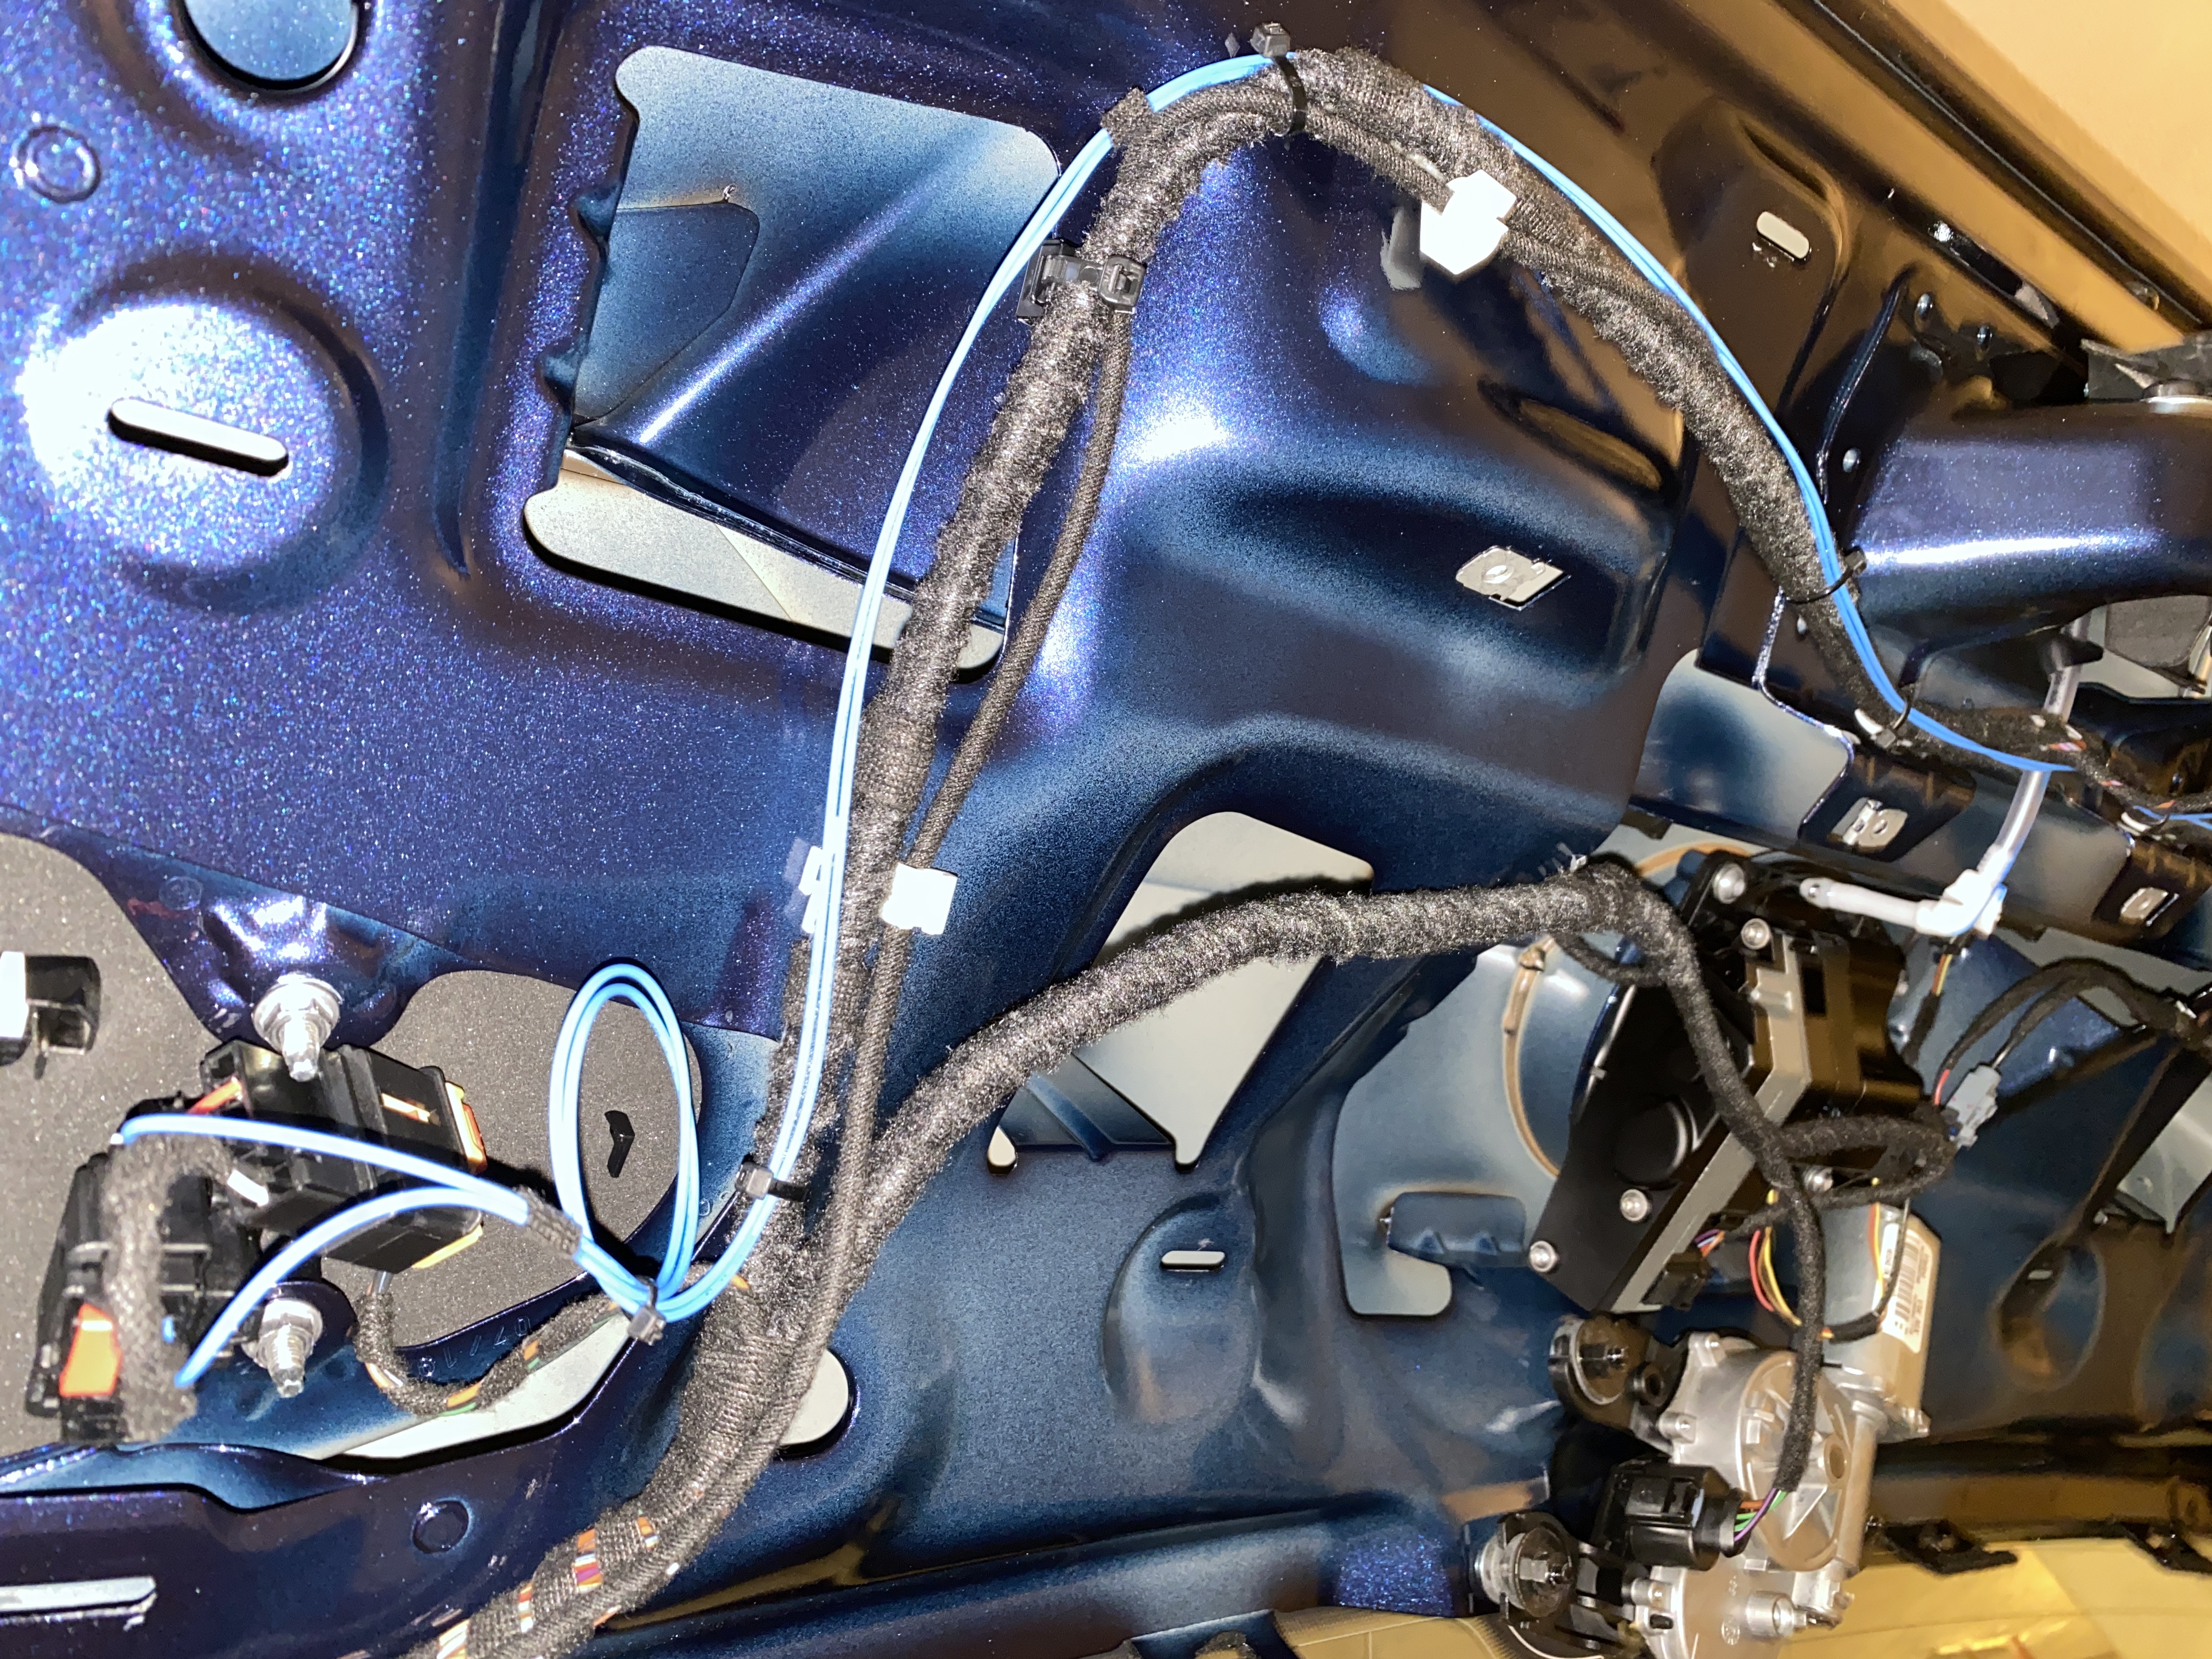
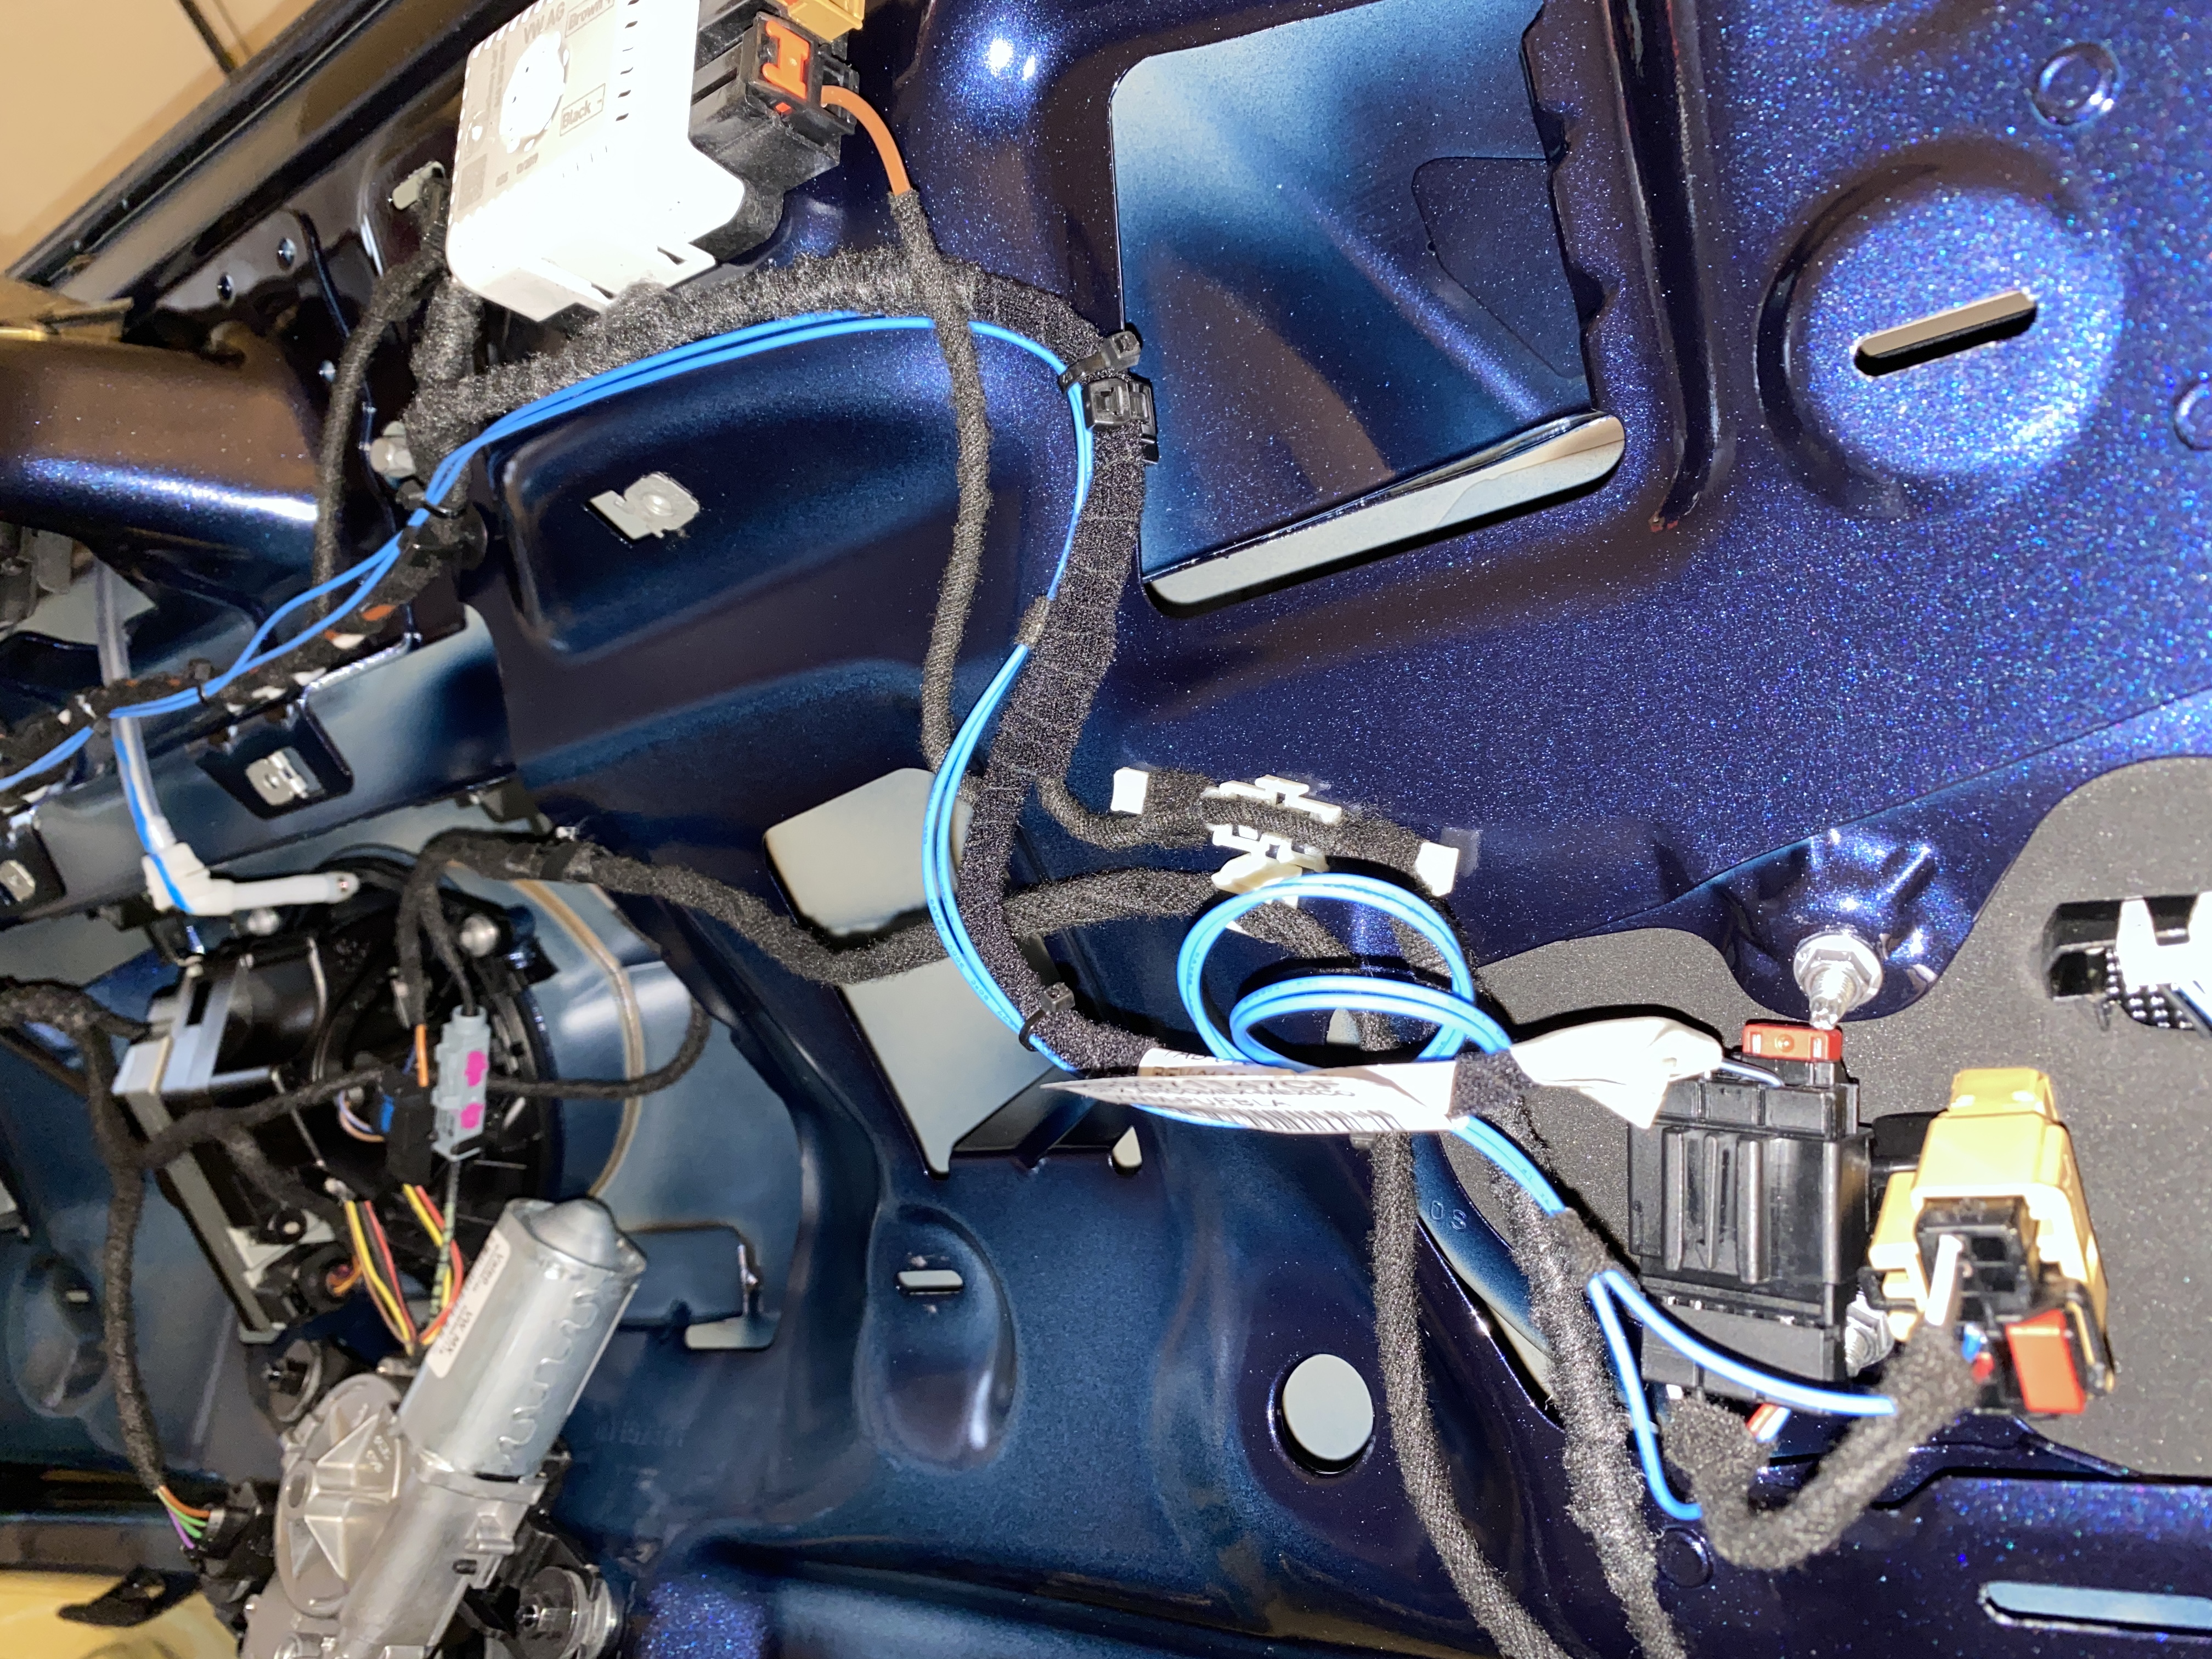
Inner Taillights#
Since I bought taillights with two fog lights (one for each side) the included inner wiring harness came with two wires connecting the two. This means the two inner lights will connect to each other with these two wires that must be routed behind the inner plastic body trim. If you didn’t get fog lights and only received the outer lights with the amber turn signals then you can skip this section.
First remove both taillights by removing the plastic access cover and using an 8 mm hex socket. Each light has two nuts that need to be removed. Then you can remove the lights by pivoting them away from the center of the tailgate. Install the new inner taillights in the reverse order and tighten the four nuts.
|

Hatch with all inner body trim pieces removed. The main piece to remove is the largest one, but I found it easier to first pop off the long piece spanning the top (when closed) of the hatch and then popping off the two side pieces.# |
You have a couple of options when wiring the inner lights. You can take the easy route and follow the included instructions, which is to blindly snake the wire and harness from one side to the other using the access panels for the inner lights. I didn’t like the idea of a wire being loose back there so I went with the slightly (but not much) harder route and remove the hatch inner plastic trim to get a complete unobstructed view of where the wire will go.
|
|
|
|
I ended up zip tying the harness wire to the existing wiring in the hatch. I then put back all the body trim pieces.
Coding#
Without coding the wrong lights will be designated as brakes and blinkers.#
The final step is to apply coding so the right LEDs light up when braking or signaling. The instructions given were for VCDS/VAG-COM but all I have is OBD11/OBDeleven. Luckily the settings are very similar. Set aside 20 to 30 minutes to do all the coding. You’ll need to write changes before tapping “Back” since OBD11 doesn’t queue up new settings.
To start you’ll need to enter an access code to enable writing:
09 Central Electrics
Security access
Login code: 31347
Tap “Enter”, it should say “Verifying login code” then “Success”
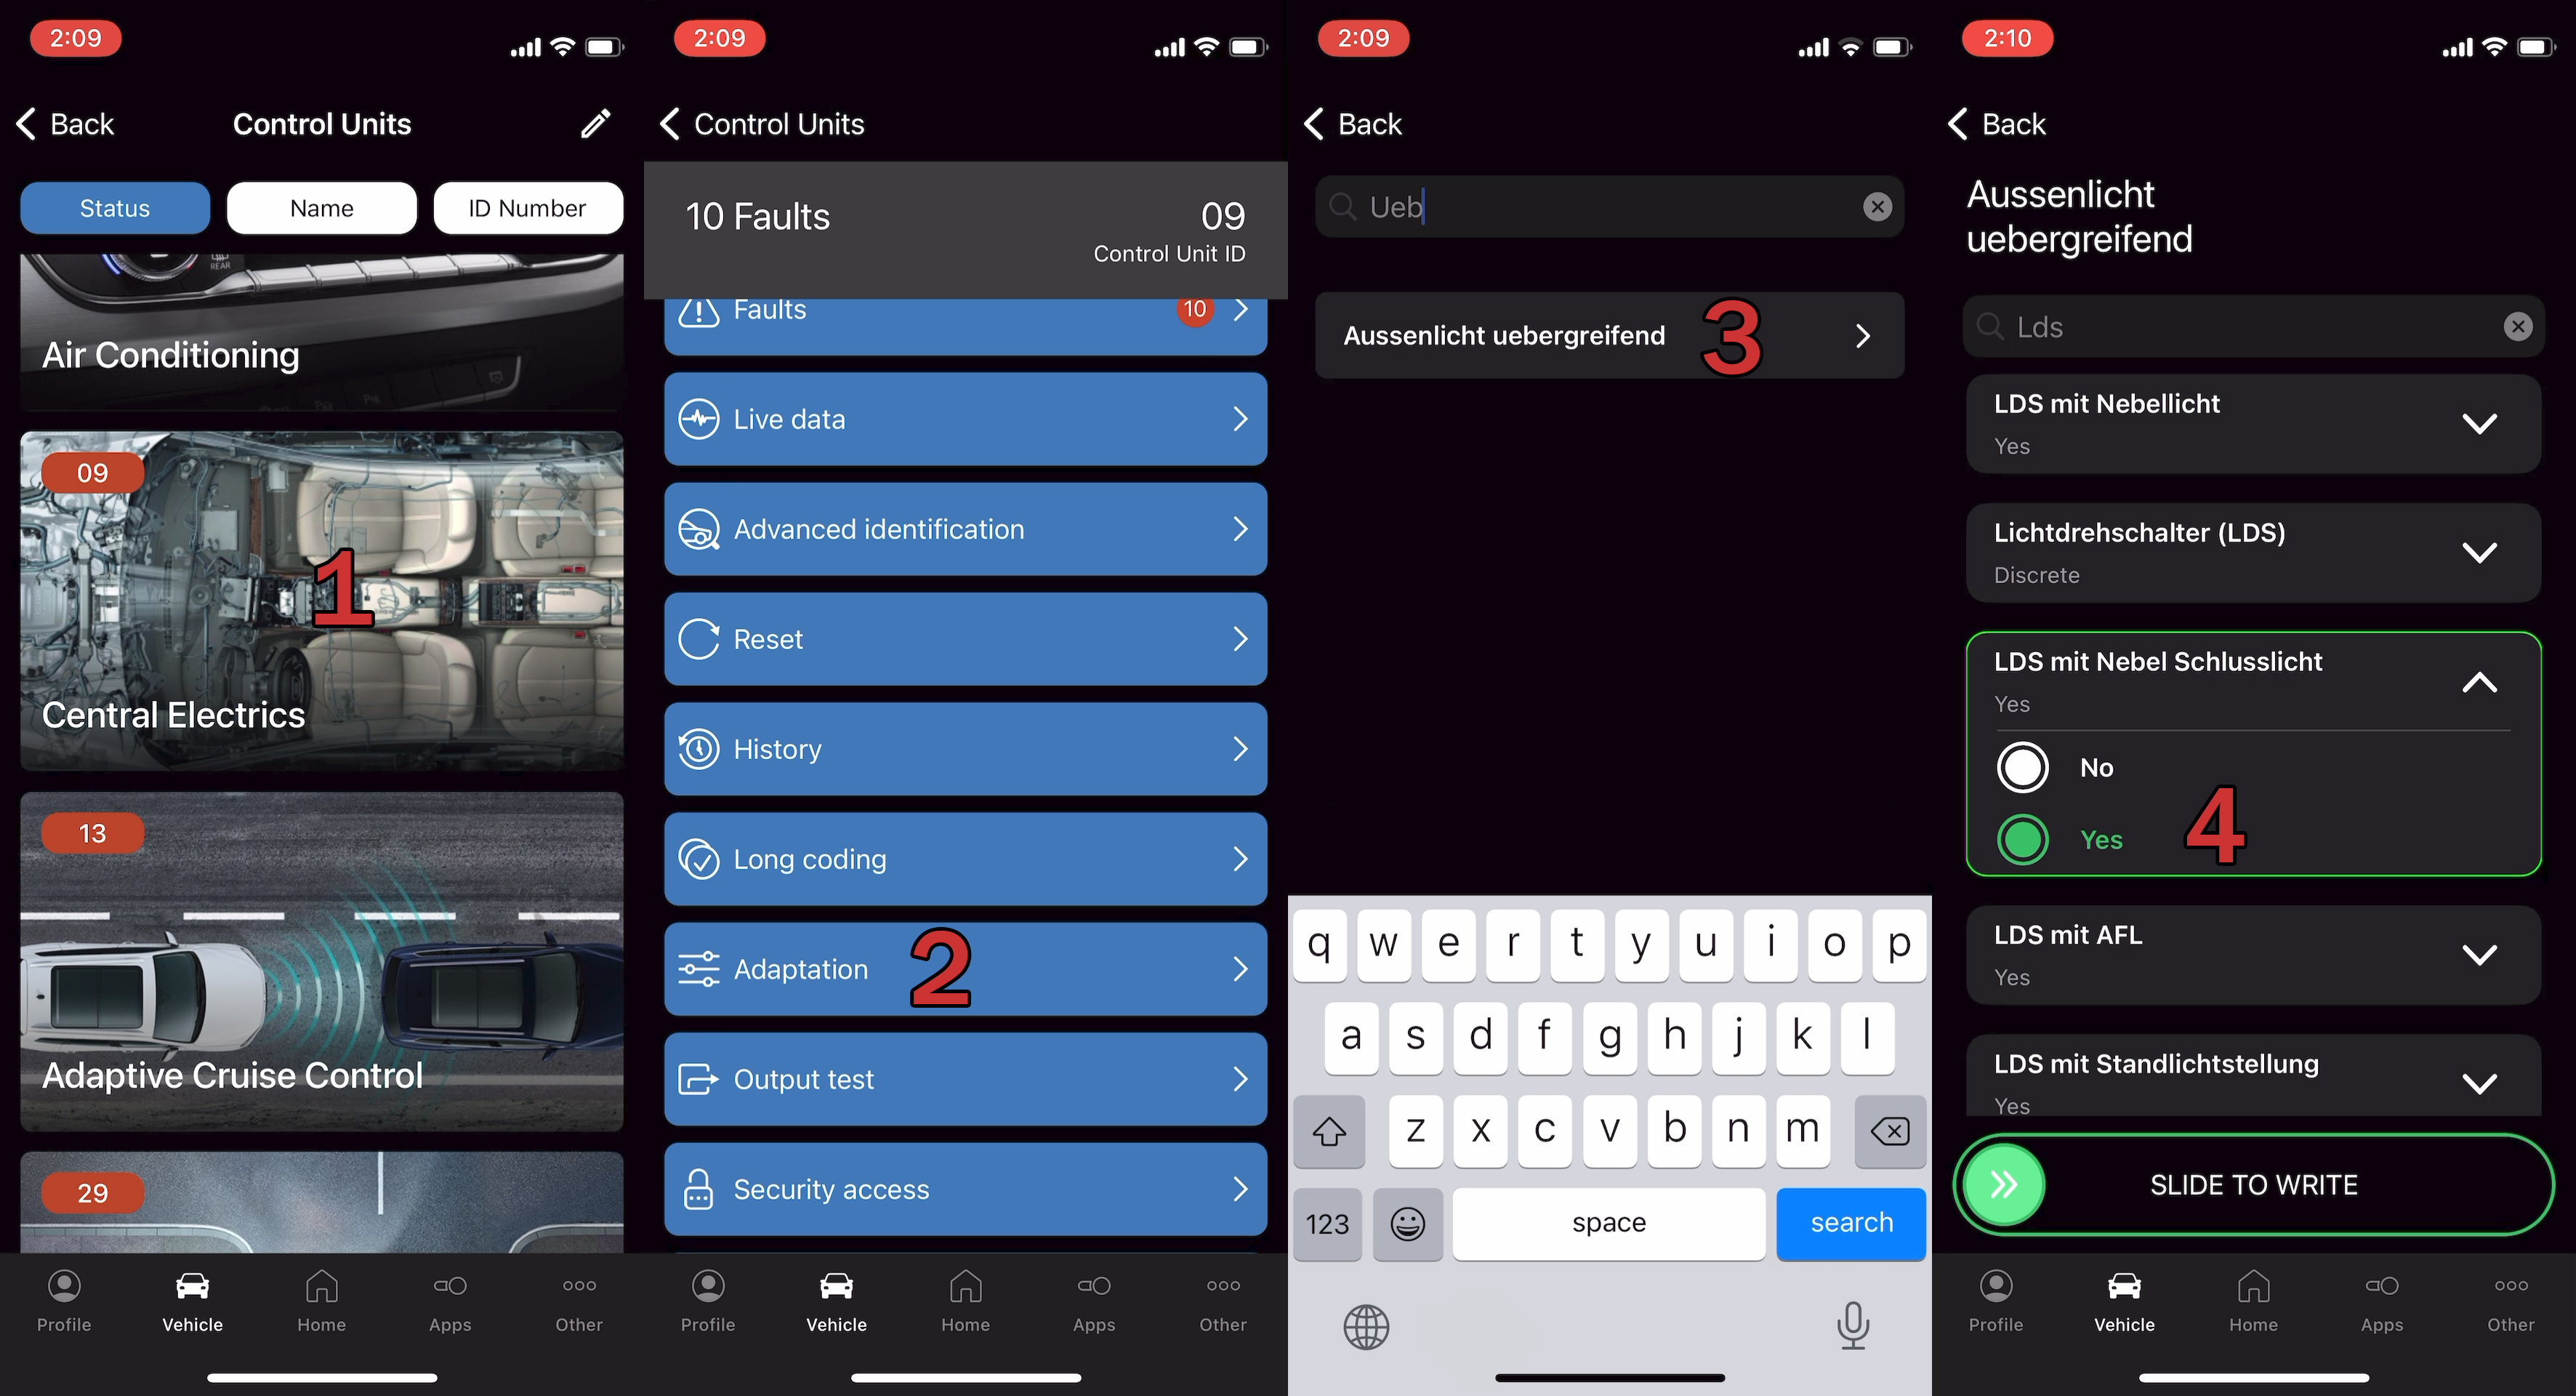
The next step I believe is to enable the rear fog lights to work with the Euro switch I mentioned above.
09 Central Electrics
Adaptation
Aussenlicht uebergreifend (search for “ueb”)
LDS mit Nebel Schlusslicht
Set to Yes
Write
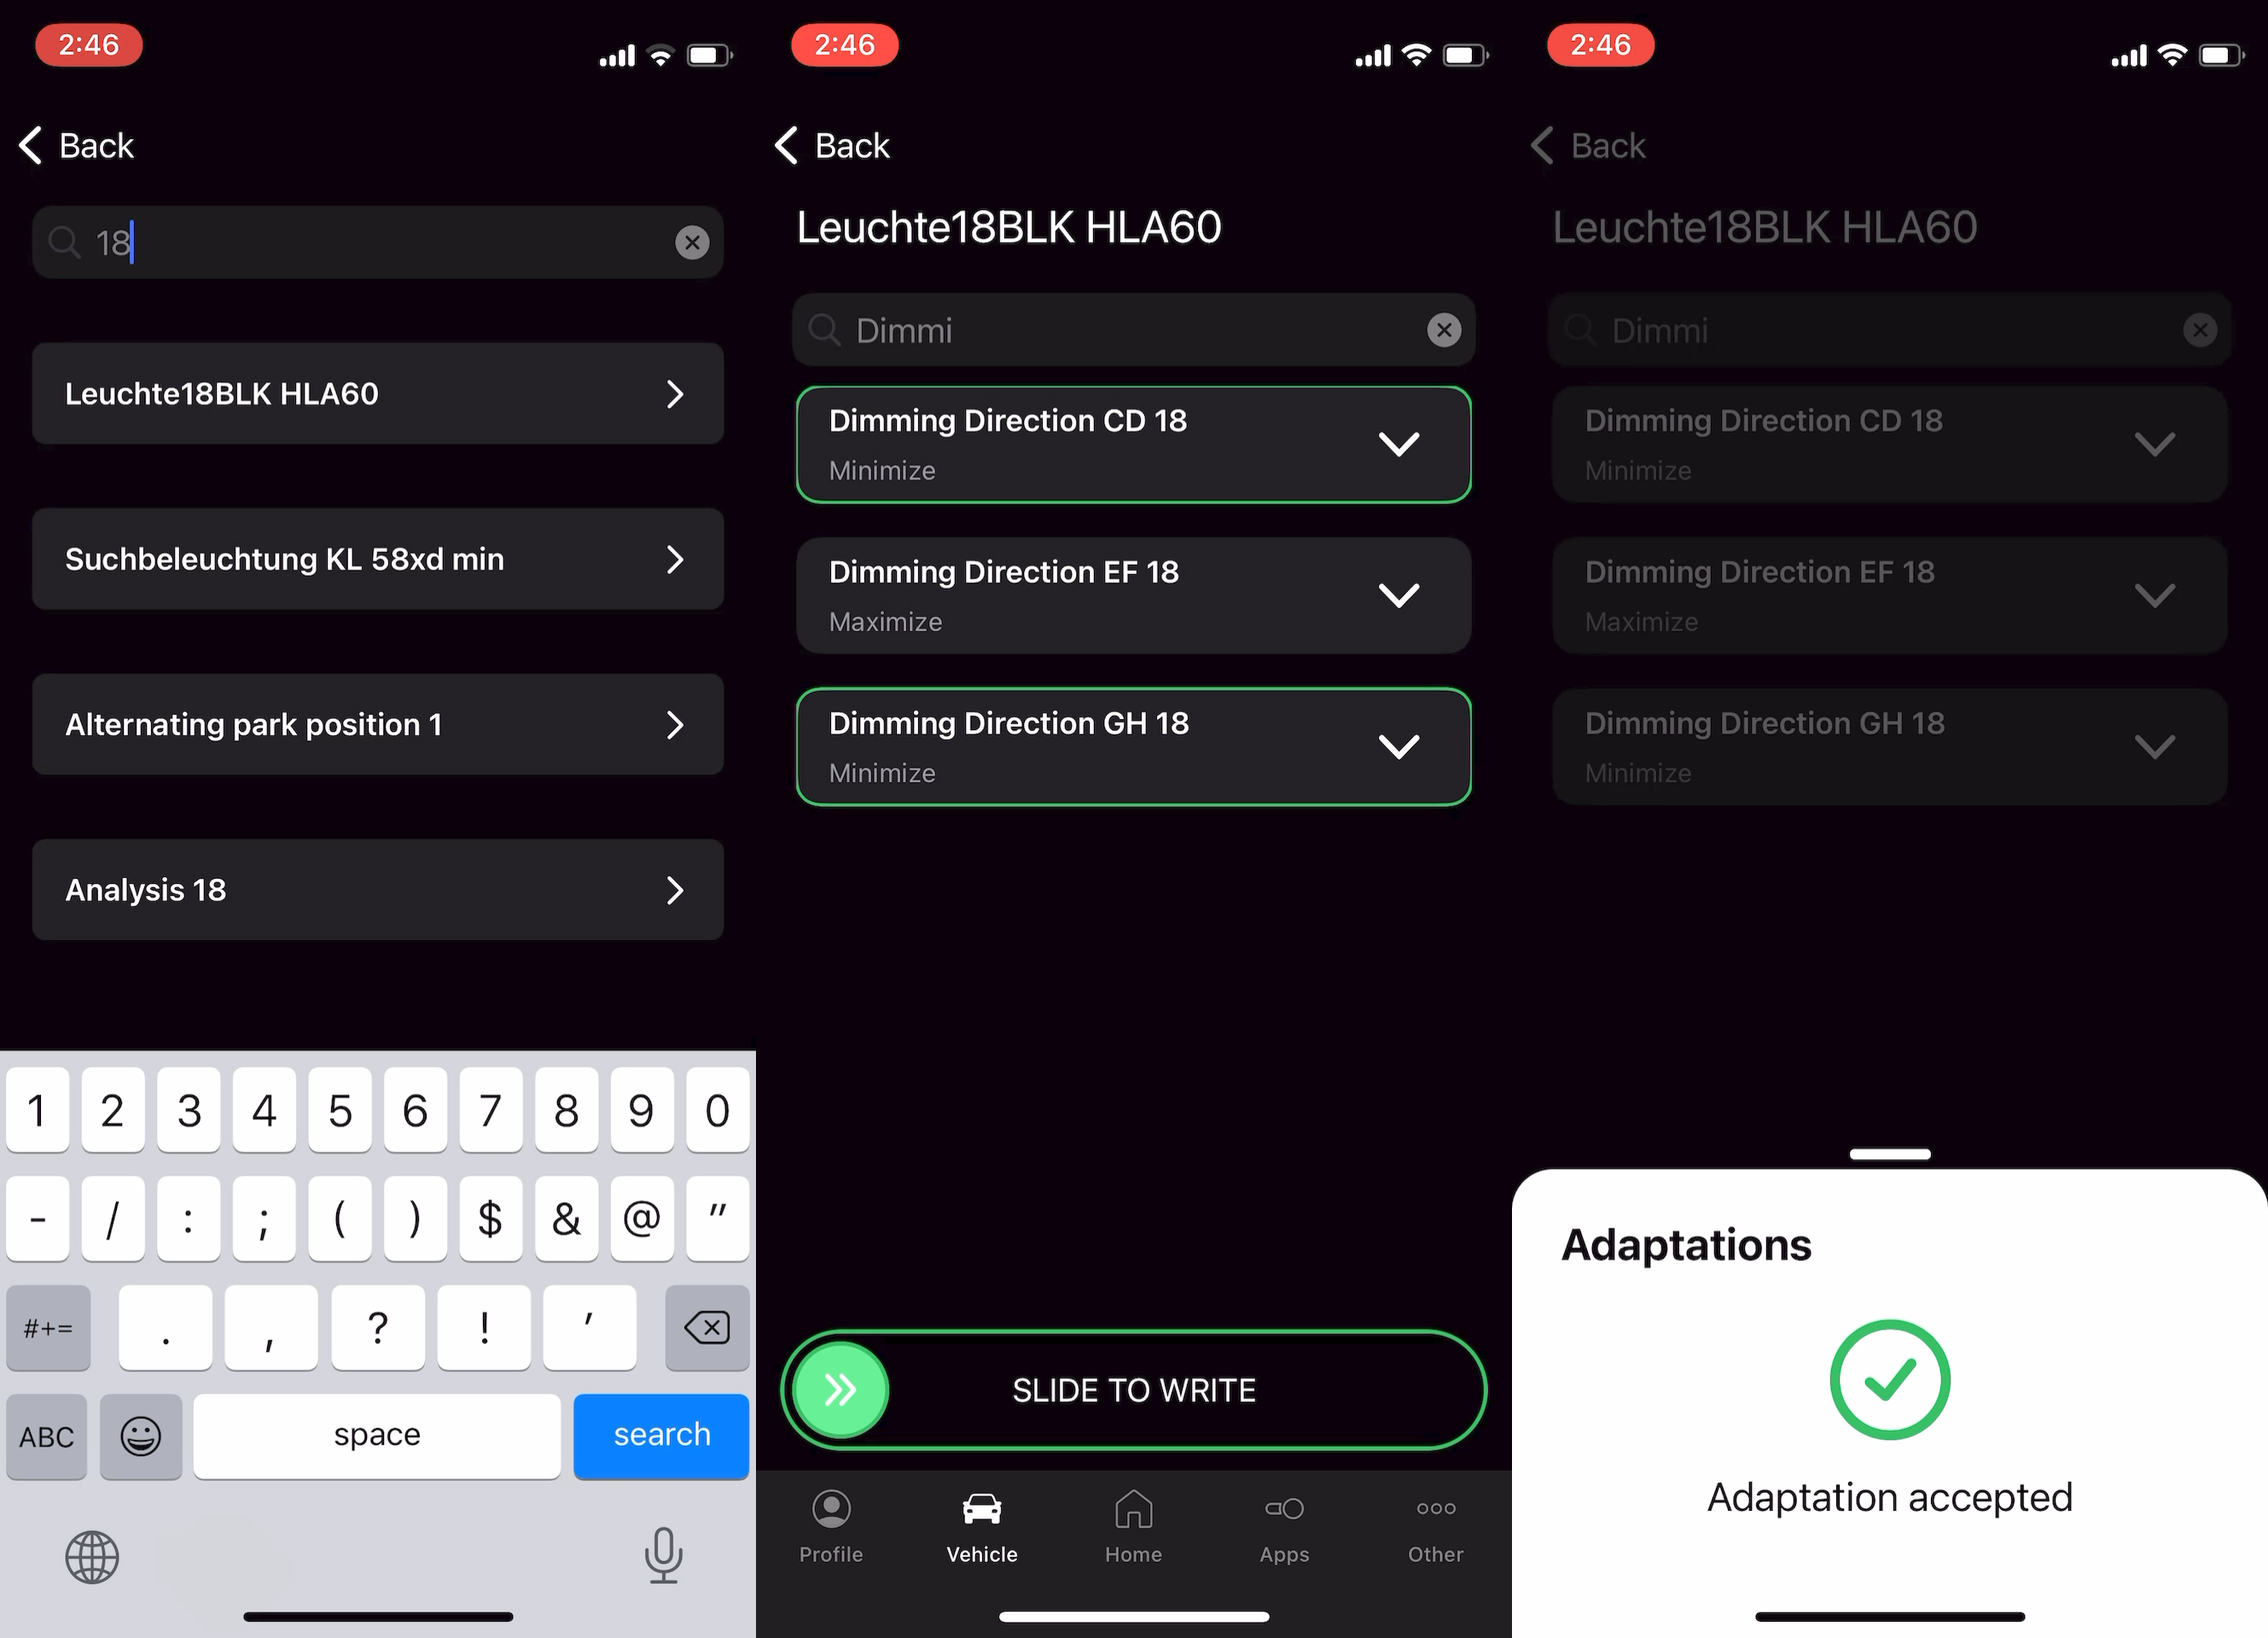
Finally it’s time for the main event; grab some coffee for this. Go through each setting and either make the change or verify the settings match the values below:
- Leuchte18
Dimming Direction CD: Minimize
Dimming Direction EF: Maximize
Dimming Direction GH: Minimize
Dimmwert AB: 0
Dimmwert CD: 0
Dimmwert EF: 127
Dimmwert GH: 0
Byte DTC-DFCC: 16
Lampendefektbitposition: 8
Lasttyp: 43 - allgemeine LED
Lichtansteuerung HD AB: Always
Lichtfunktion A-H: Nicht aktiv
- Leuchte19
Dimming Direction CD: Minimize
Dimming Direction EF: Maximize
Dimming Direction GH: Minimize
Dimmwert AB: 0
Dimmwert CD: 0
Dimmwert EF: 127
Dimmwert GH: 0
Byte DTC-DFCC: 18
Lampendefektbitposition: 18
Lasttyp: 43 - allgemeine LED
Lichtansteuerung HD AB: Always
Lichtfunktion A-H: Nicht aktiv
- Leuchte20
Dimming Direction CD-GH: Maximize
Dimmwert AB: 127
Dimmwert CD: 127
Dimmwert EF: 0
Dimmwert GH: 0
Byte DTC-DFCC: 3D
Lampendefektbitposition: 13
Lasttyp: 43 - allgemeine LED
Lichtansteuerung HD AB: Always
Lichtfunktion A: Brake light
Lichtfunktion B-H: Nicht aktiv
- Leuchte21
Dimming Direction CD-GH: Maximize
Dimmwert AB: 127
Dimmwert CD: 127
Dimmwert EF: 0
Dimmwert GH: 0
Byte DTC-DFCC: 3E
Lampendefektbitposition: 23
Lasttyp: 43 - allgemeine LED
Lichtansteuerung HD AB: Always
Lichtfunktion A: Brake light
Lichtfunktion B-H: Nicht aktiv
- Leuchte23
Dimming Direction CD-GH: Maximize
Dimmwert AB: 127
Dimmwert CD: 0
Dimmwert EF: 0
Dimmwert GH: 10
Byte DTC-DFCC: 29
Lampendefektbitposition: A
Lasttyp: 38 - LED Blinkleuchten
Lichtansteuerung HD AB: Always
Lichtfunktion A: Blinken links Hellphase
Lichtfunktion B-E: Nicht aktiv
Lichtfunktion F: Parklicht links (beidseitiges Parklicht aktiviert li & re)
Lichtfunktion G: Nicht aktiv
Lichtfunktion H: Parklicht links (beidseitiges Parklicht aktiviert li & re)
- Leuchte24
Dimming Direction CD-GH: Maximize
Dimmwert AB: 127
Dimmwert CD: 0
Dimmwert EF: 0
Dimmwert GH: 10
Byte DTC-DFCC: 2A
Lampendefektbitposition: 1A
Lasttyp: 38 - LED Blinkleuchten
Lichtansteuerung HD AB: Always
Lichtfunktion A: Blinken rechts Hellphase
Lichtfunktion B-E: Nicht aktiv
Lichtfunktion F: Parklicht rechts
Lichtfunktion G: Nicht aktiv
Lichtfunktion H: Parklicht rechts
- Leuchte25
Dimming Direction CD-GH: Maximize
Dimmwert AB: 127
Dimmwert CD: 0
Dimmwert EF: 127
Dimmwert GH: 0
Byte DTC-DFCC: 30
Lampendefektbitposition: 28
Lasttyp: 43 - allgemeine LED
Lichtansteuerung HD AB: Always
Lichtfunktion A: Standlicht allgemein (Schlusslicht, Positionslicht, Begrenzungslicht)
Lichtfunktion B-H: Nicht aktiv
- Leuchte26
Dimming Direction CD-GH: Maximize
Dimmwert AB: 127
Dimmwert CD: 0
Dimmwert EF: 0
Dimmwert GH: 0
Byte DTC-DFCC: 54
Lampendefektbitposition: 0
Lasttyp: 43 - allgemeine LED
Lichtansteuerung HD AB: Always
Lichtfunktion A: Standlicht allgemein (Schlusslicht, Positionslicht, Begrenzungslicht)
Lichtfunktion B-H: Nicht aktiv
- Leuchte27
Dimming Direction CD-GH: Maximize
Dimmwert AB: 127
Dimmwert CD: 0
Dimmwert EF: 0
Dimmwert GH: 0
Byte DTC-DFCC: 53
Lampendefektbitposition: 0
Lasttyp: 43 - allgemeine LED
Lichtansteuerung HD AB: Always
Lichtfunktion A: Standlicht allgemein (Schlusslicht, Positionslicht, Begrenzungslicht)
Lichtfunktion B-H: Nicht aktiv
- Leuchte28
Dimming Direction CD-GH: Maximize
Dimmwert AB: 127
Dimmwert CD: 0
Dimmwert EF: 0
Dimmwert GH: 0
Byte DTC-DFCC: 31
Lampendefektbitposition: B
Lasttyp: 43 - allgemeine LED
Lichtansteuerung HD AB: Always
Lichtfunktion A: Nebelschlusslicht wenn kein Anhaenger gesteckt
Lichtfunktion B-H: Nicht aktiv
Comments
comments powered by Disqus