EcoHitch Install#
I decided to go with the EcoHitch x7315. Installing was straight forward, but it ended up taking my entire Sunday to complete. Overall I’m very happy with how it turned out.
I ended up getting my own bolts instead of using the bolts that came with the hitch based on what jjvincent said, but this is optional. If you want to do the same I bought them from McMaster-Carr (from: https://www.mcmaster.com/bolts/fastener-strength-grade-class~class-12-9/extreme-strength-metric-class-12-9-steel-hex-head-screws/thread-size~m8/).
I used the following tools:
13mm and 10mm sockets
1 ft socket extension
Ratchet
T25 and T15 Torx drivers
Crescent wrench (adjustable spanner)
Plastic trim removal tools and a flat screwdriver
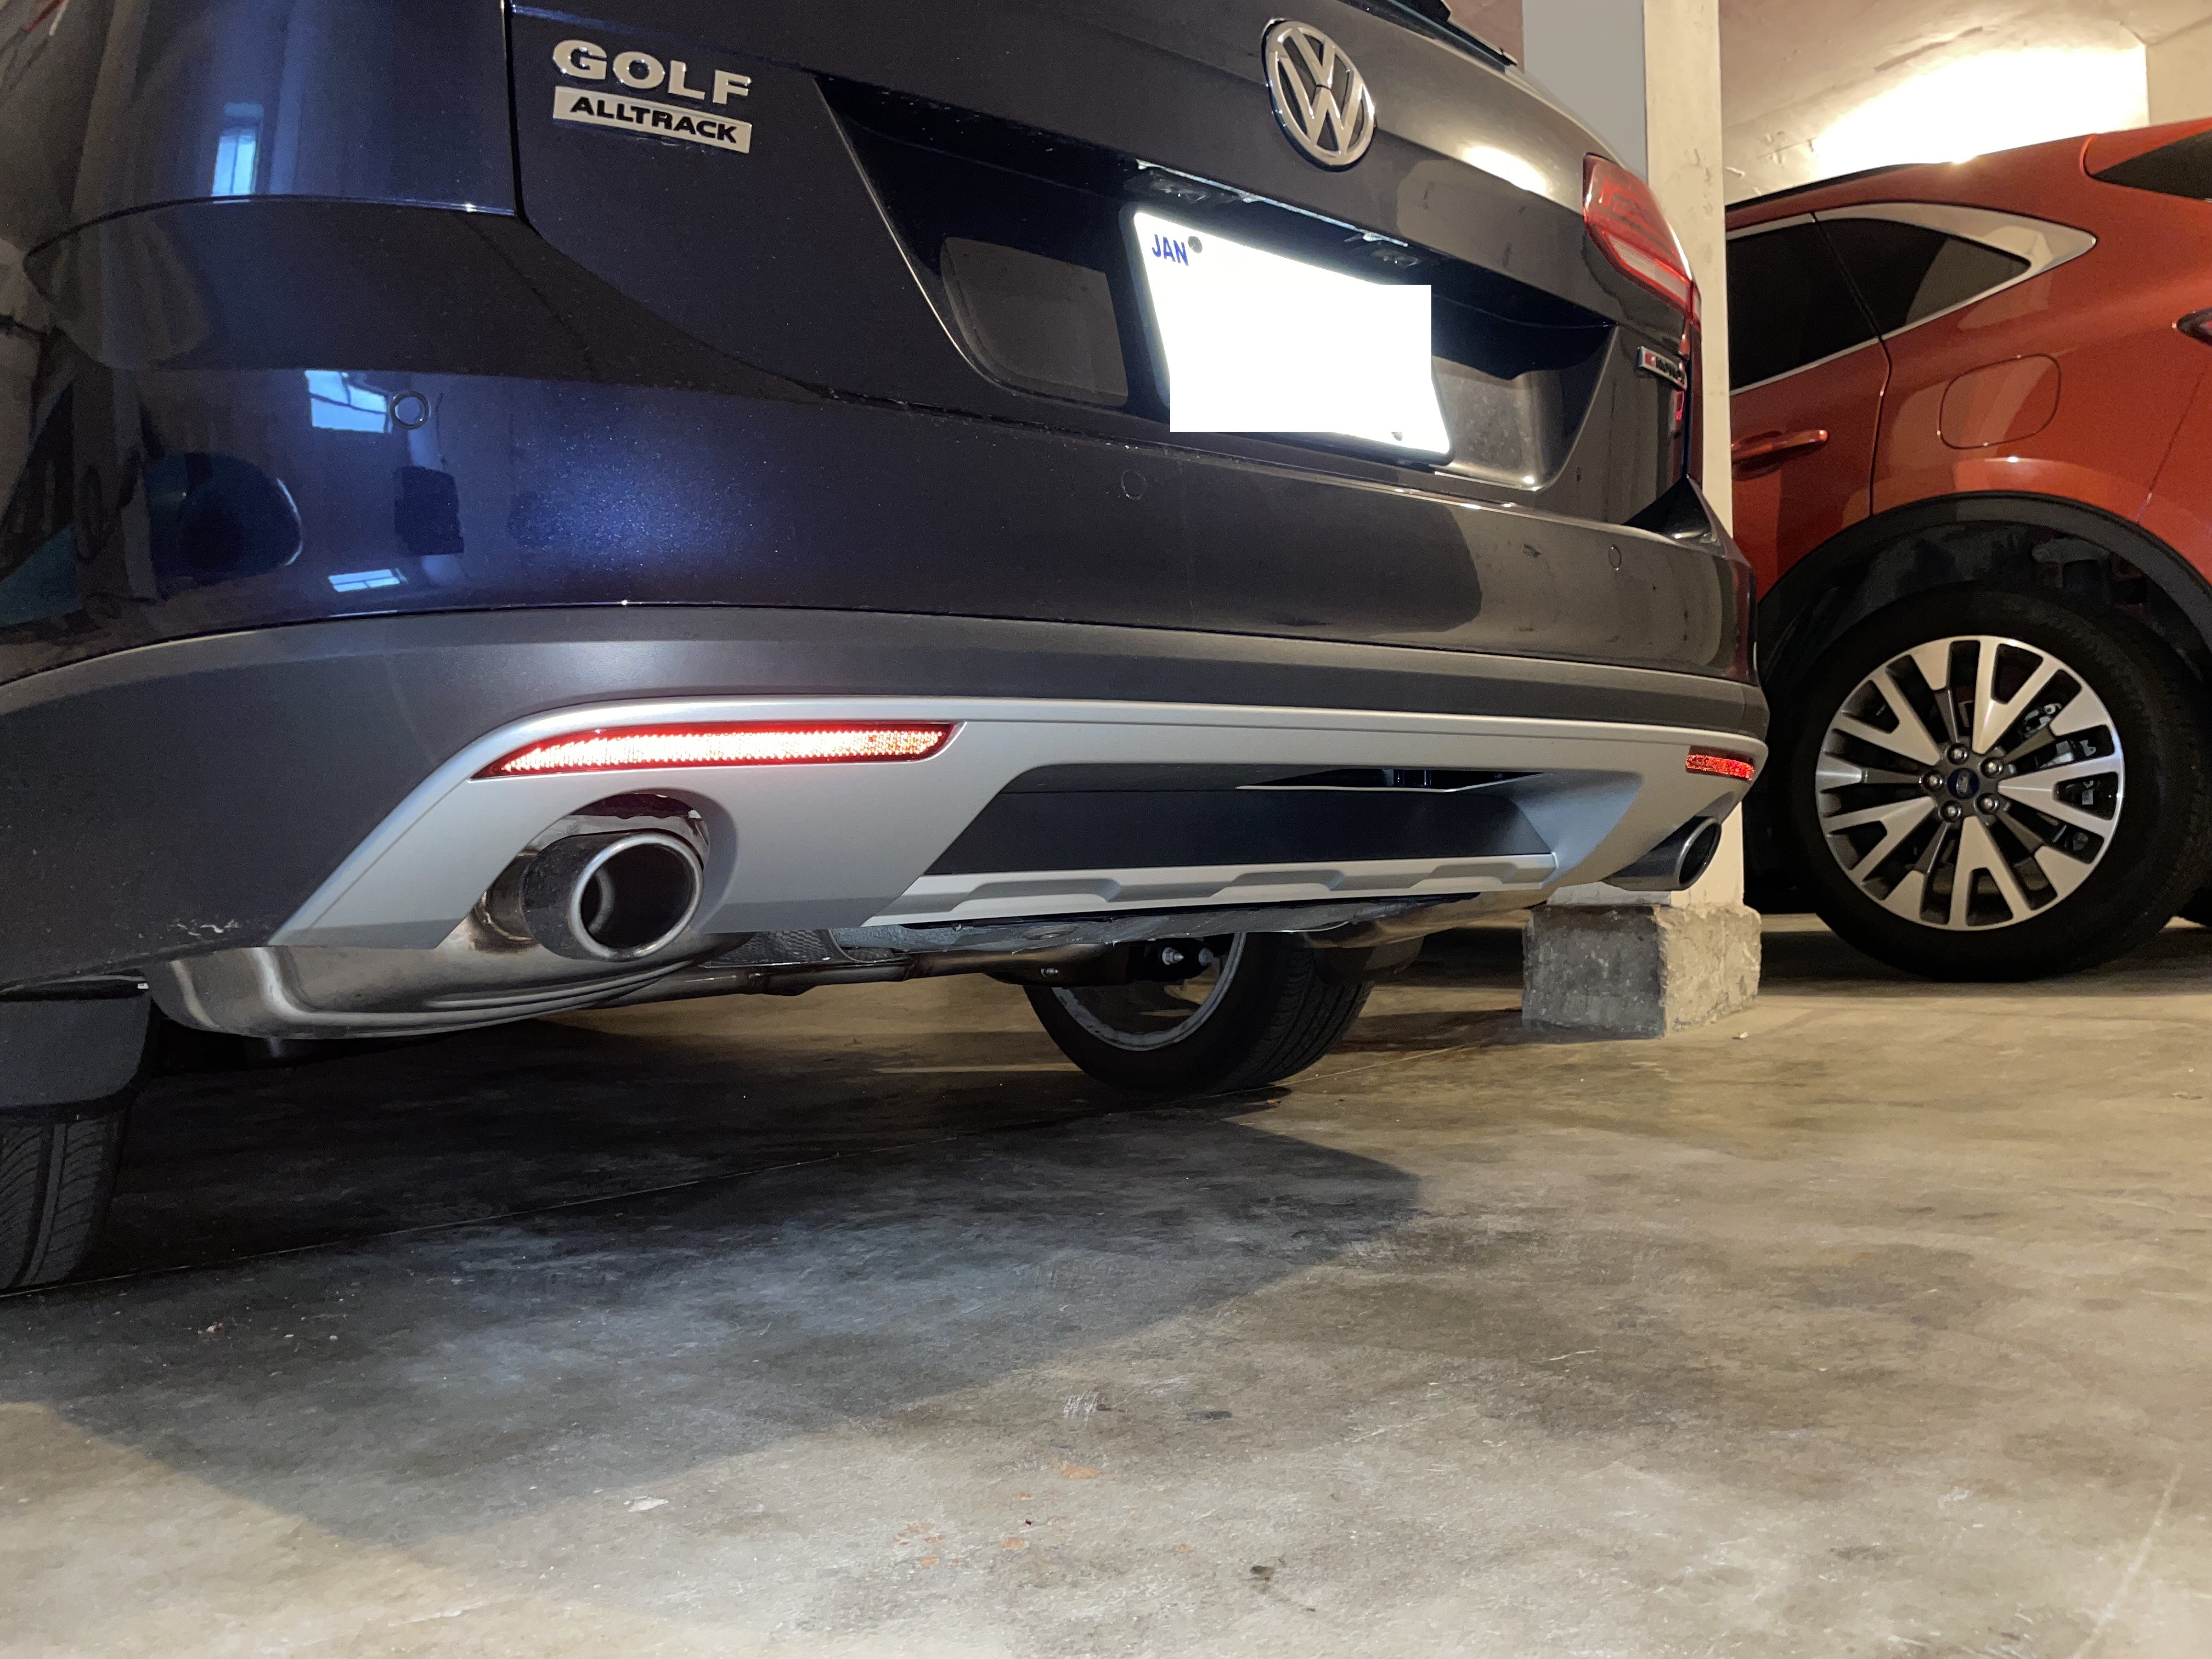
Before installing.# |
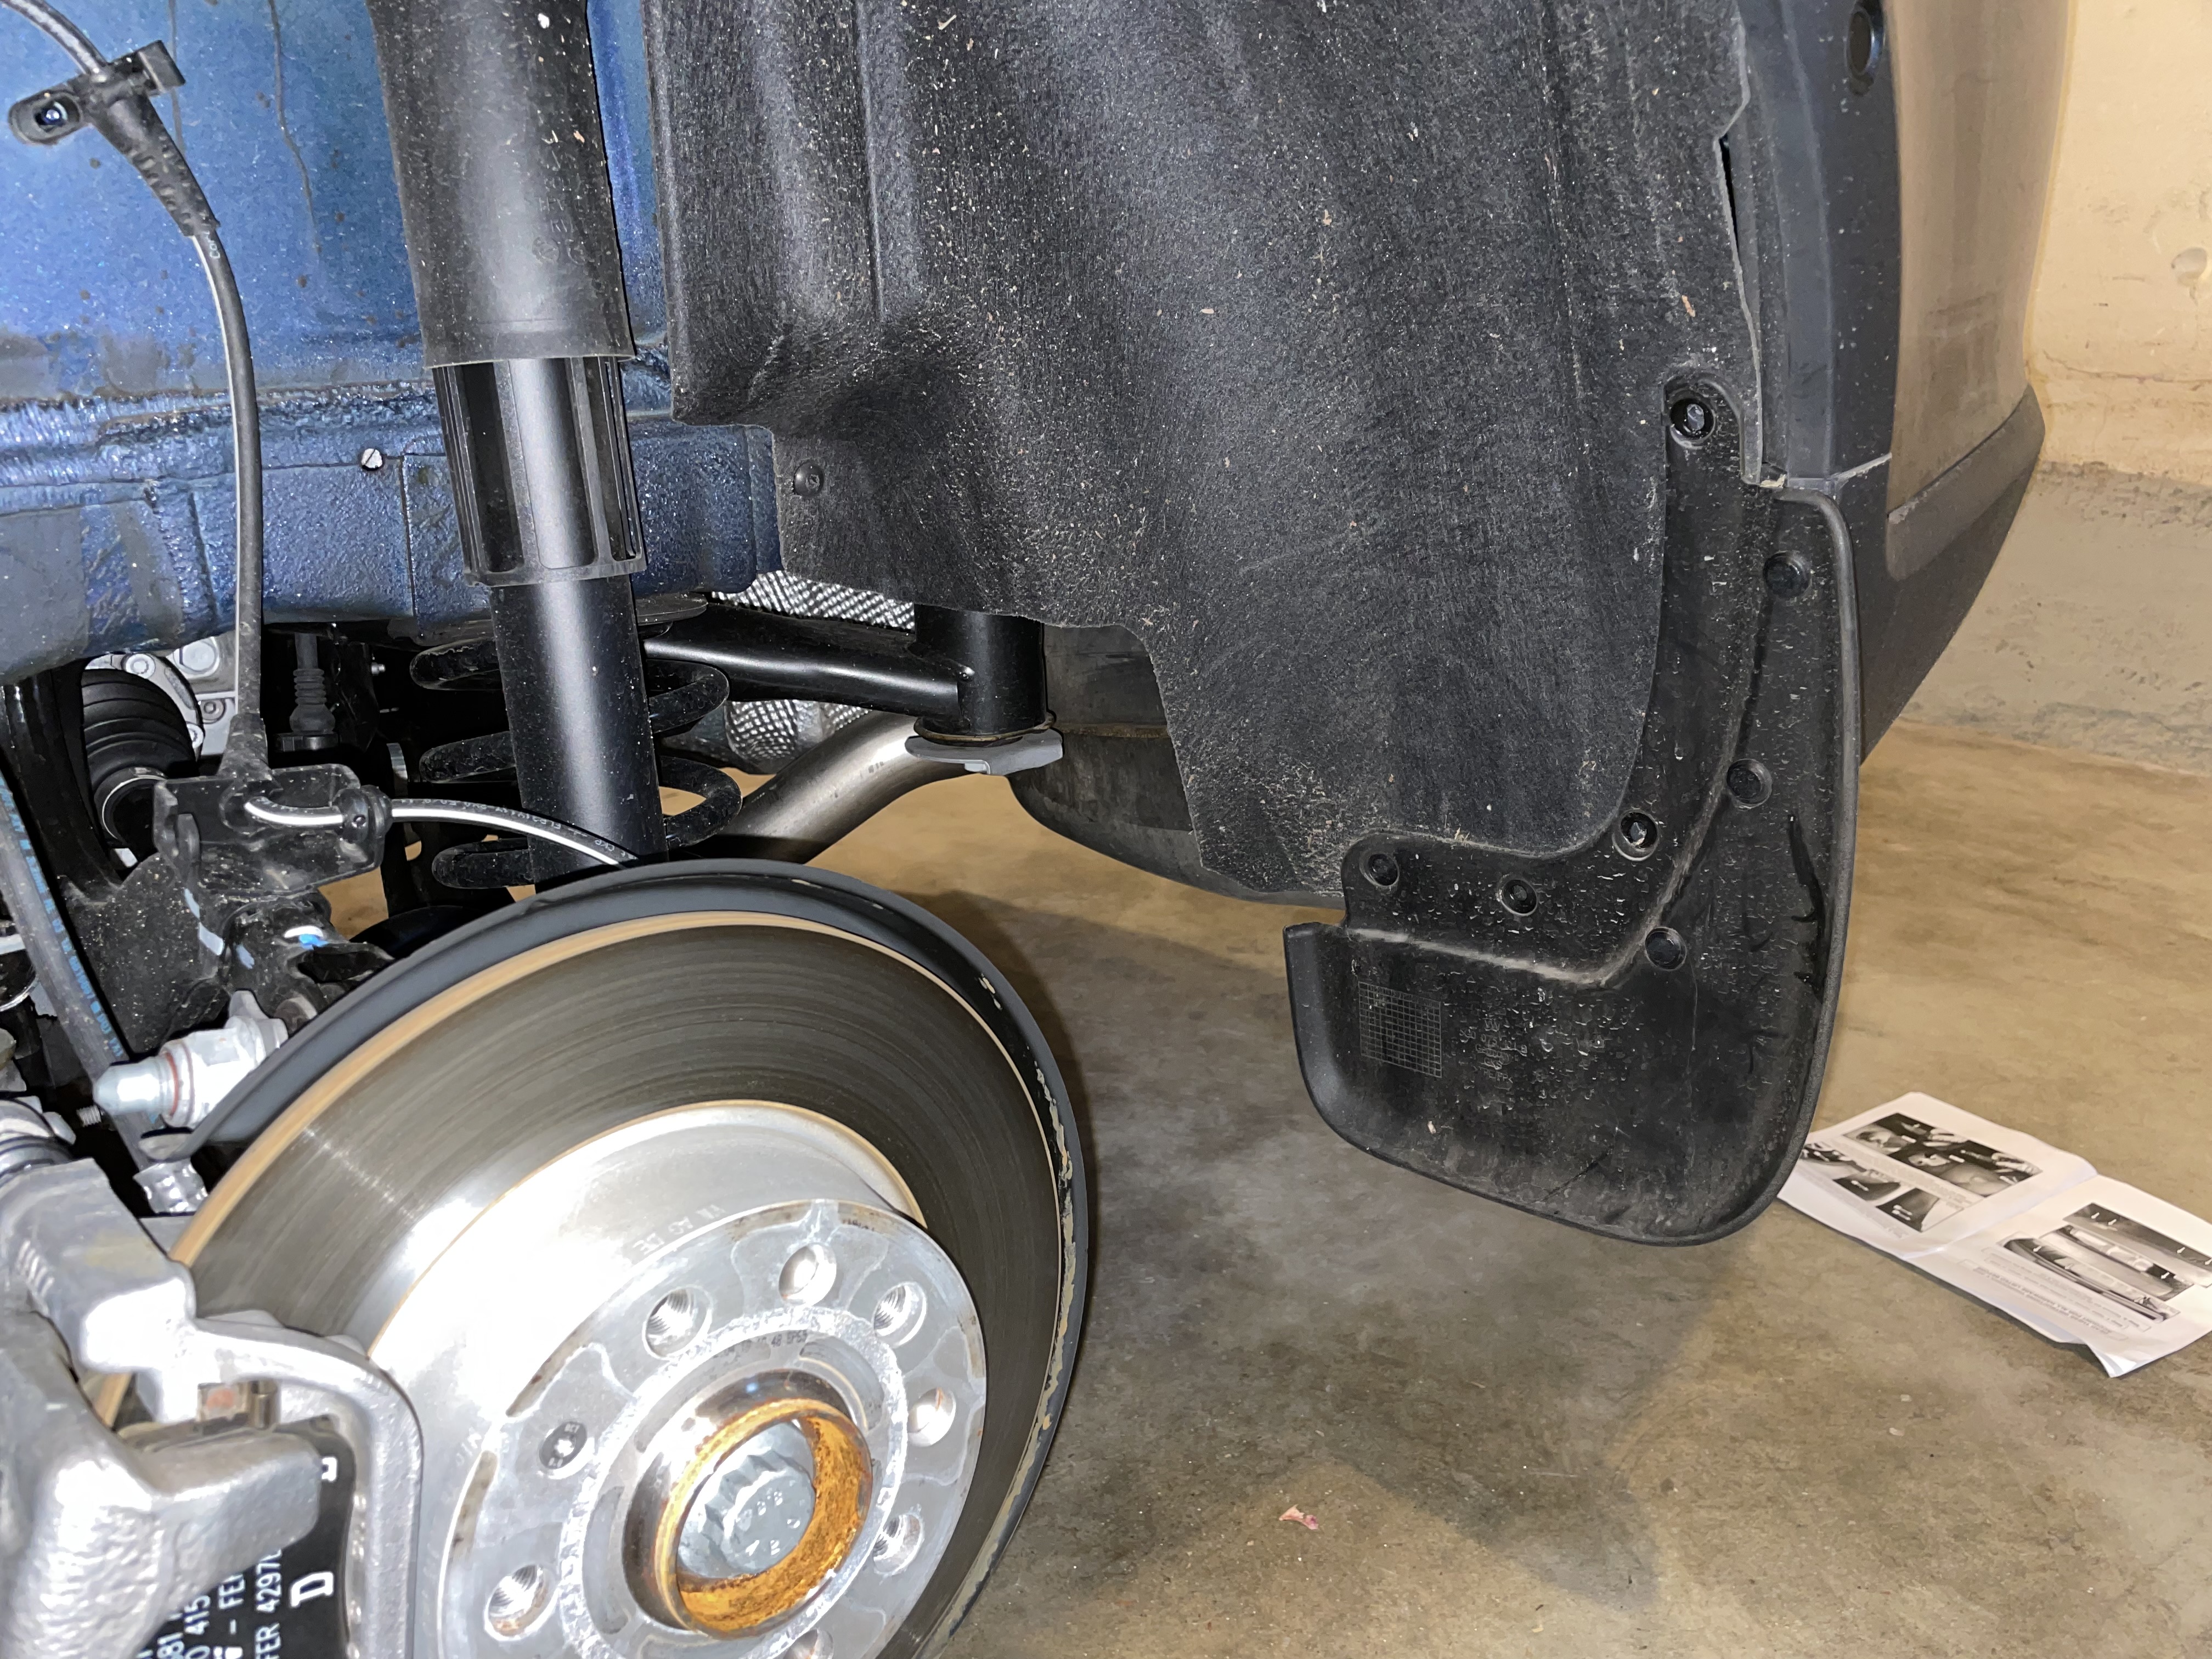
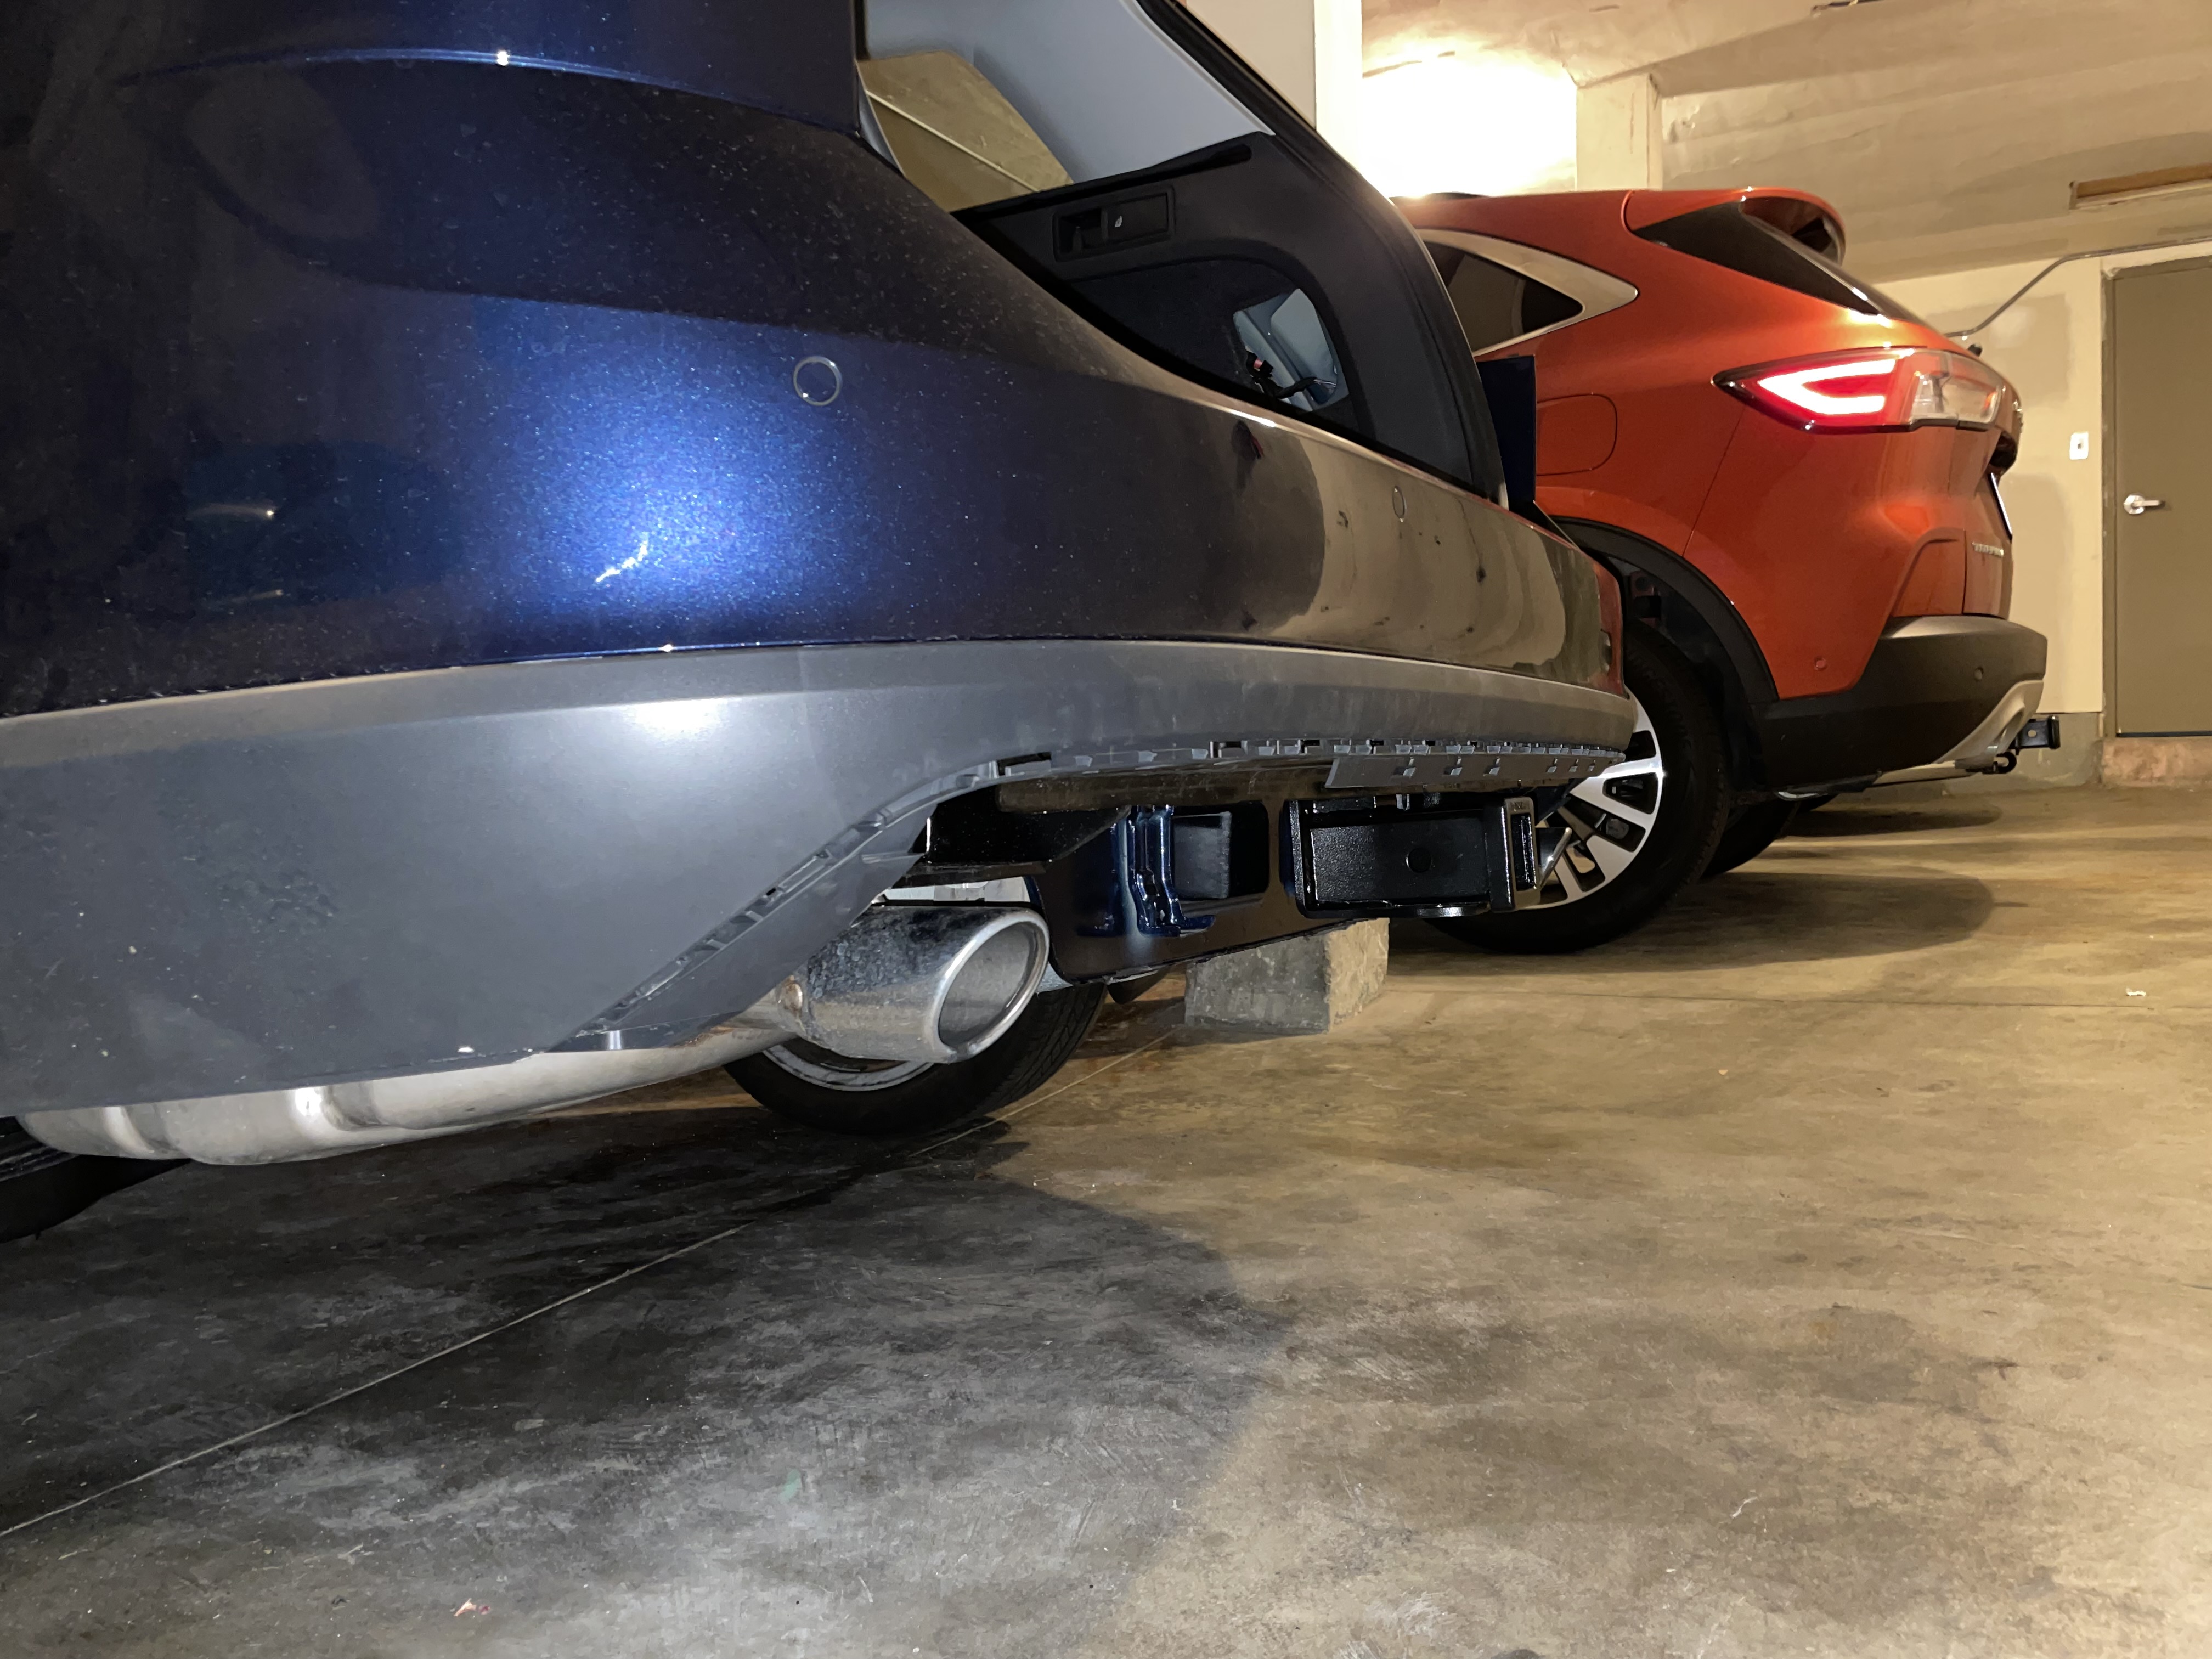
Because I don’t have a ratchet wrench that will fit I had to remove the rear tires to remove the screws in the wheel wells. I left the OEM mud flaps on to avoid scratch the bottom of my bumper.# |
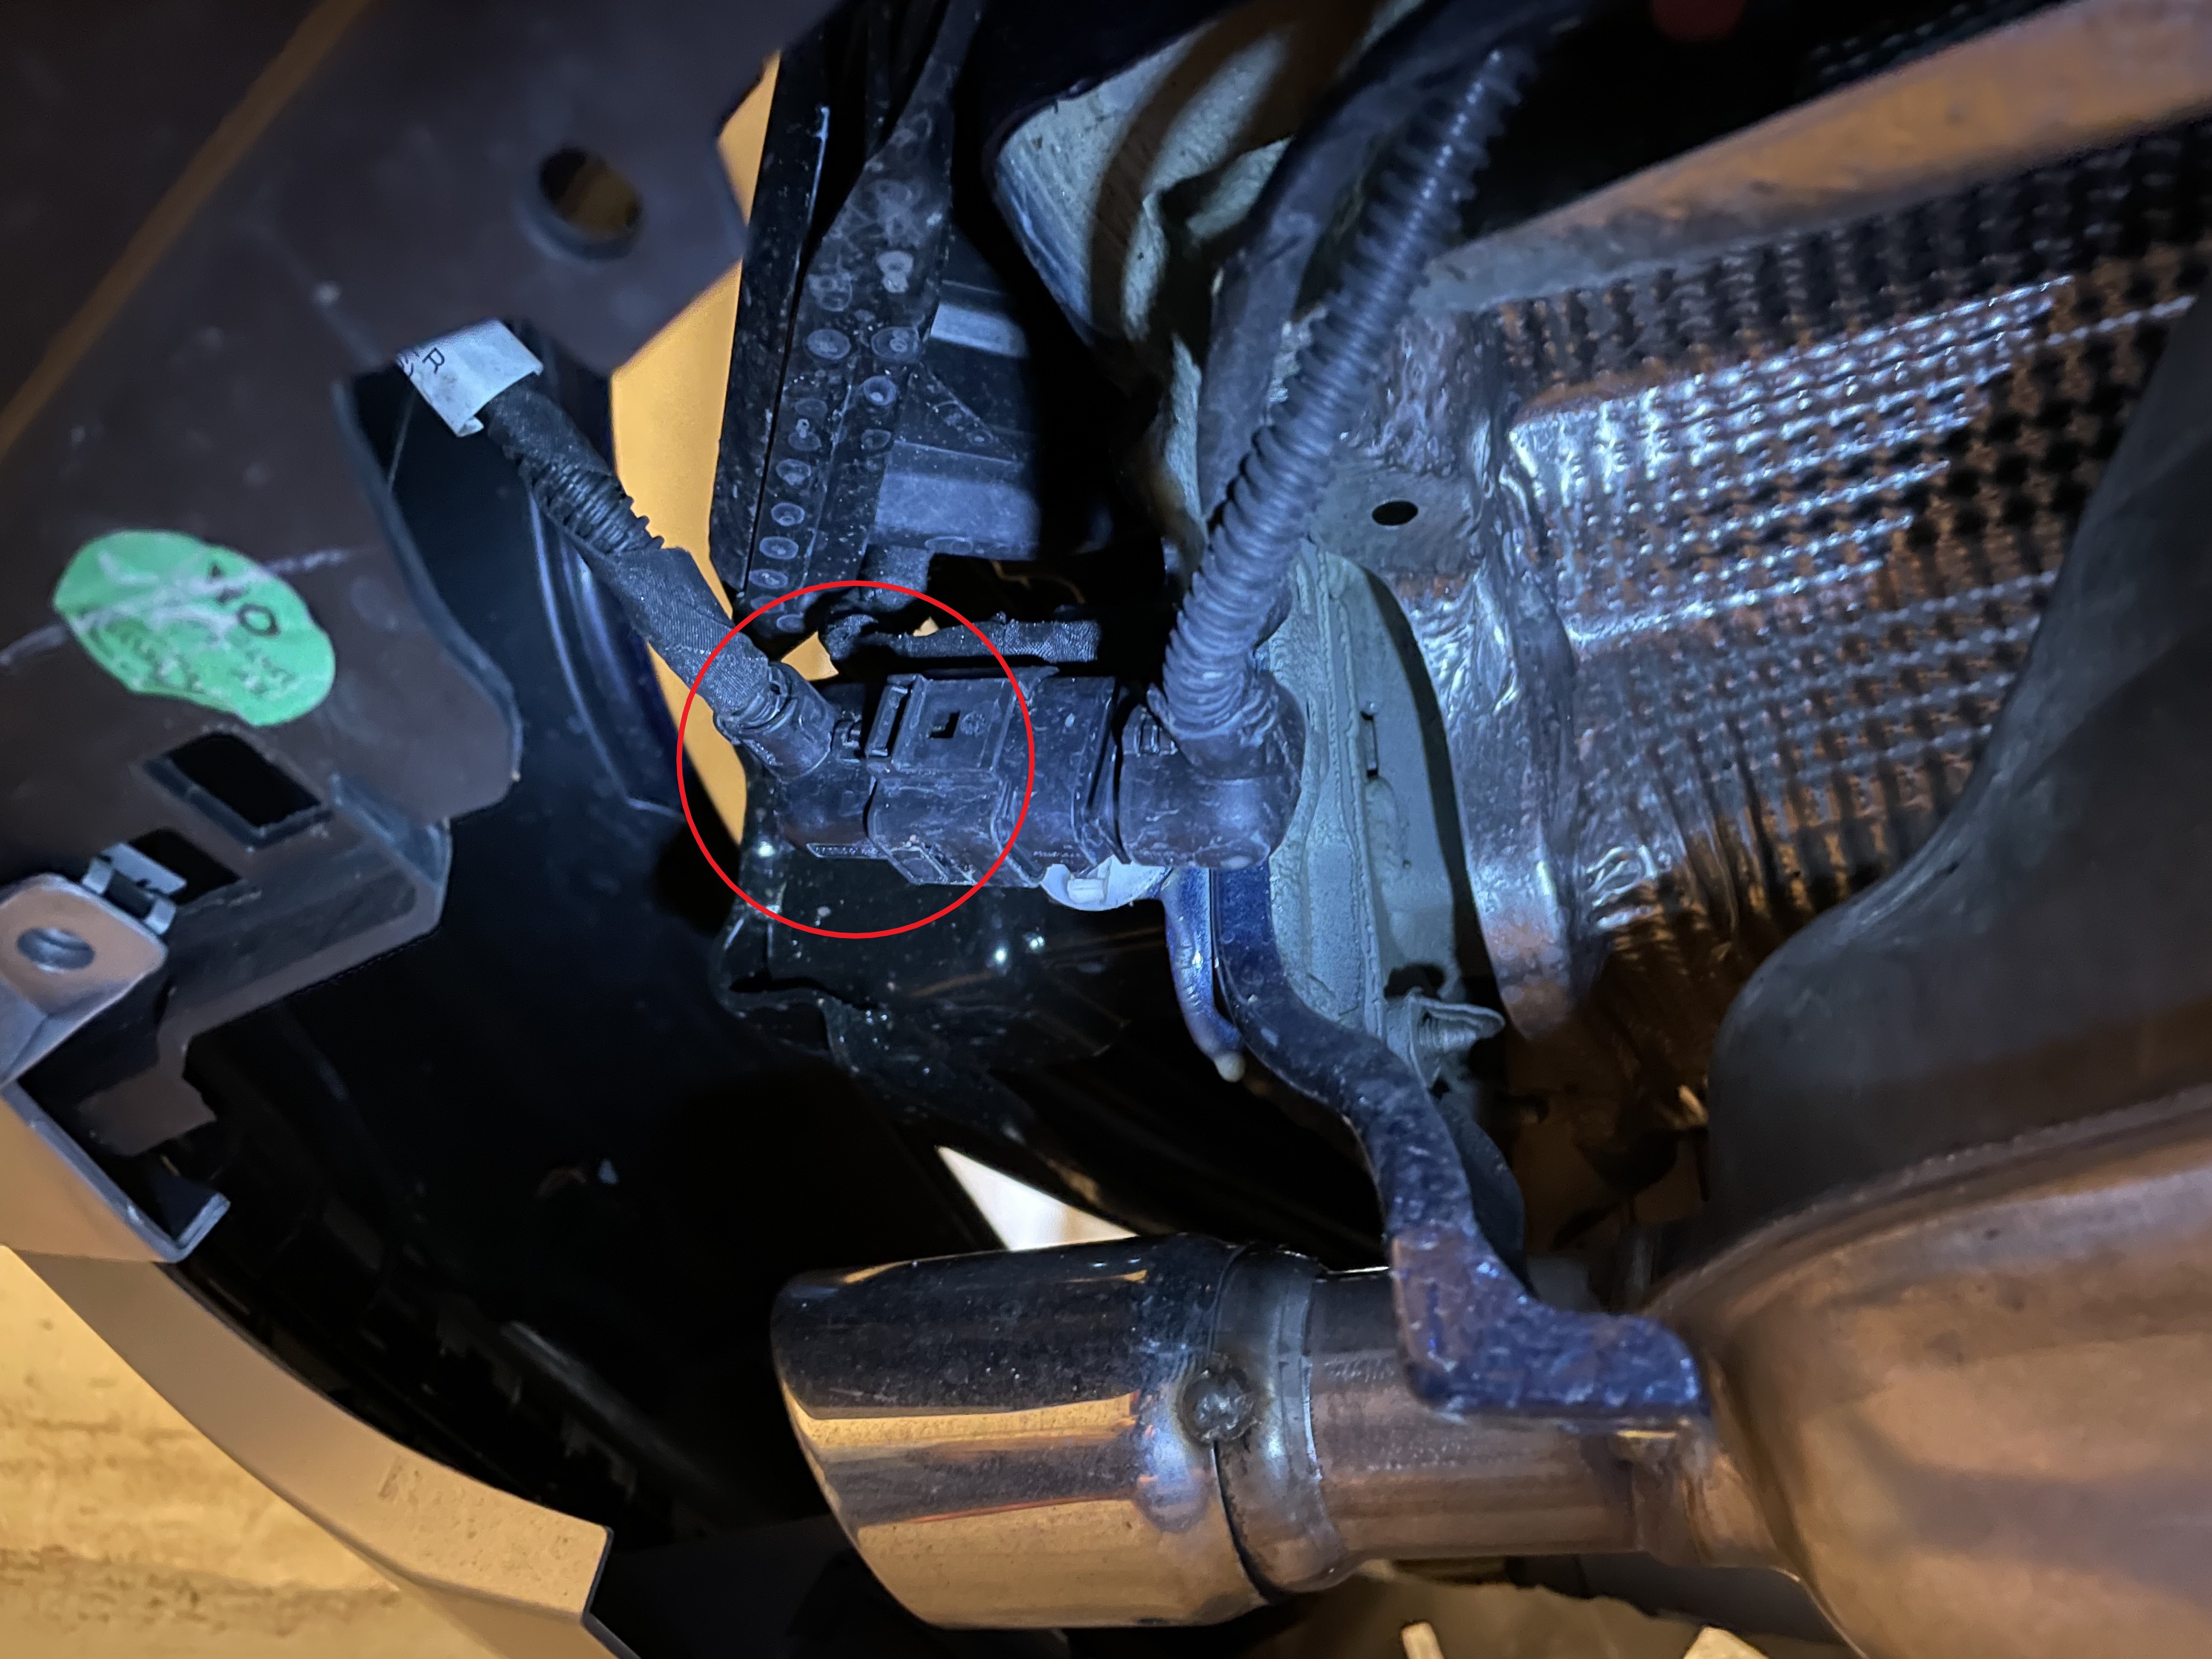
My 2019 Alltrack SE came with sensors in the bumpers, so I had to unplug this cable on the passenger side to get the bumper off.# |
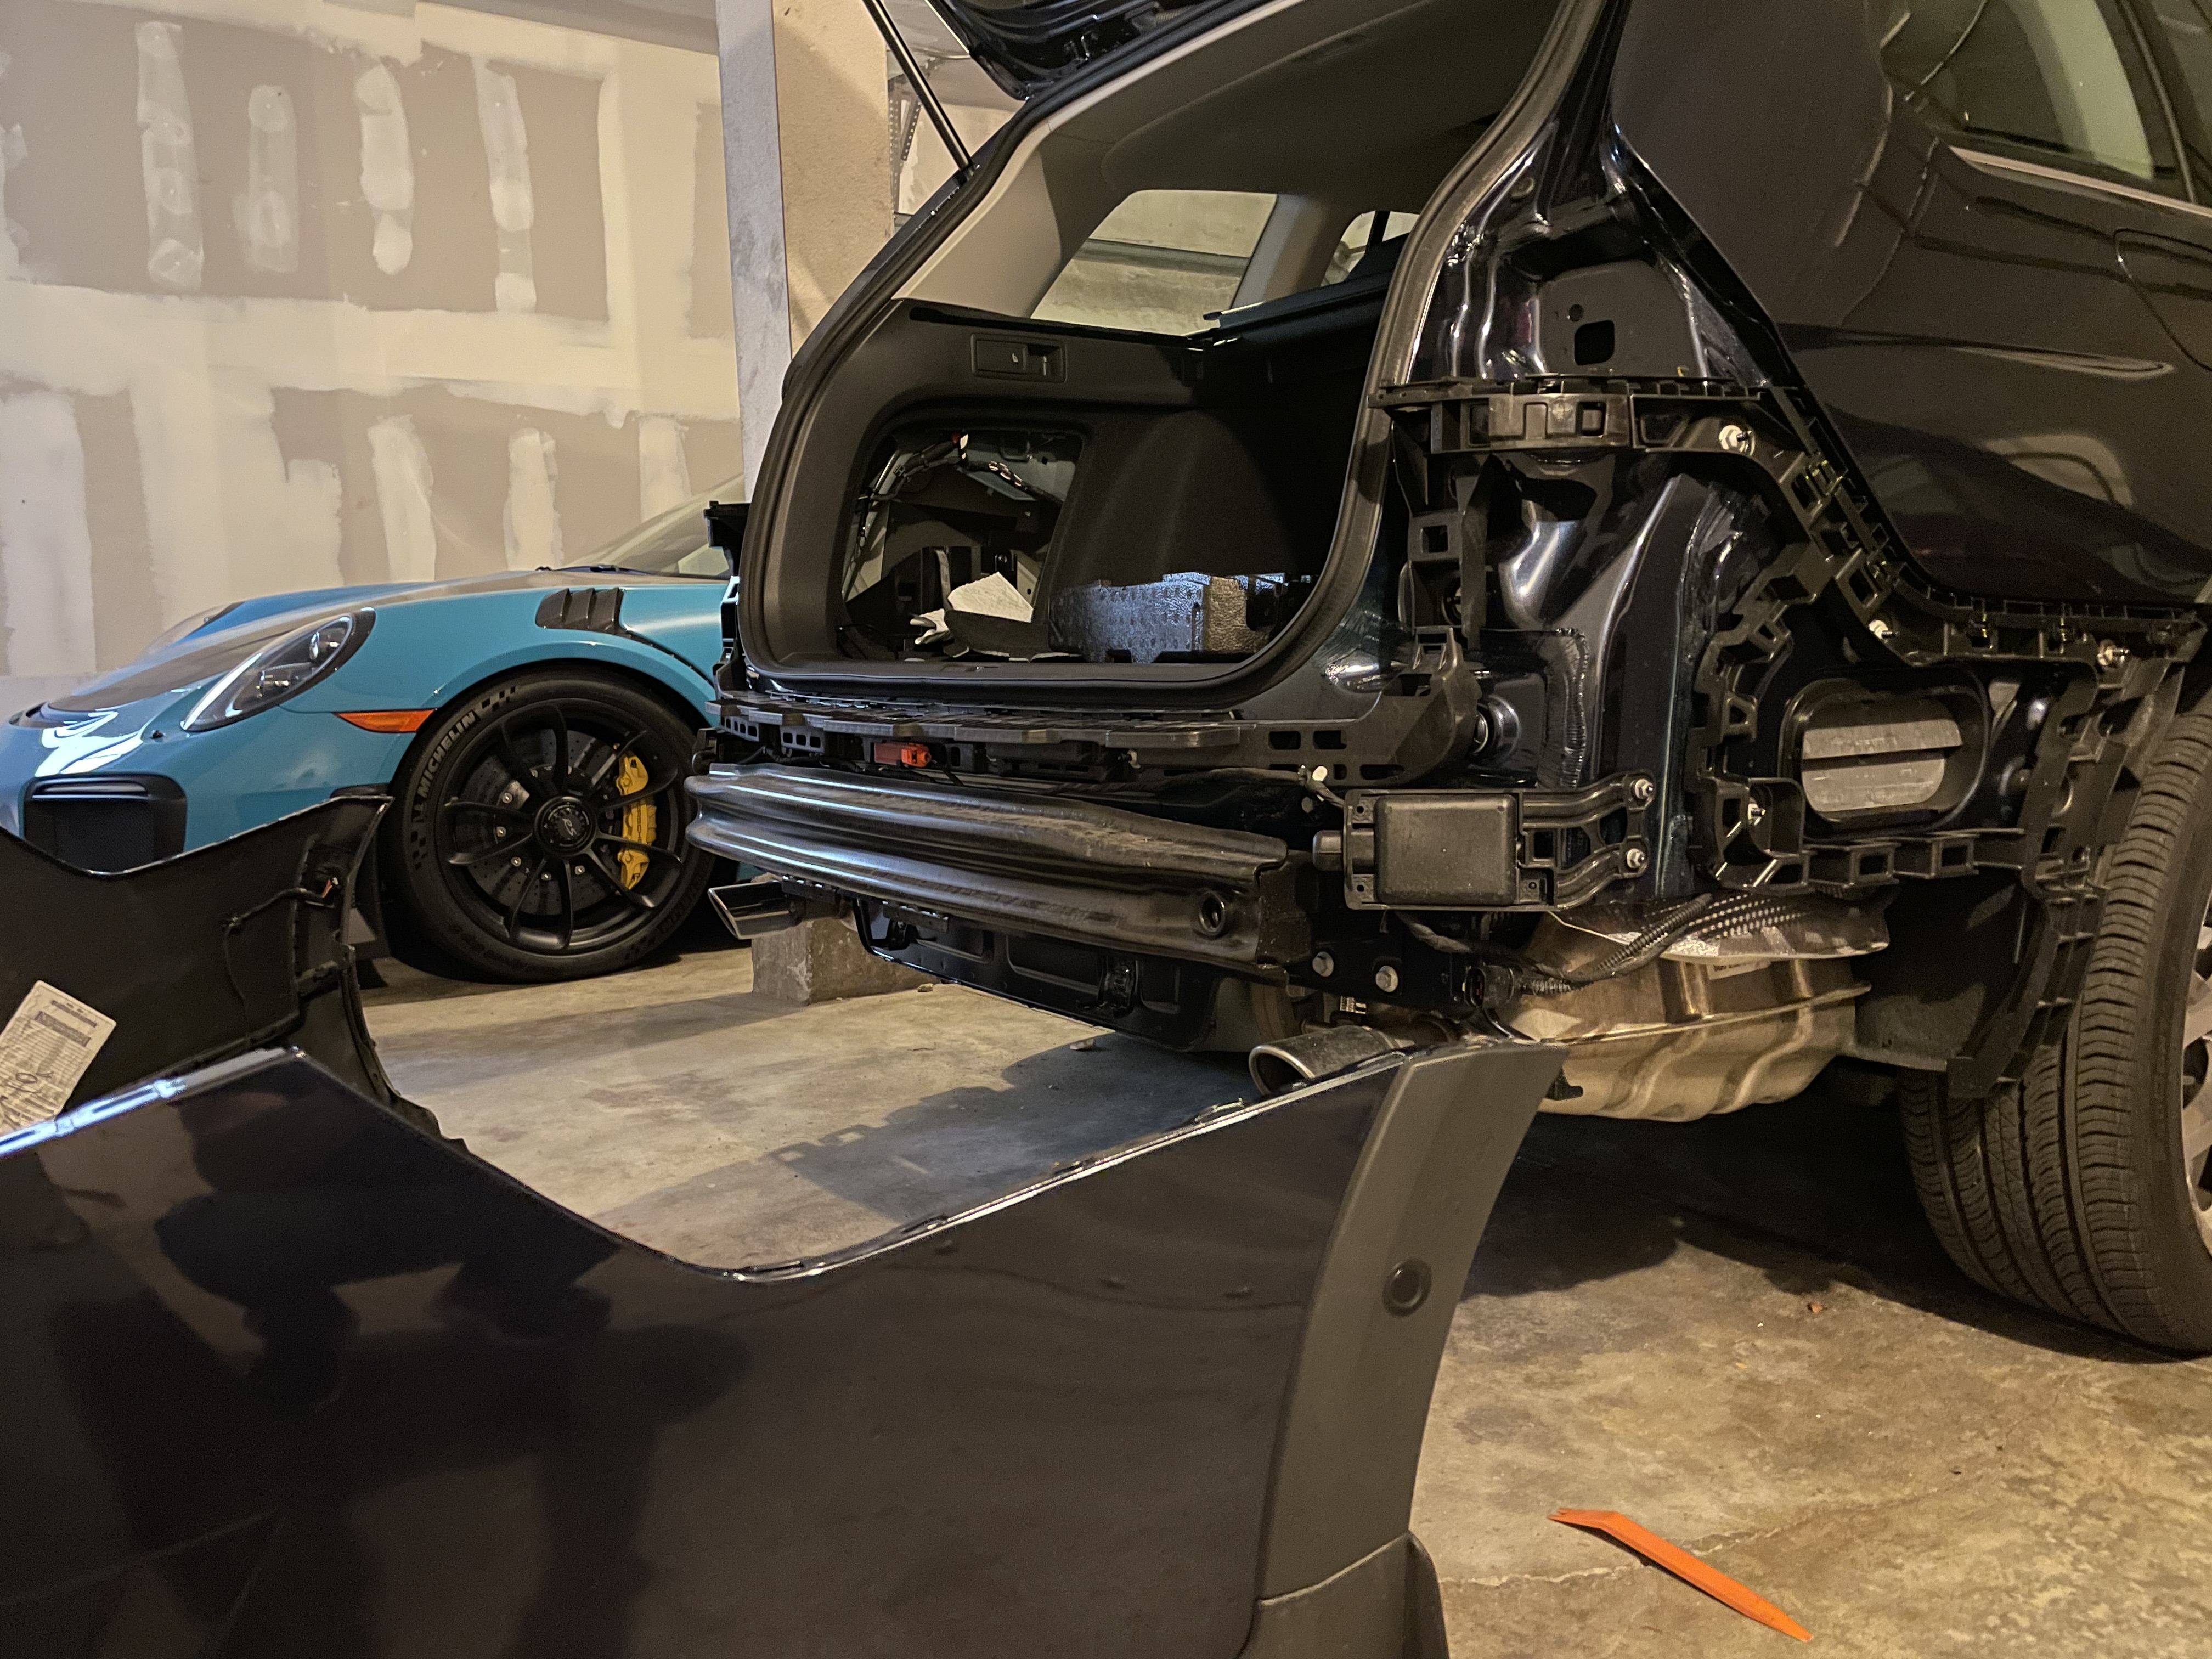
Removed the rear bumper.# |
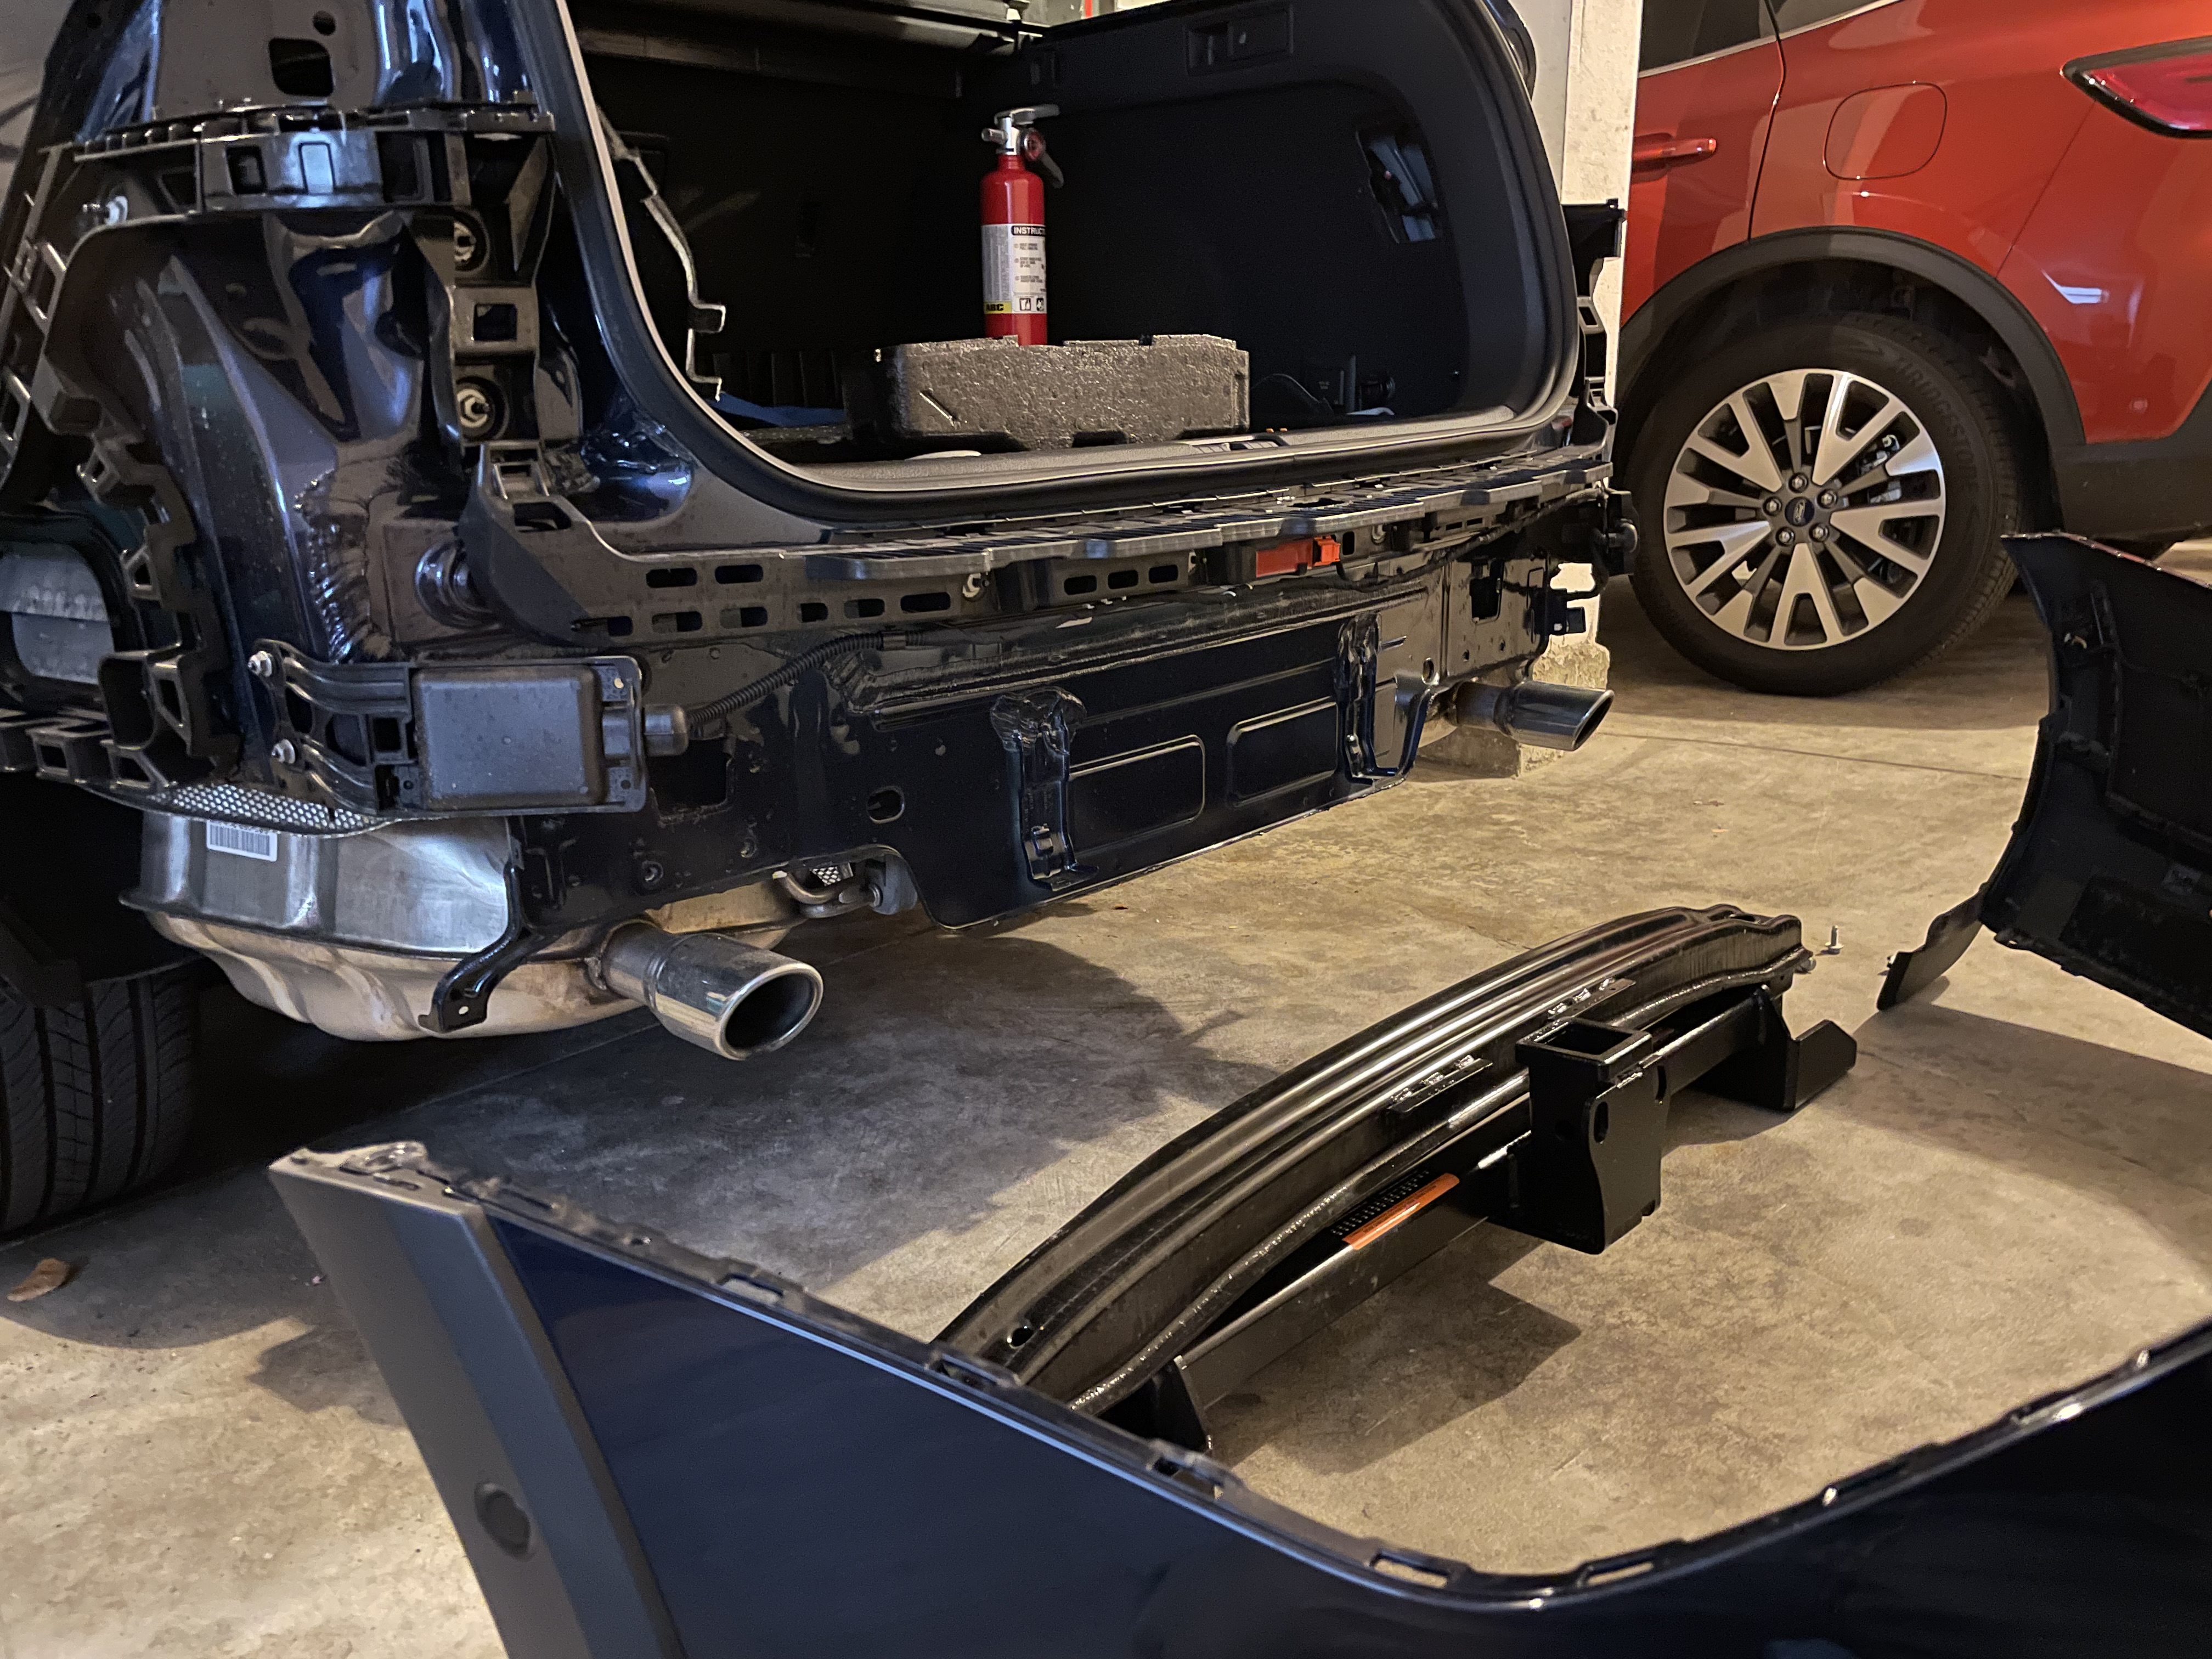
Removed the impact bar.# |
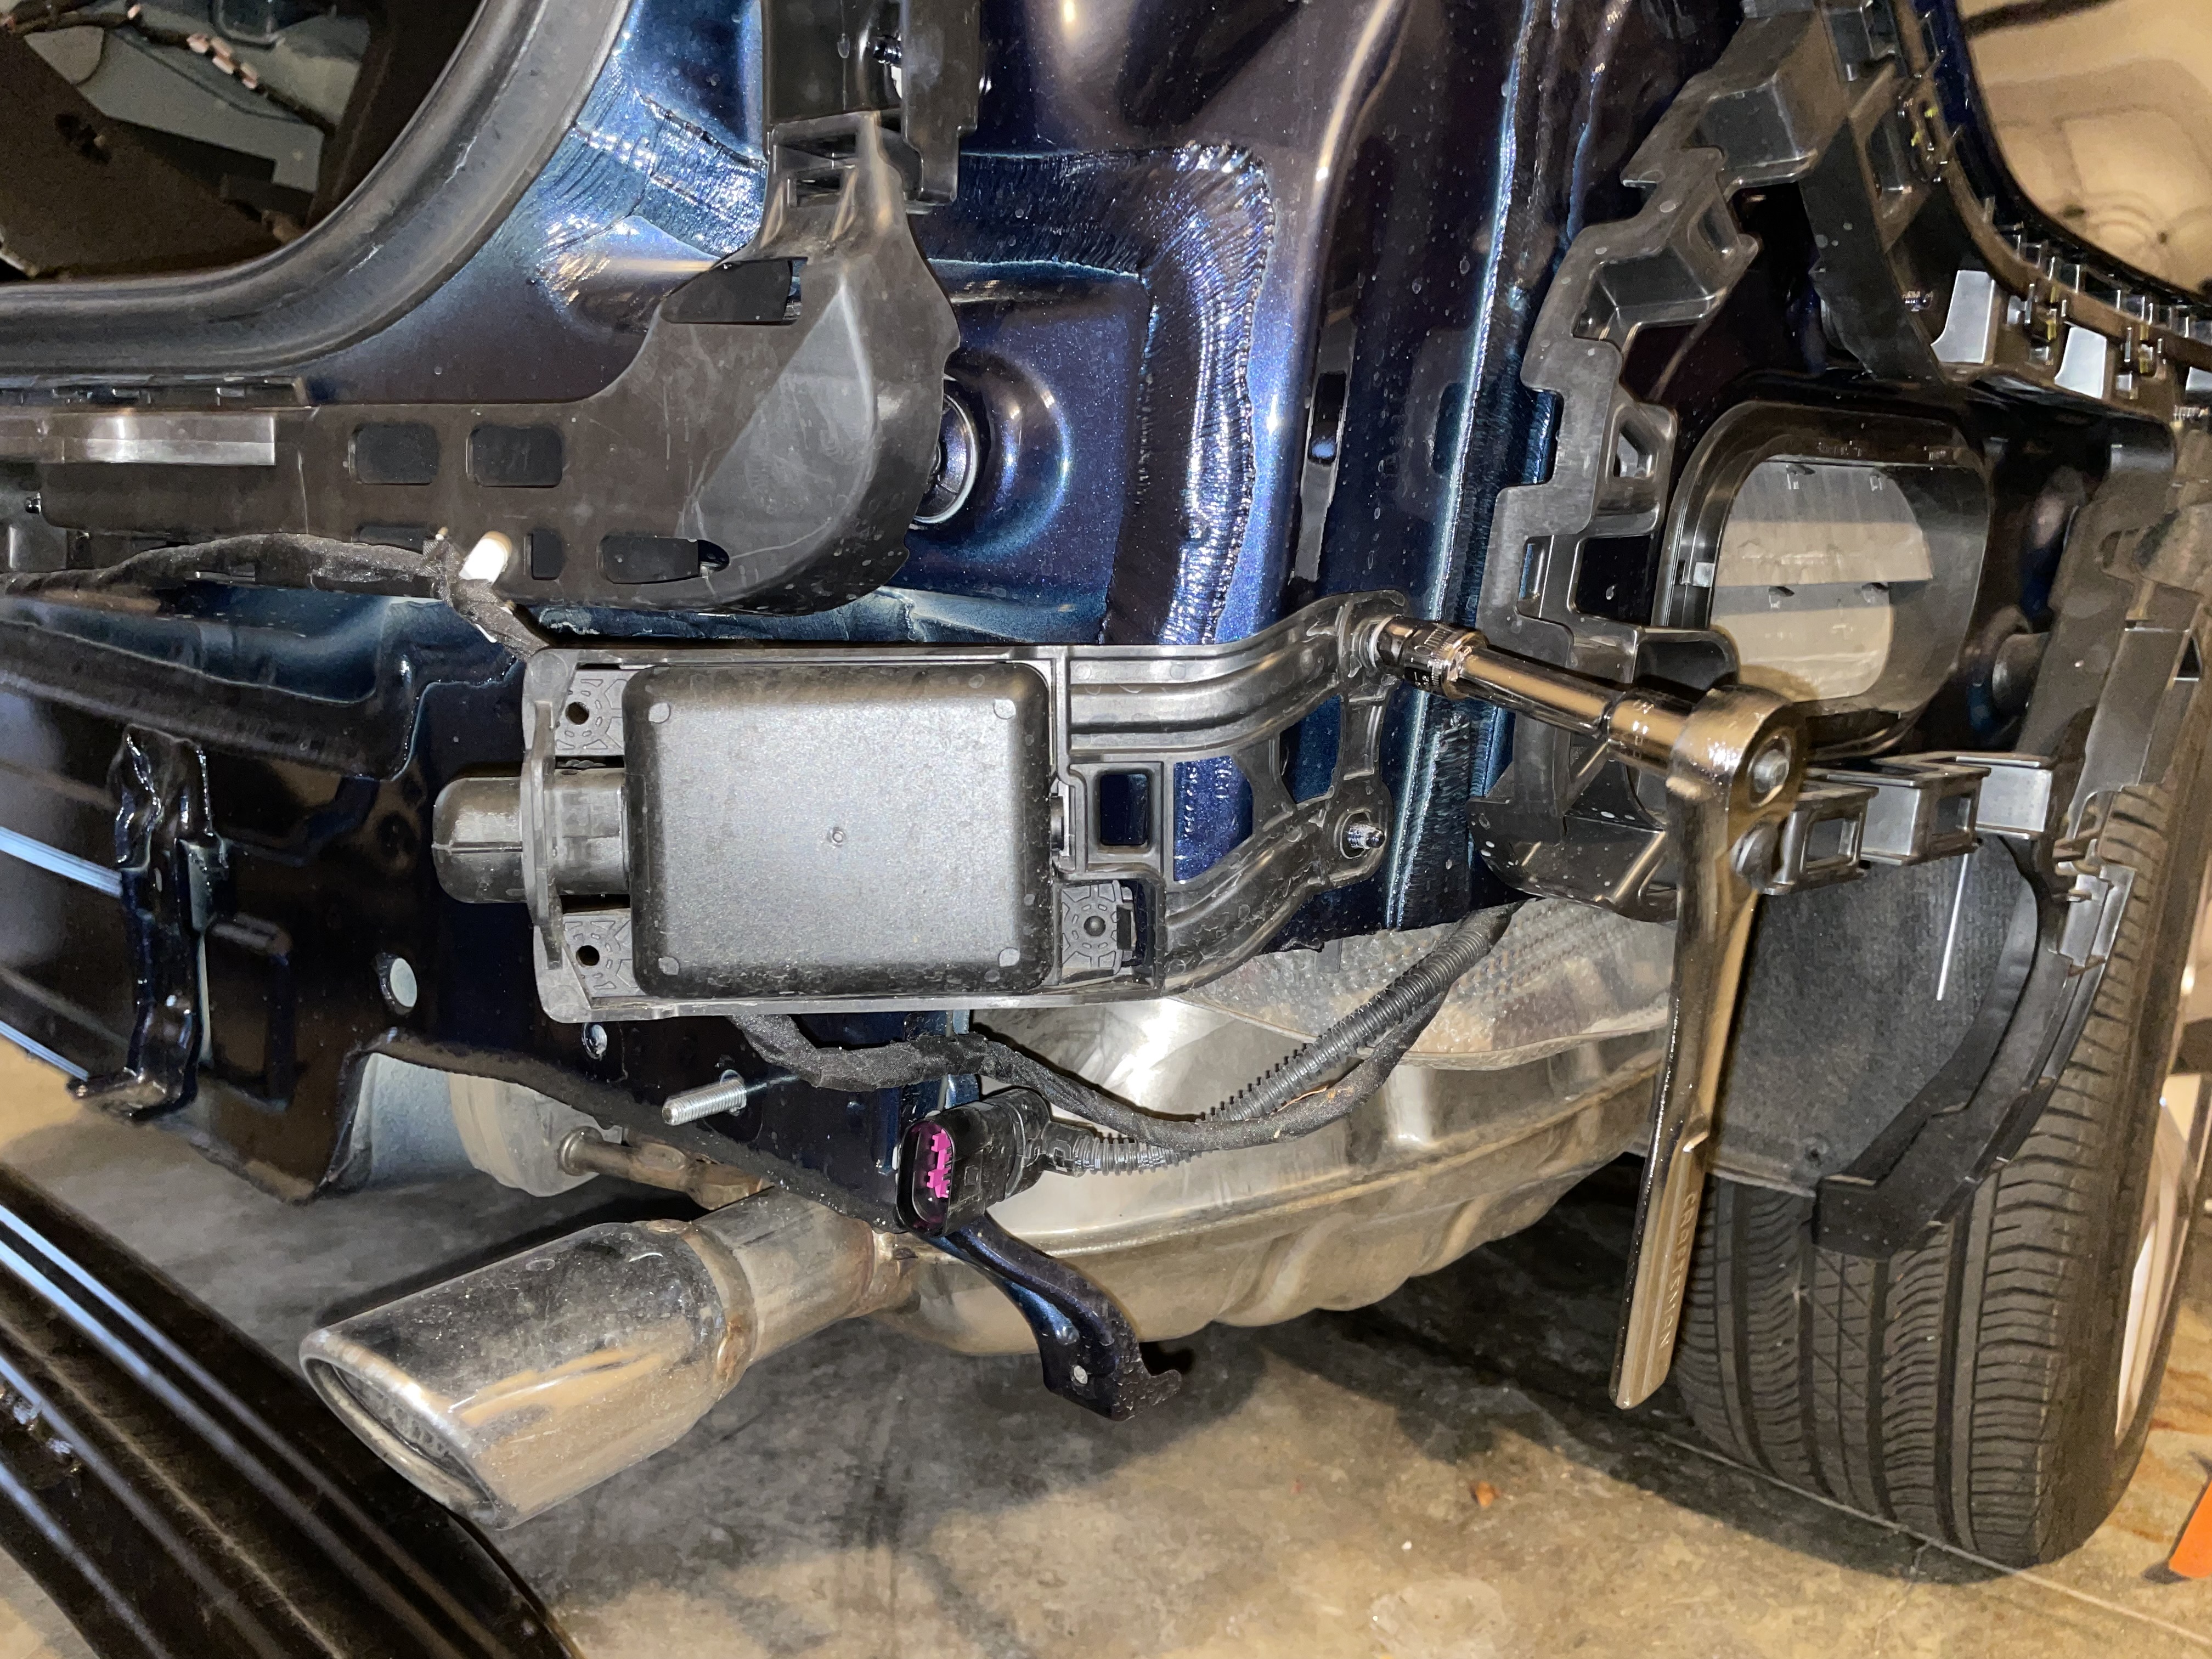
Had to remove these sensors to get them out of the way when mounting the hitch.# |
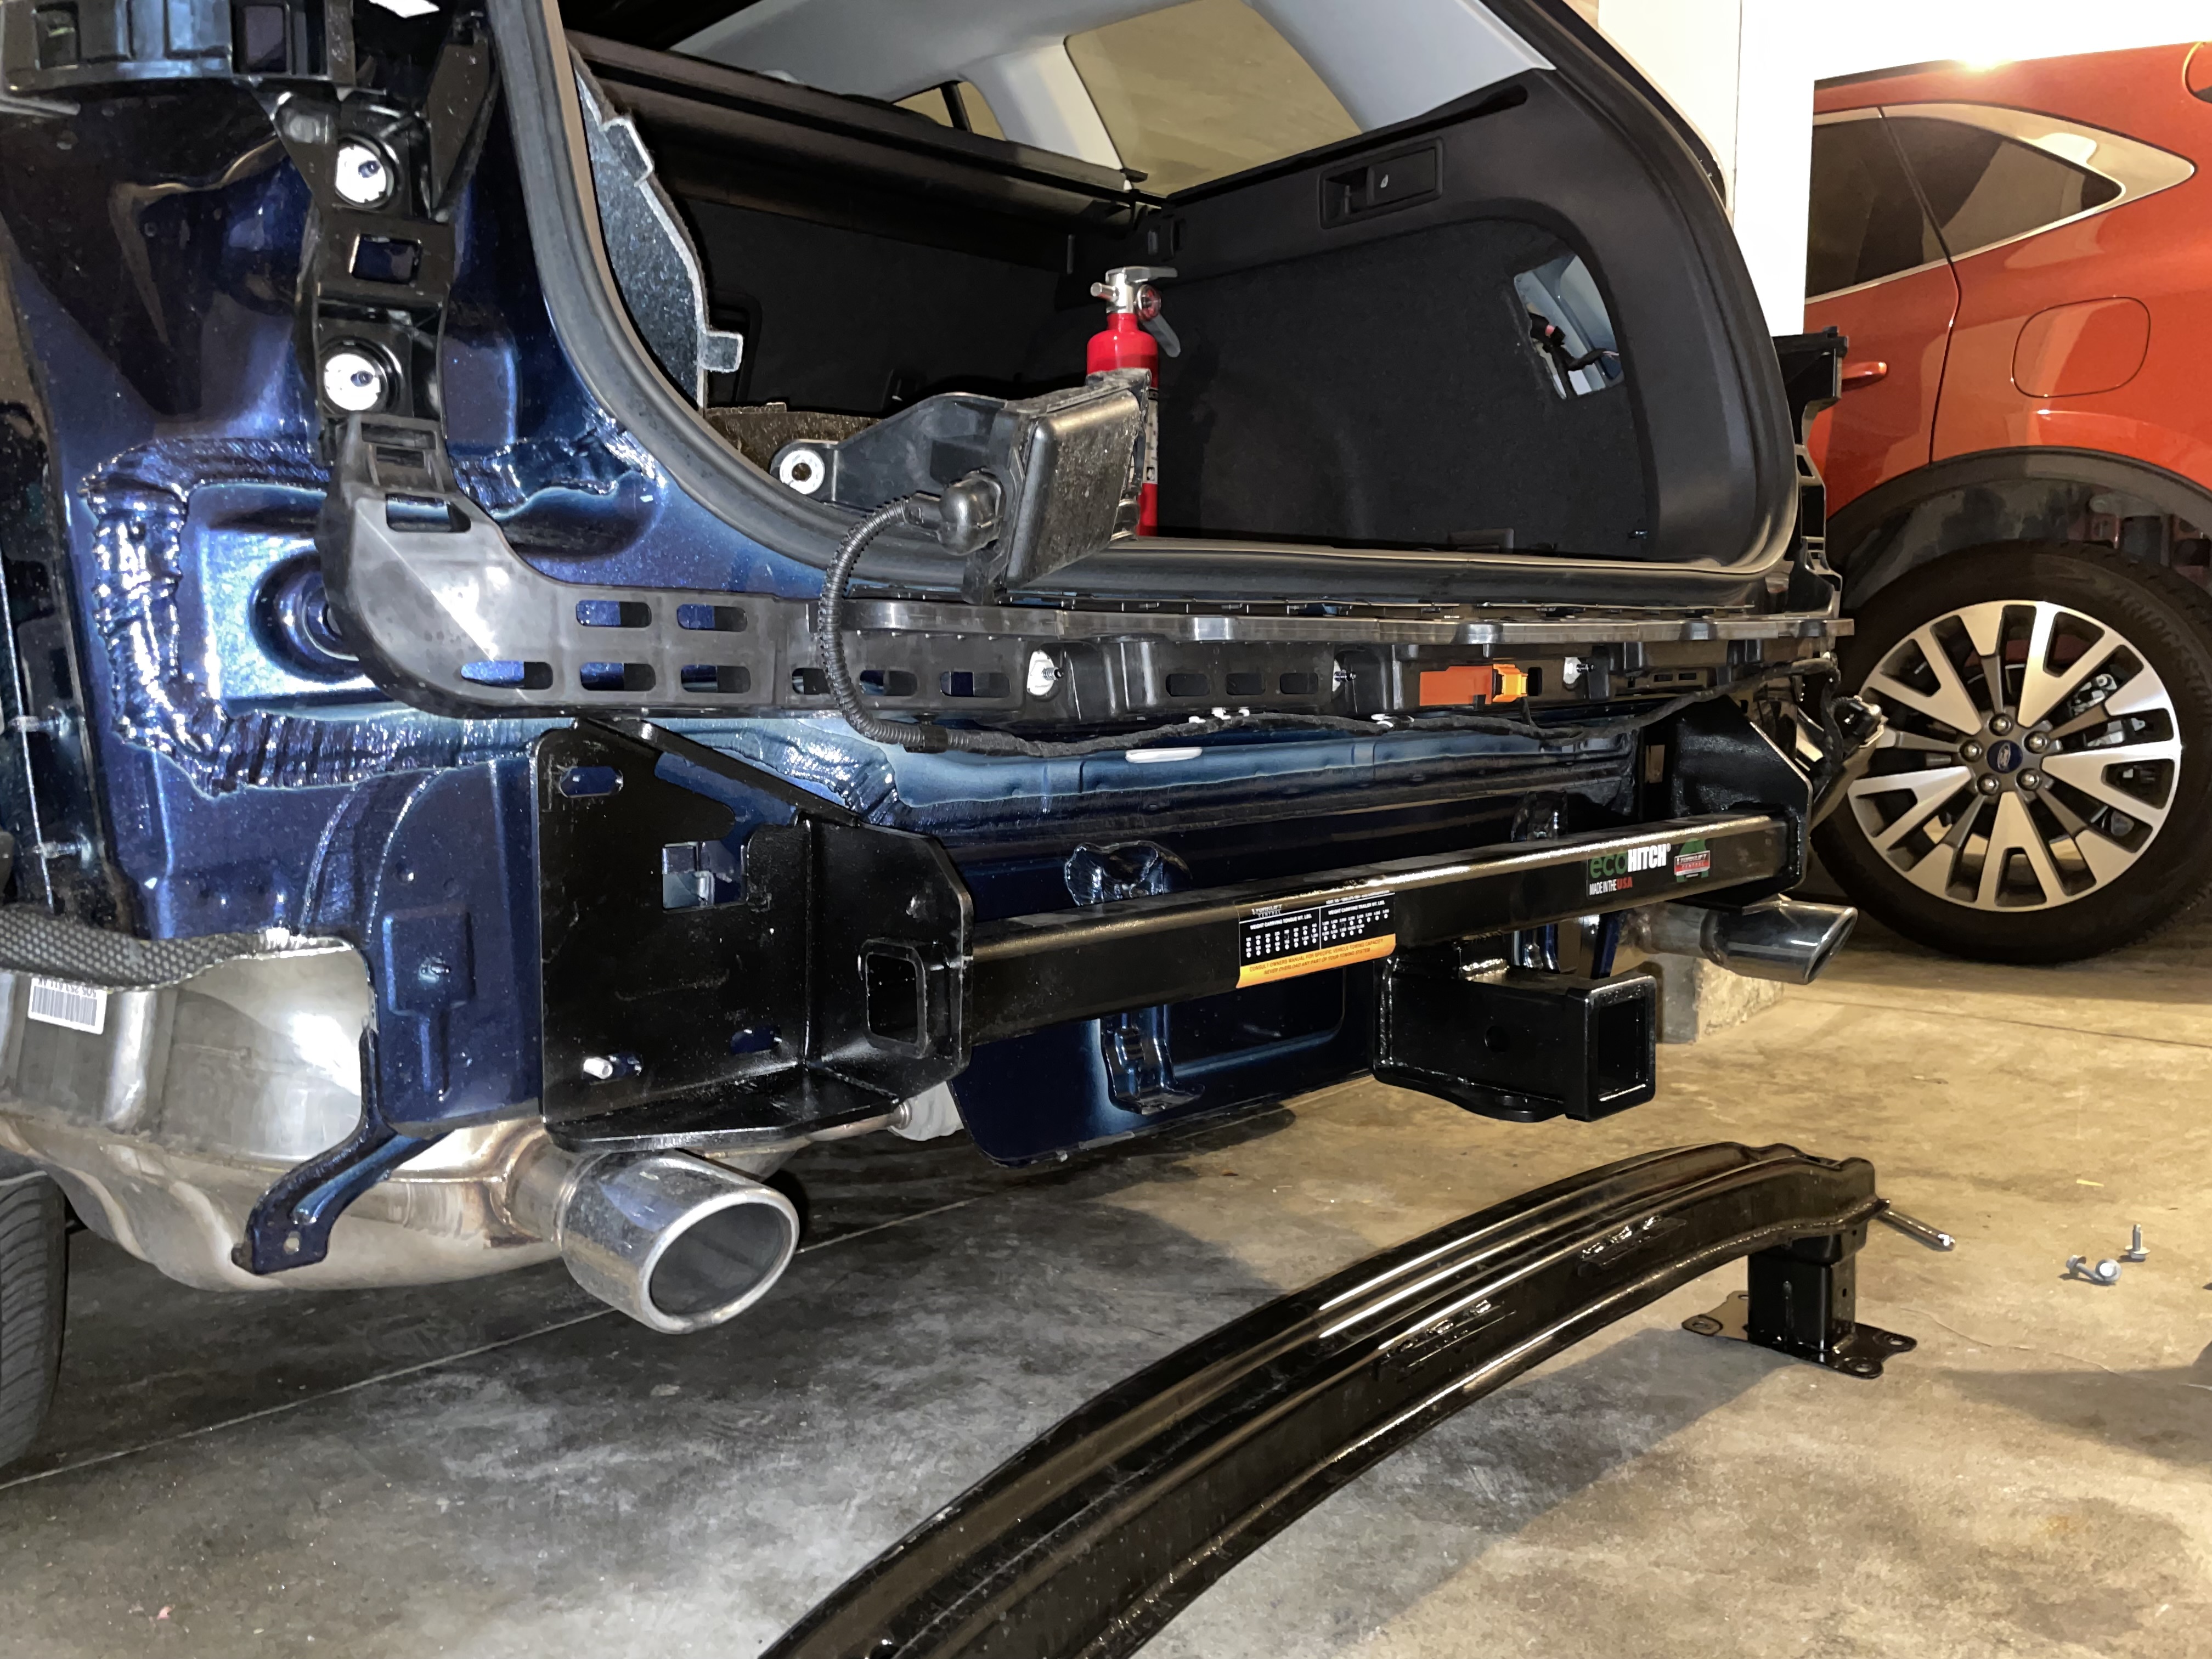
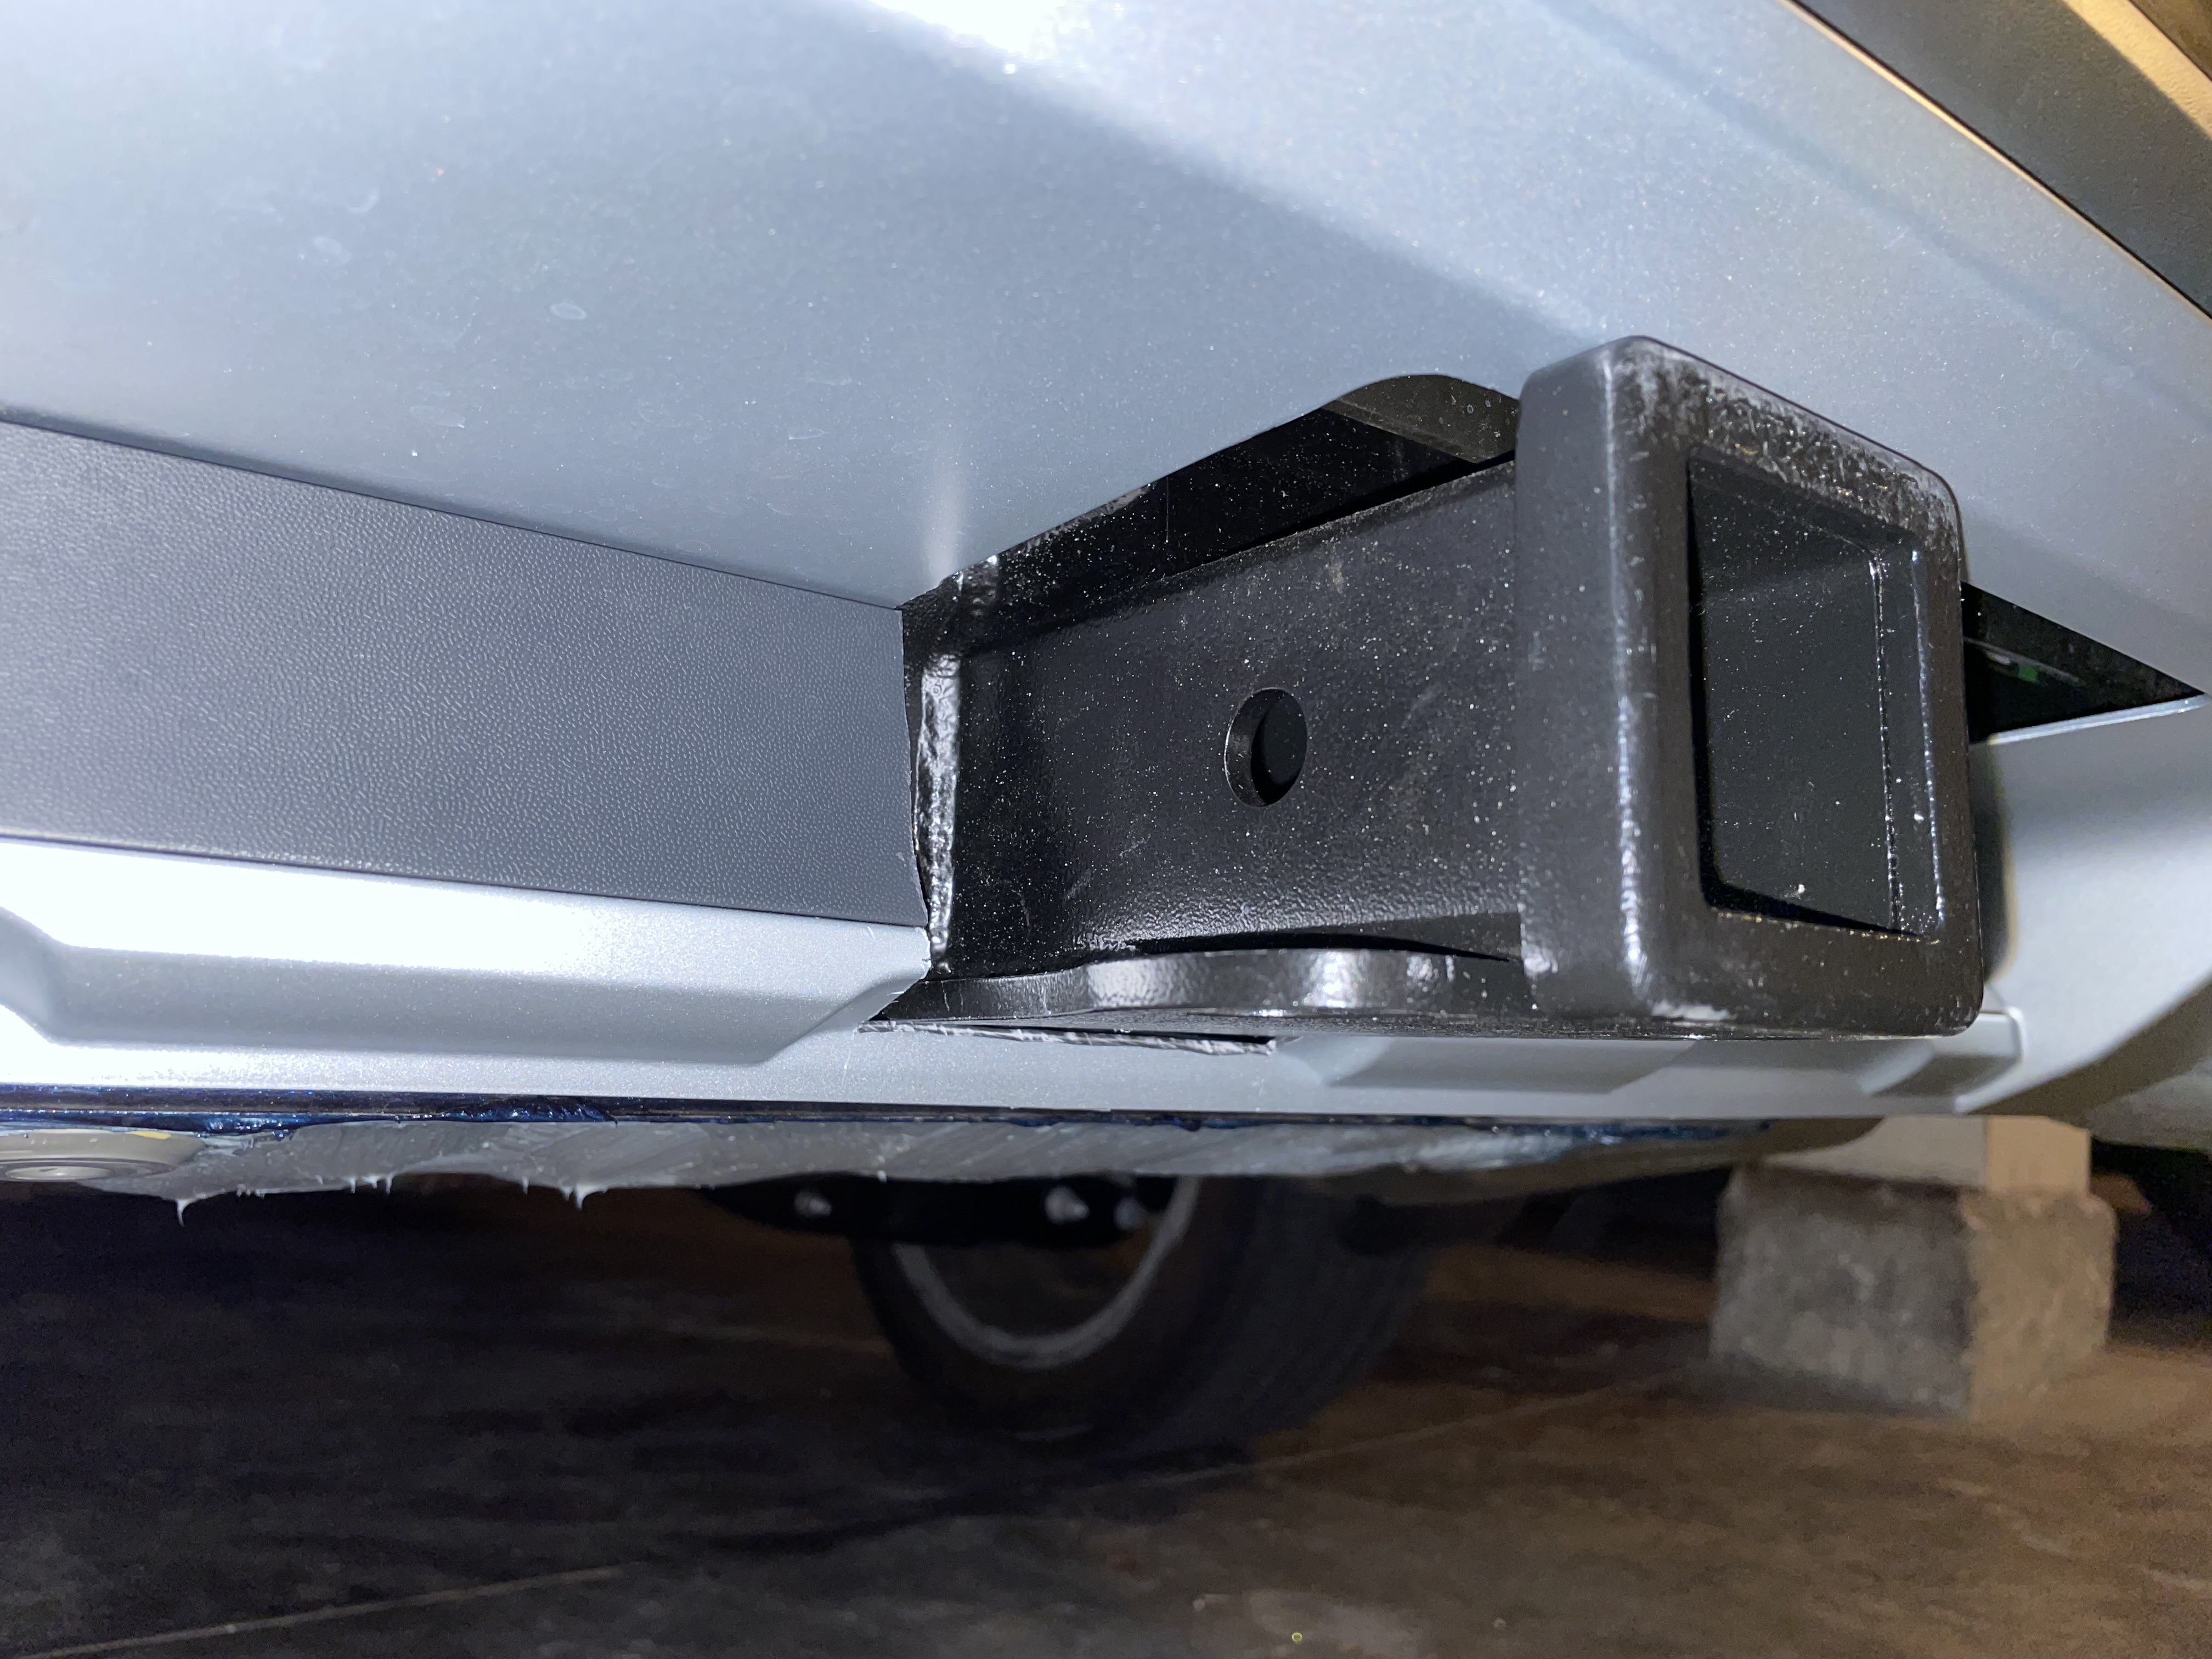
The instructions say to place the impact bar on the hitch and install both of them at the same time. The hitch itself is pretty heavy, and both of them together would be too heavy for a solo-install. Mounting them one at a time worked fine.# |
Bought stronger bolts to use instead of the ones that came with the hitch: https://www.mcmaster.com/91029A107/ (from https://www.mcmaster.com/bolts/fastener-strength-grade-class~class-12-9/extreme-strength-metric-class-12-9-steel-hex-head-screws/thread-size~m8/). The EcoHitch manual also states to torque these to 18 ft-lbs but the Curt hitch manual says to torque to 23 ft-lbs. I went with the latter.# |
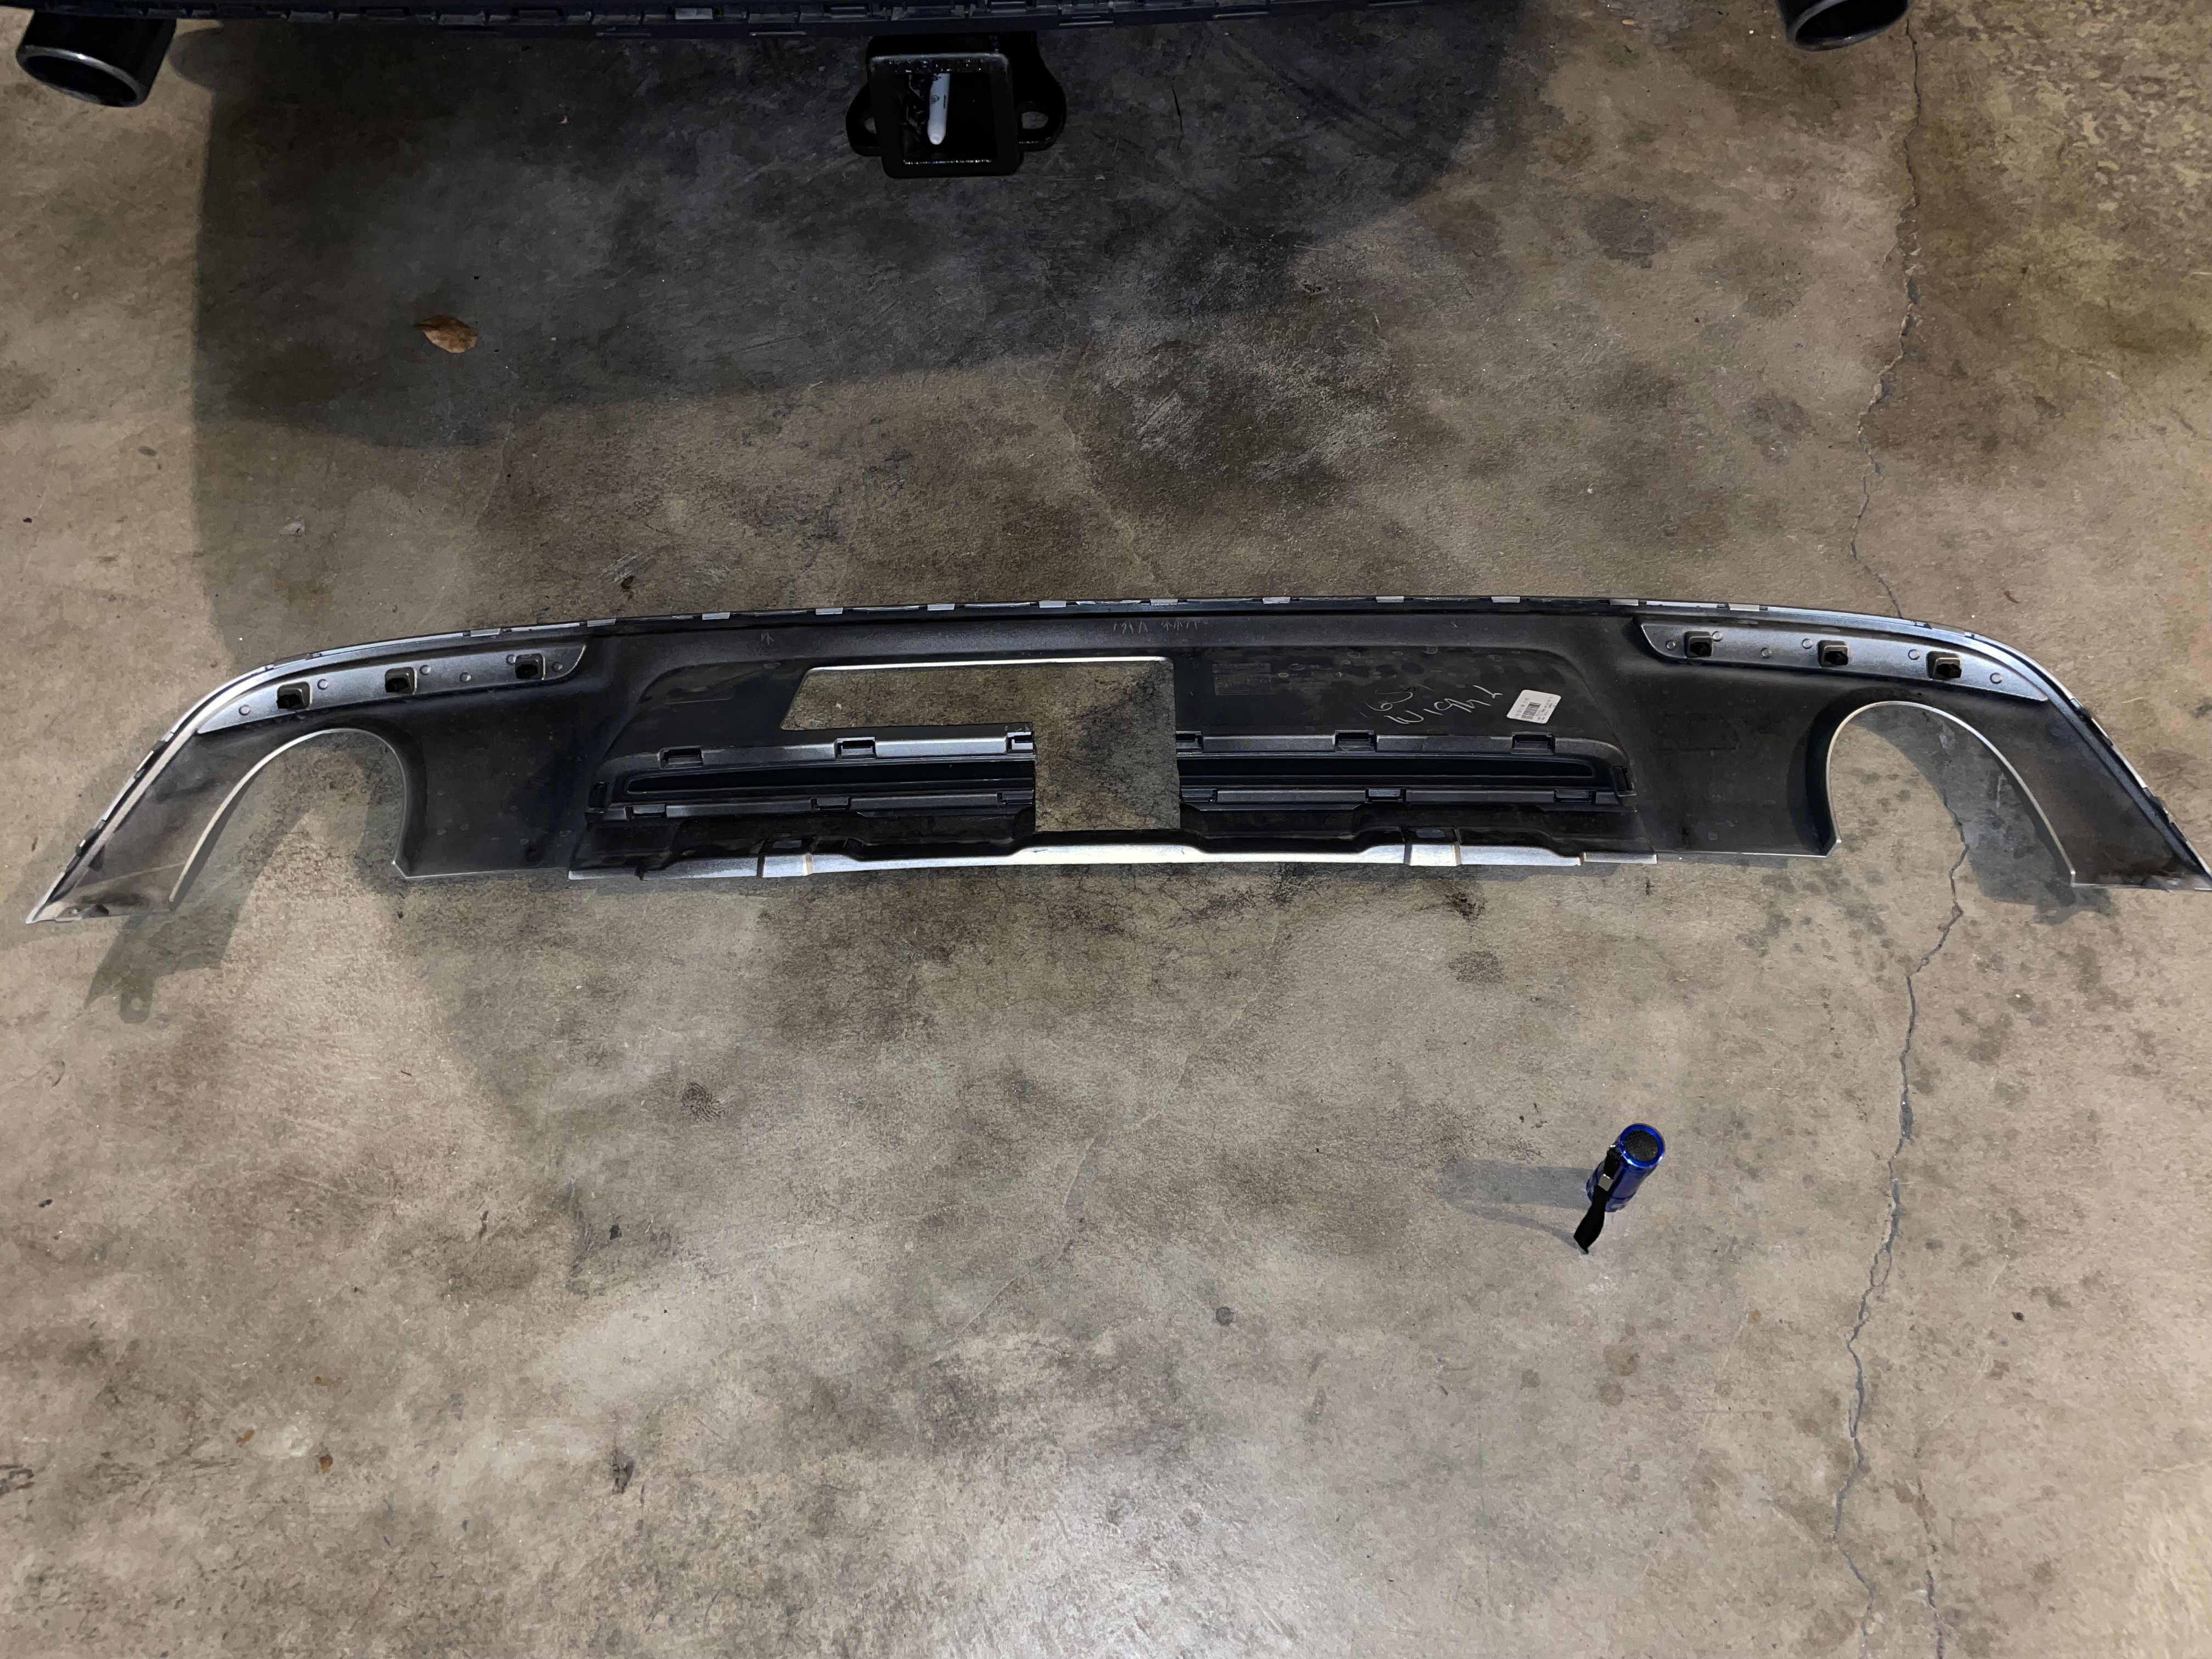
To make trimming and mounting the bumper easier I removed the bottom piece of trim from the bumper before reinstalling the bumper.# |
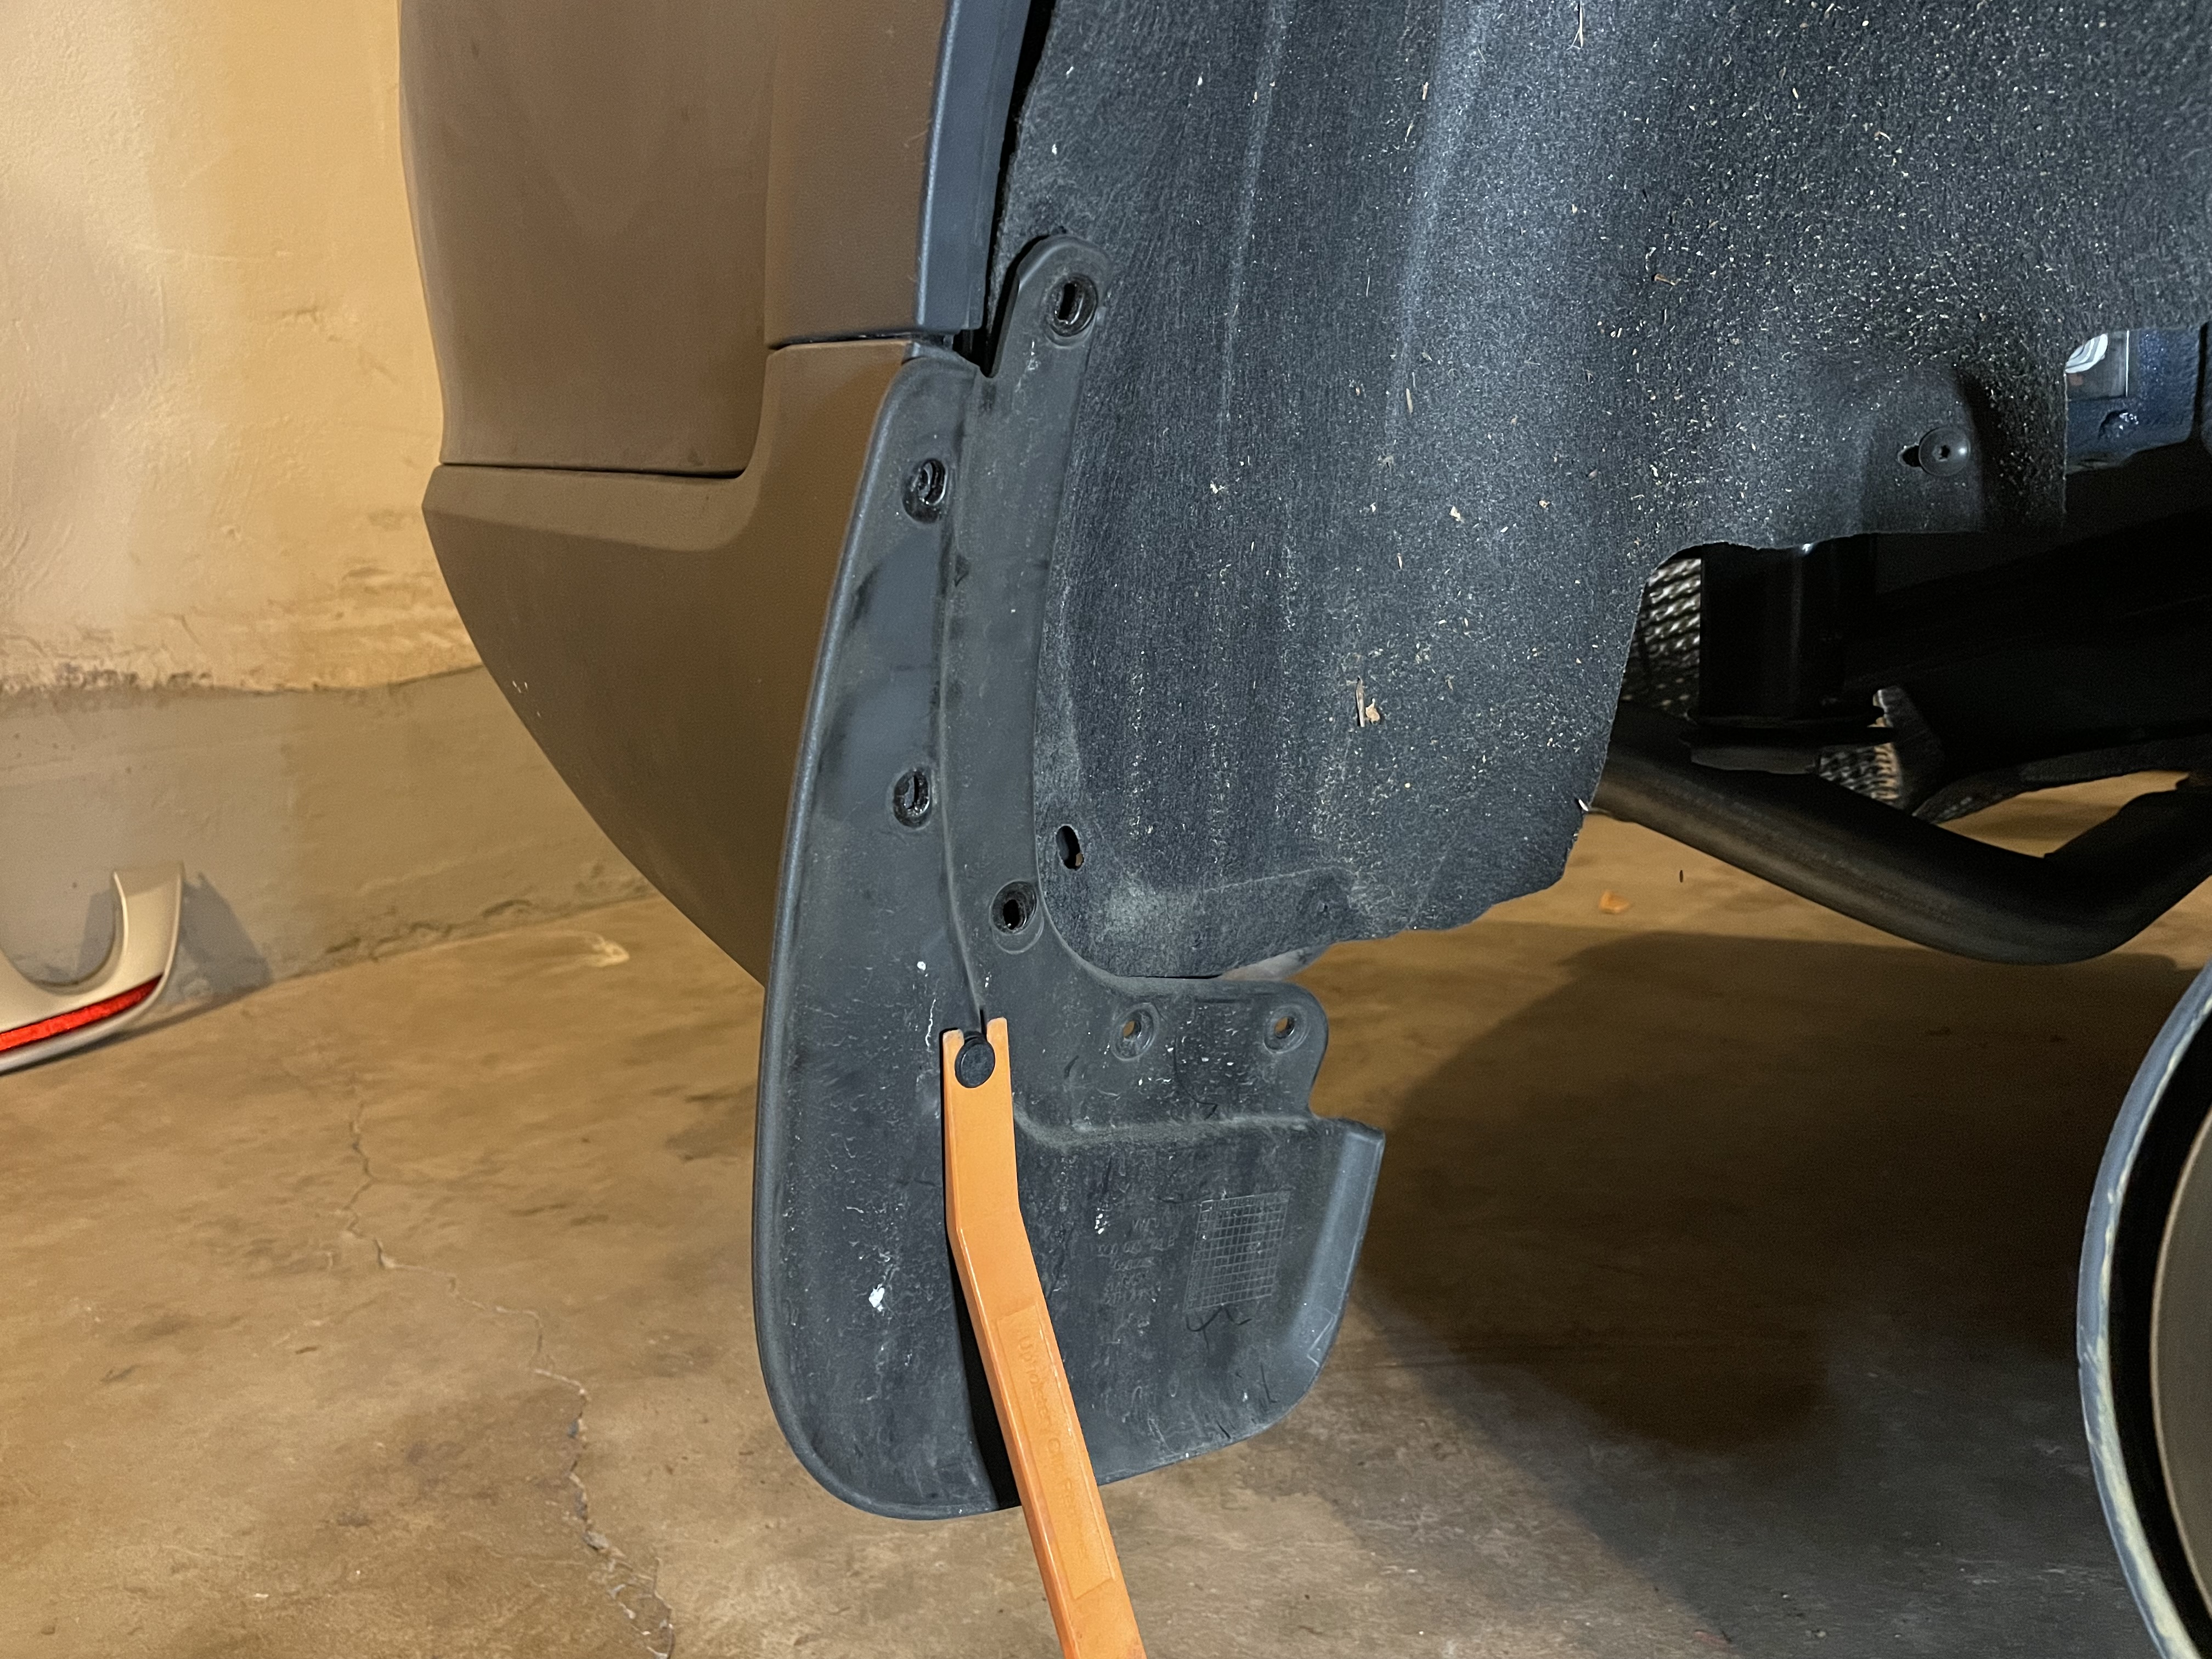
If you have OEM splash guards I highly recommend removing them now. I spent 30 minutes trying to get the bumper back on before I removed them and saw the plastic pieces not lining up correctly, on both sides!# |
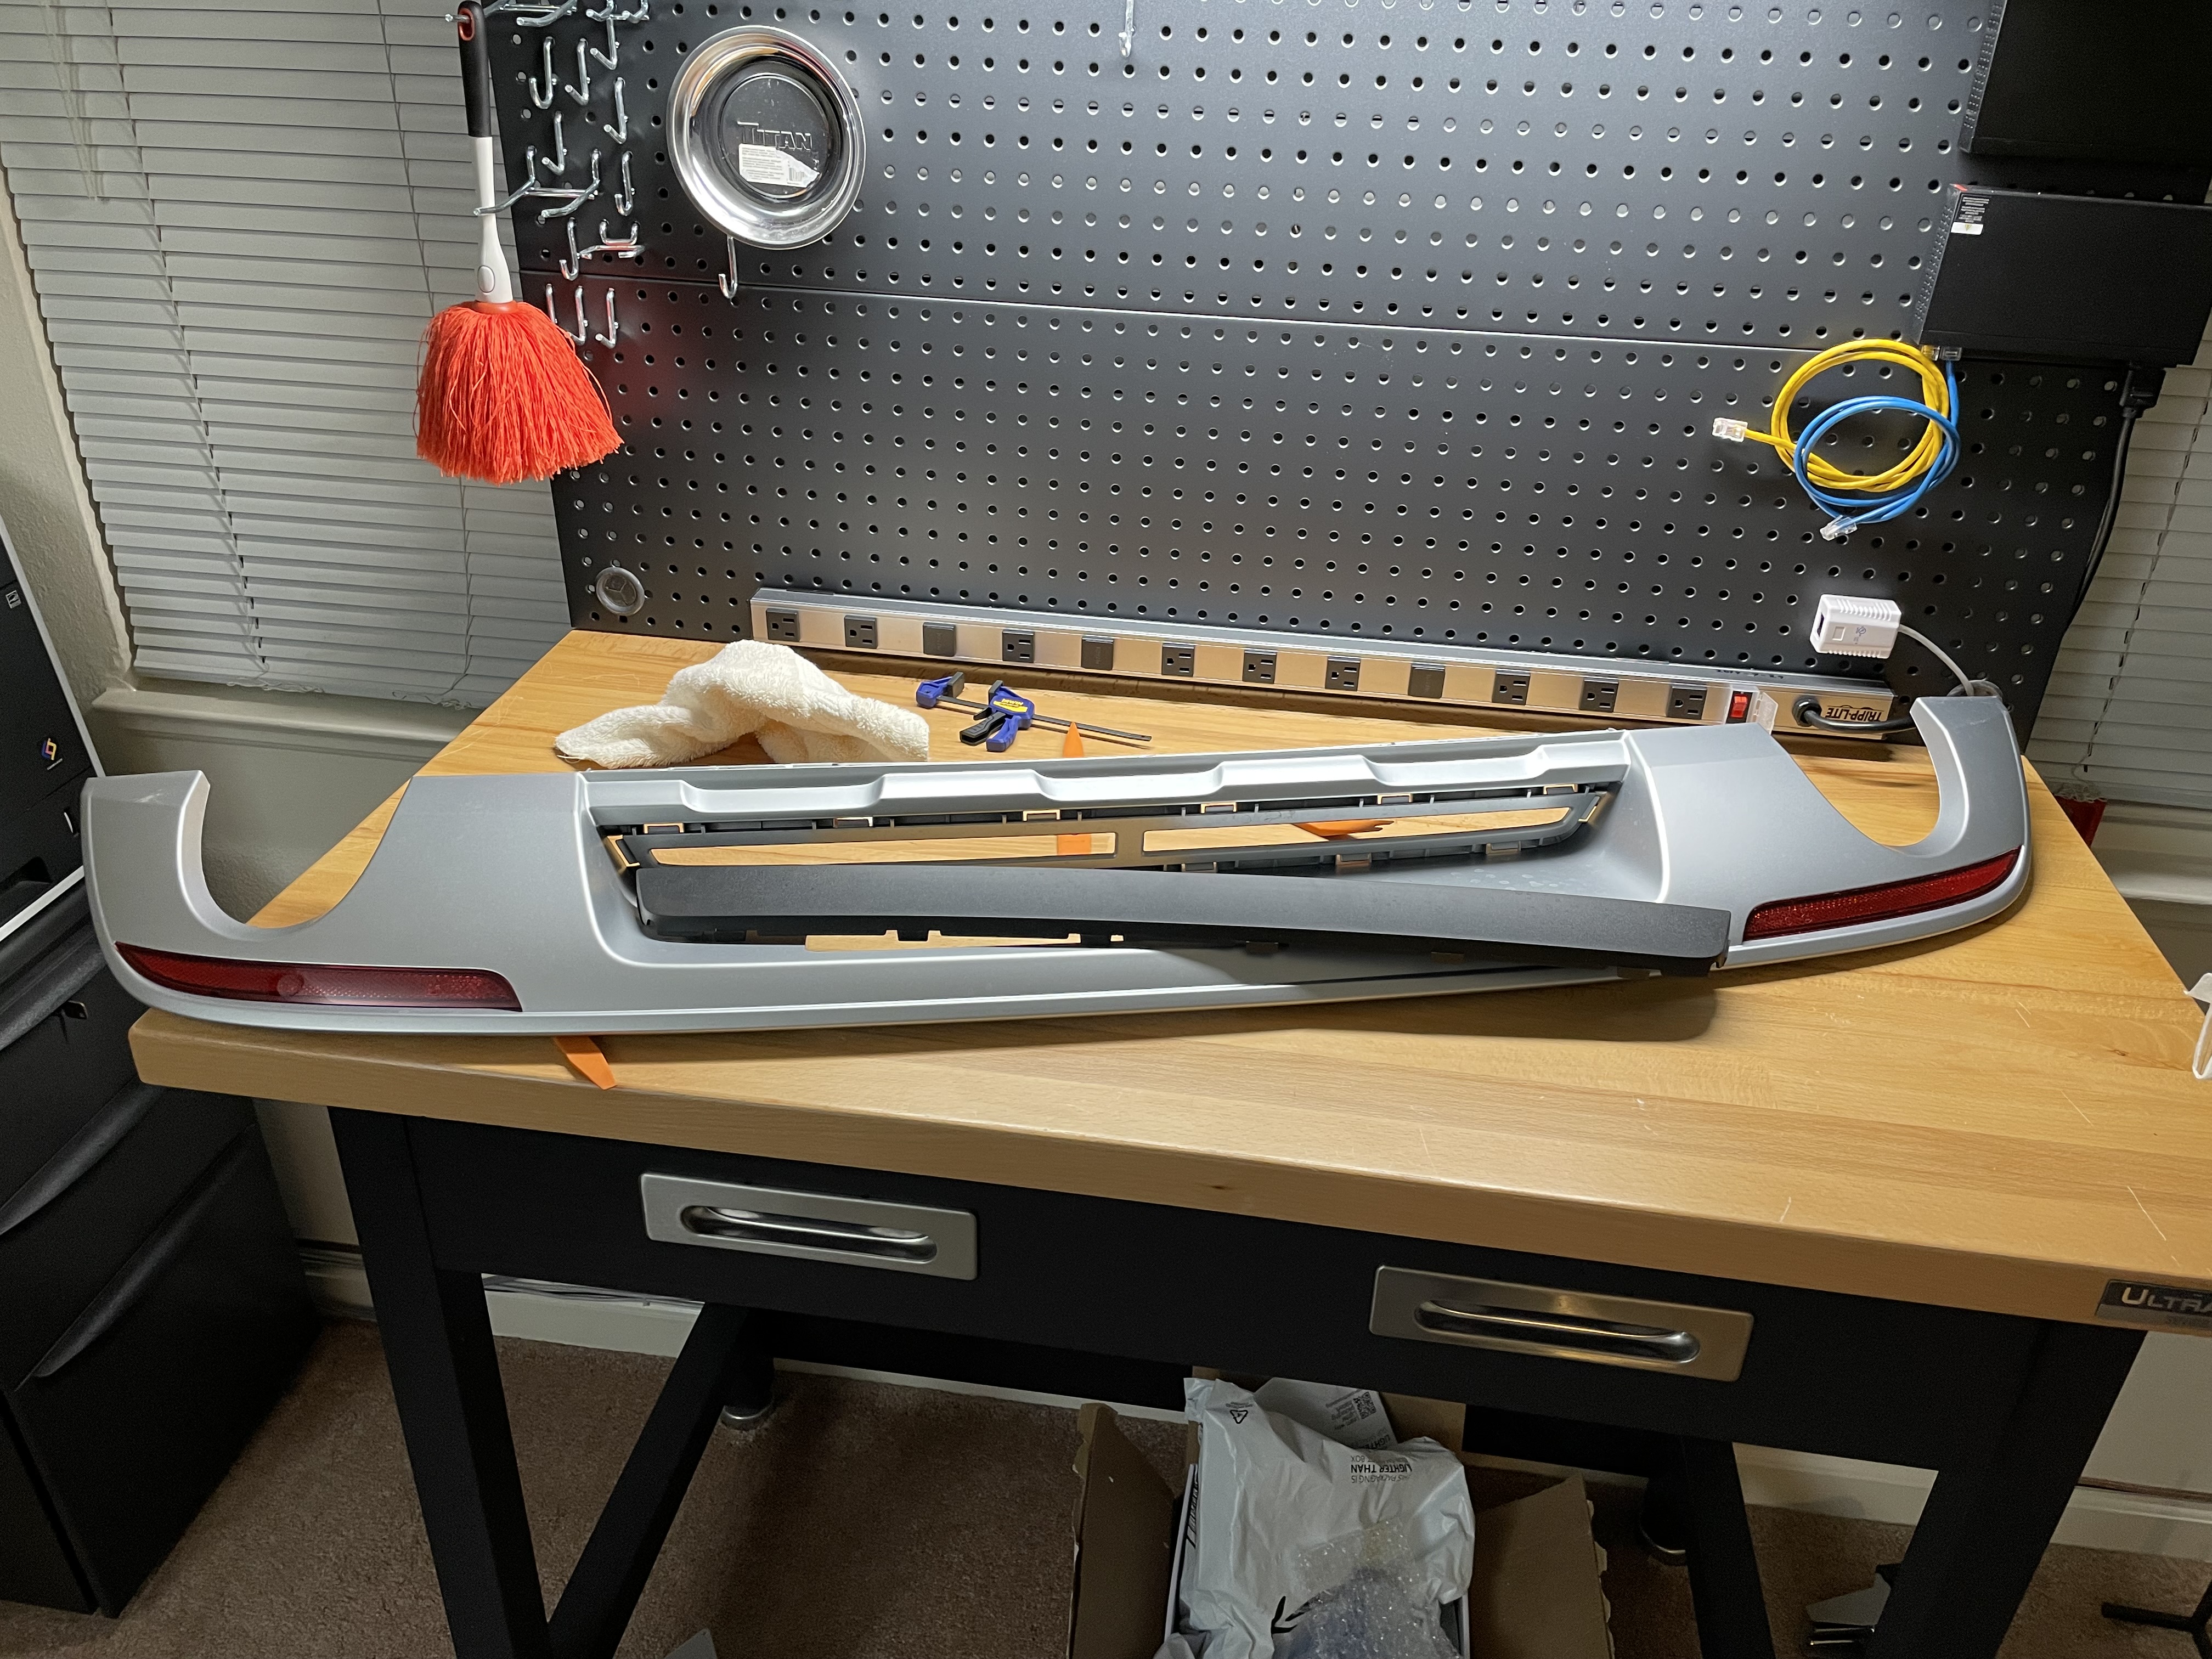
Popped off the inner piece of the bottom bumper trim. Will make it easier to trim.# |
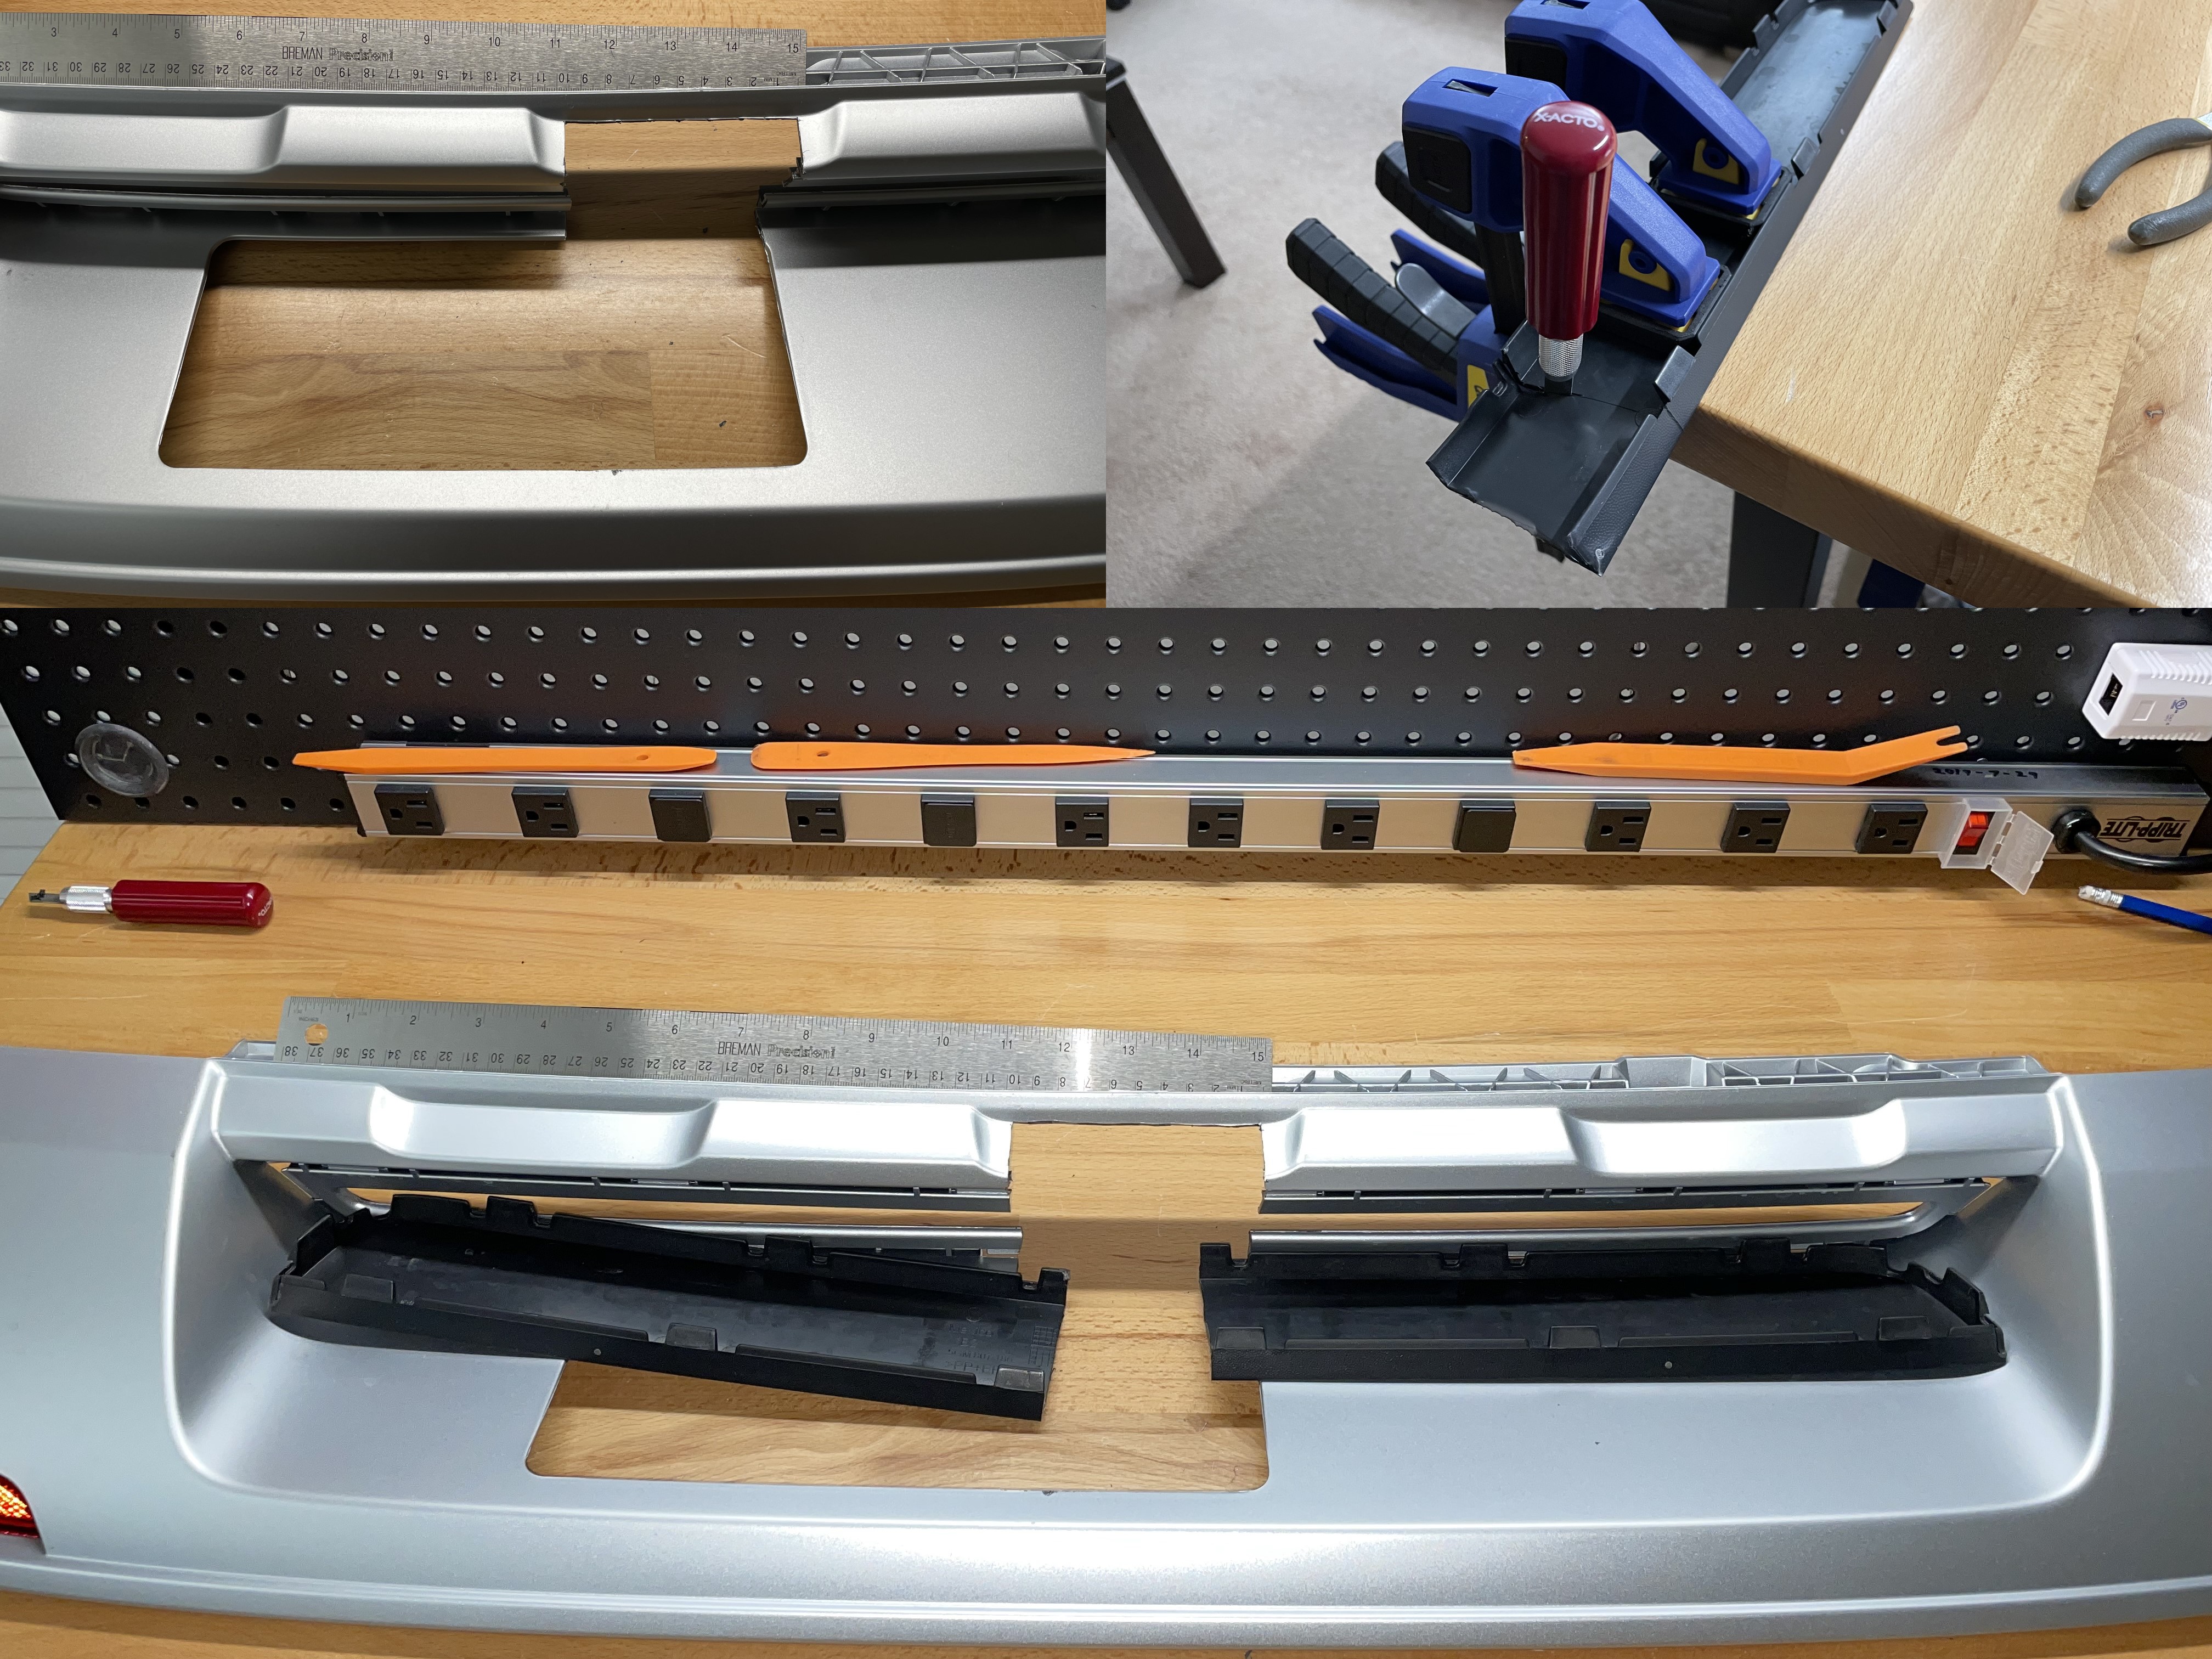
After iterating several times I ended up with these cuts to the bumper. It’s about 9.75 cm wide, flush with the inner side of the preexisting cut out. I did the trimming with an X-Acto knife, which ended up being relatively easy to do and give me cleaner cuts than using snips. It was like cutting cold butter with a cold blunt butter knife.# |
Reassembled before installing.# |
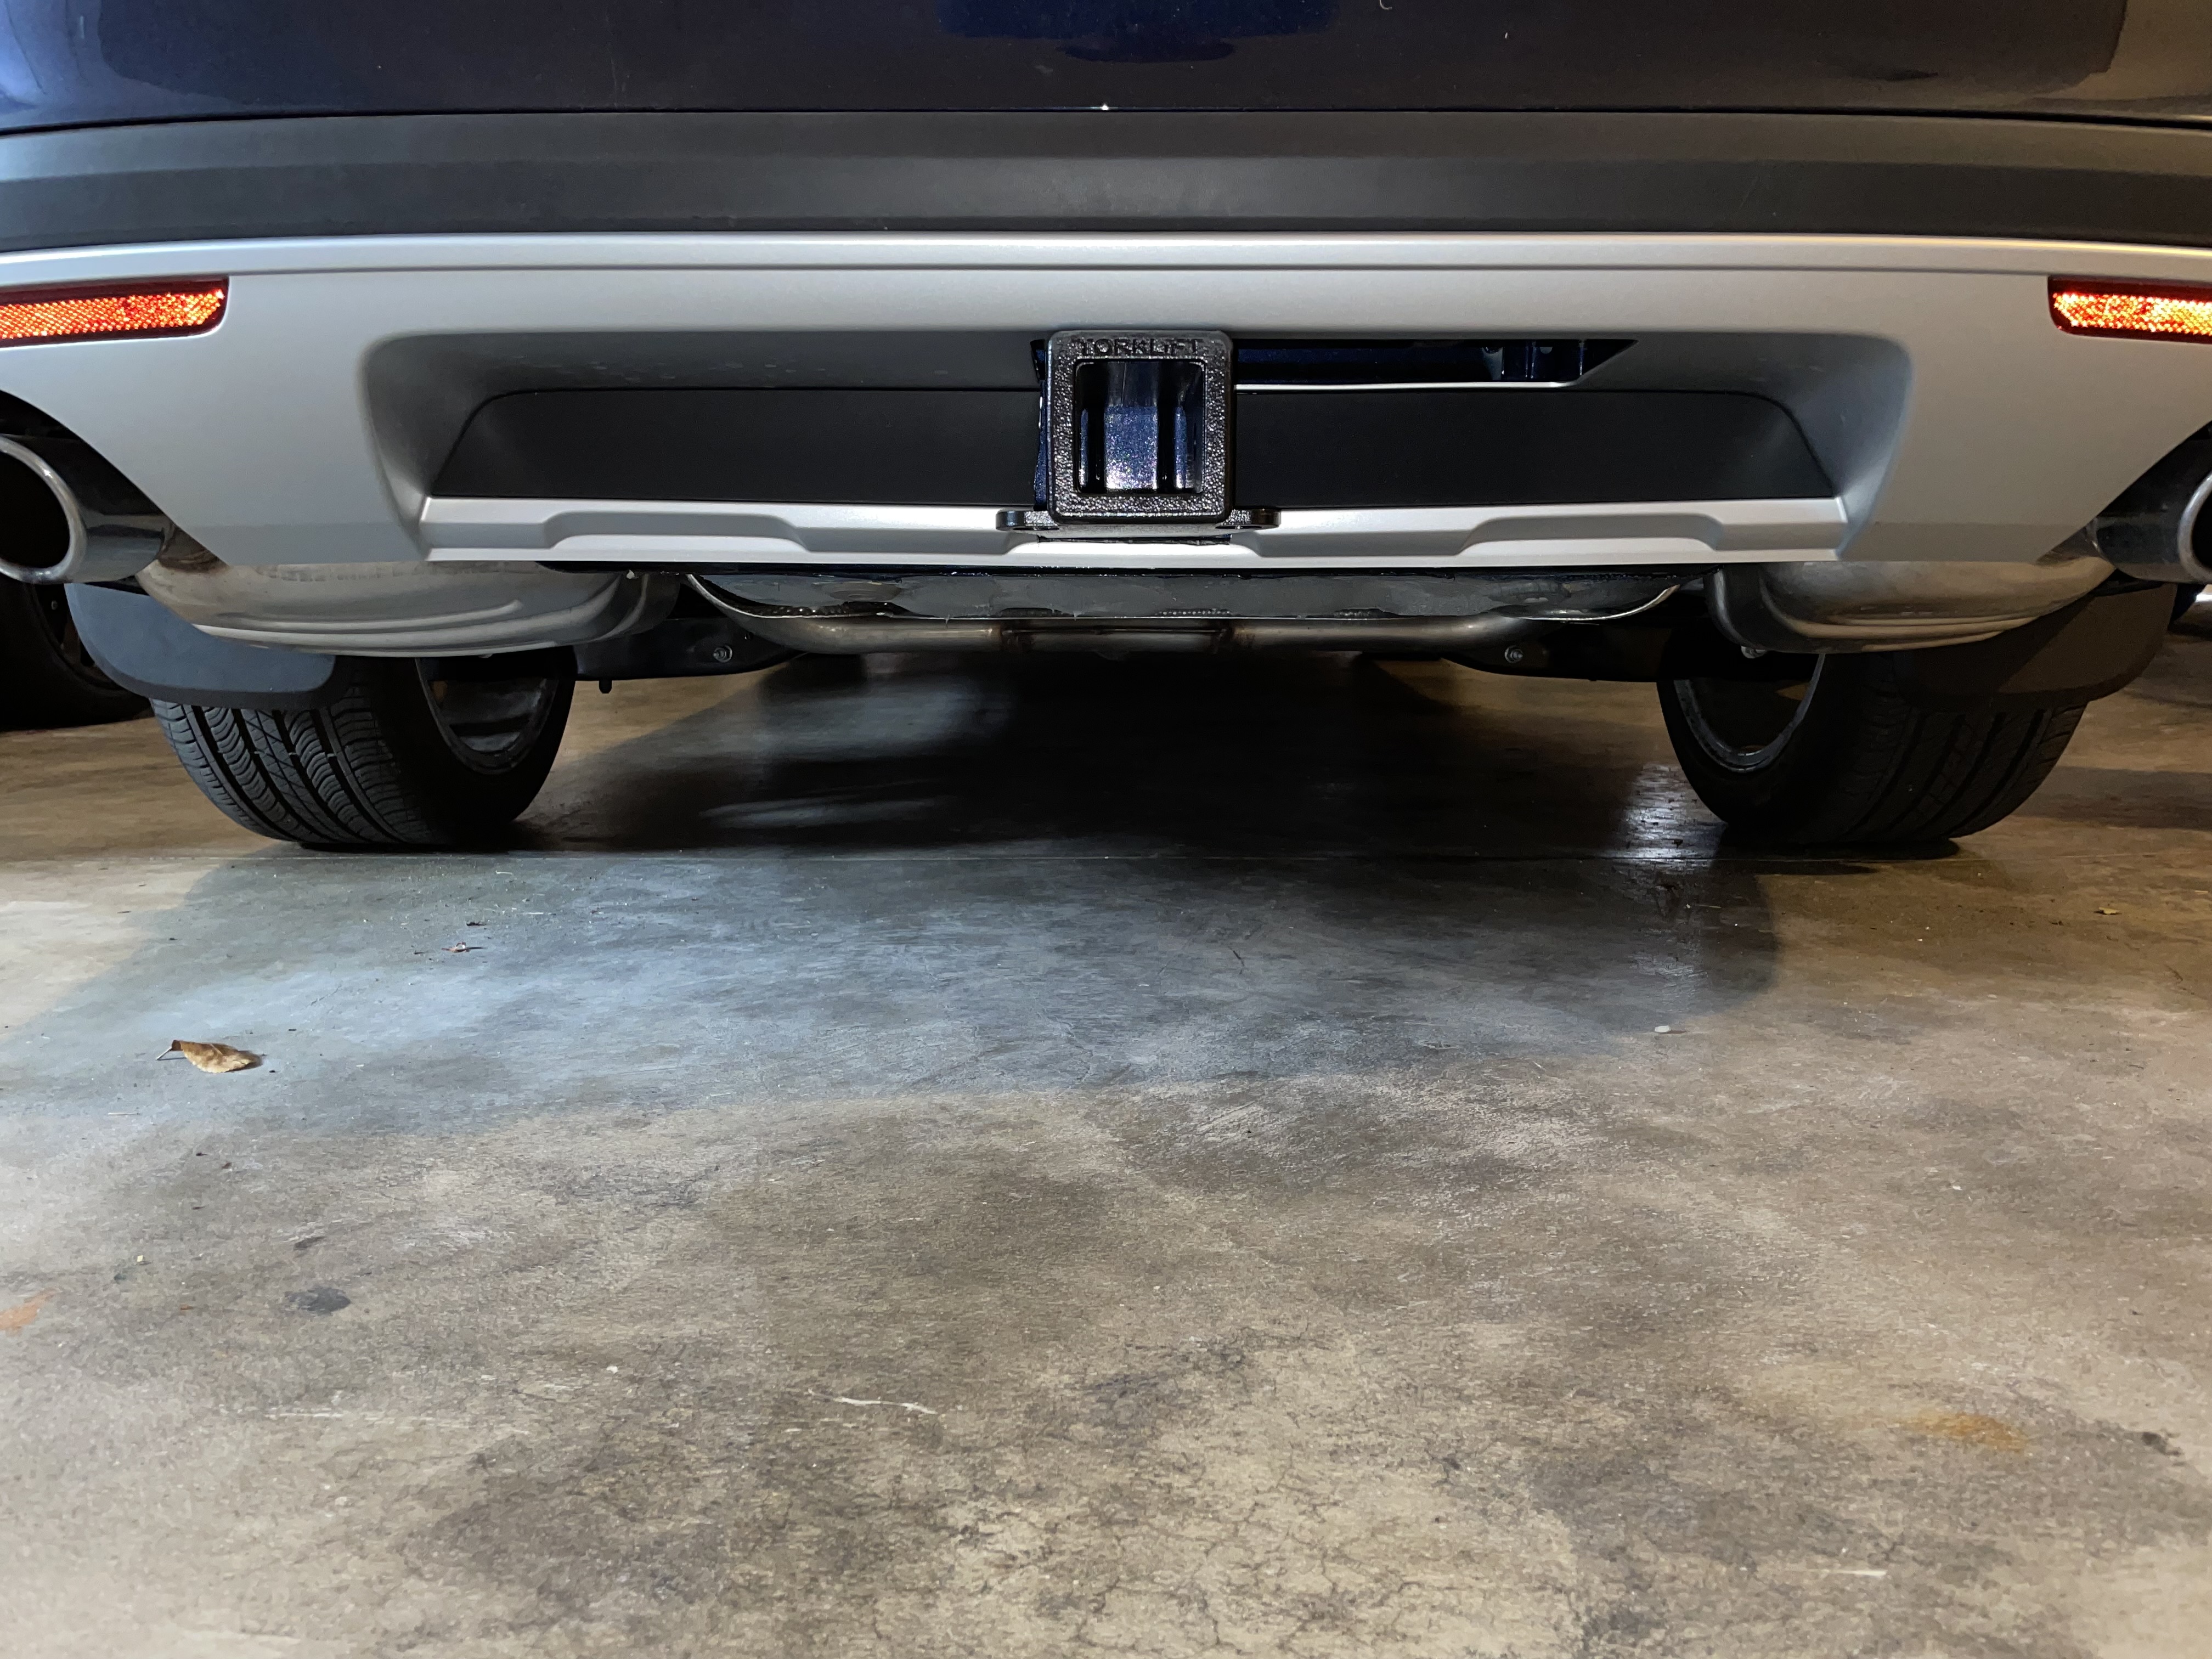
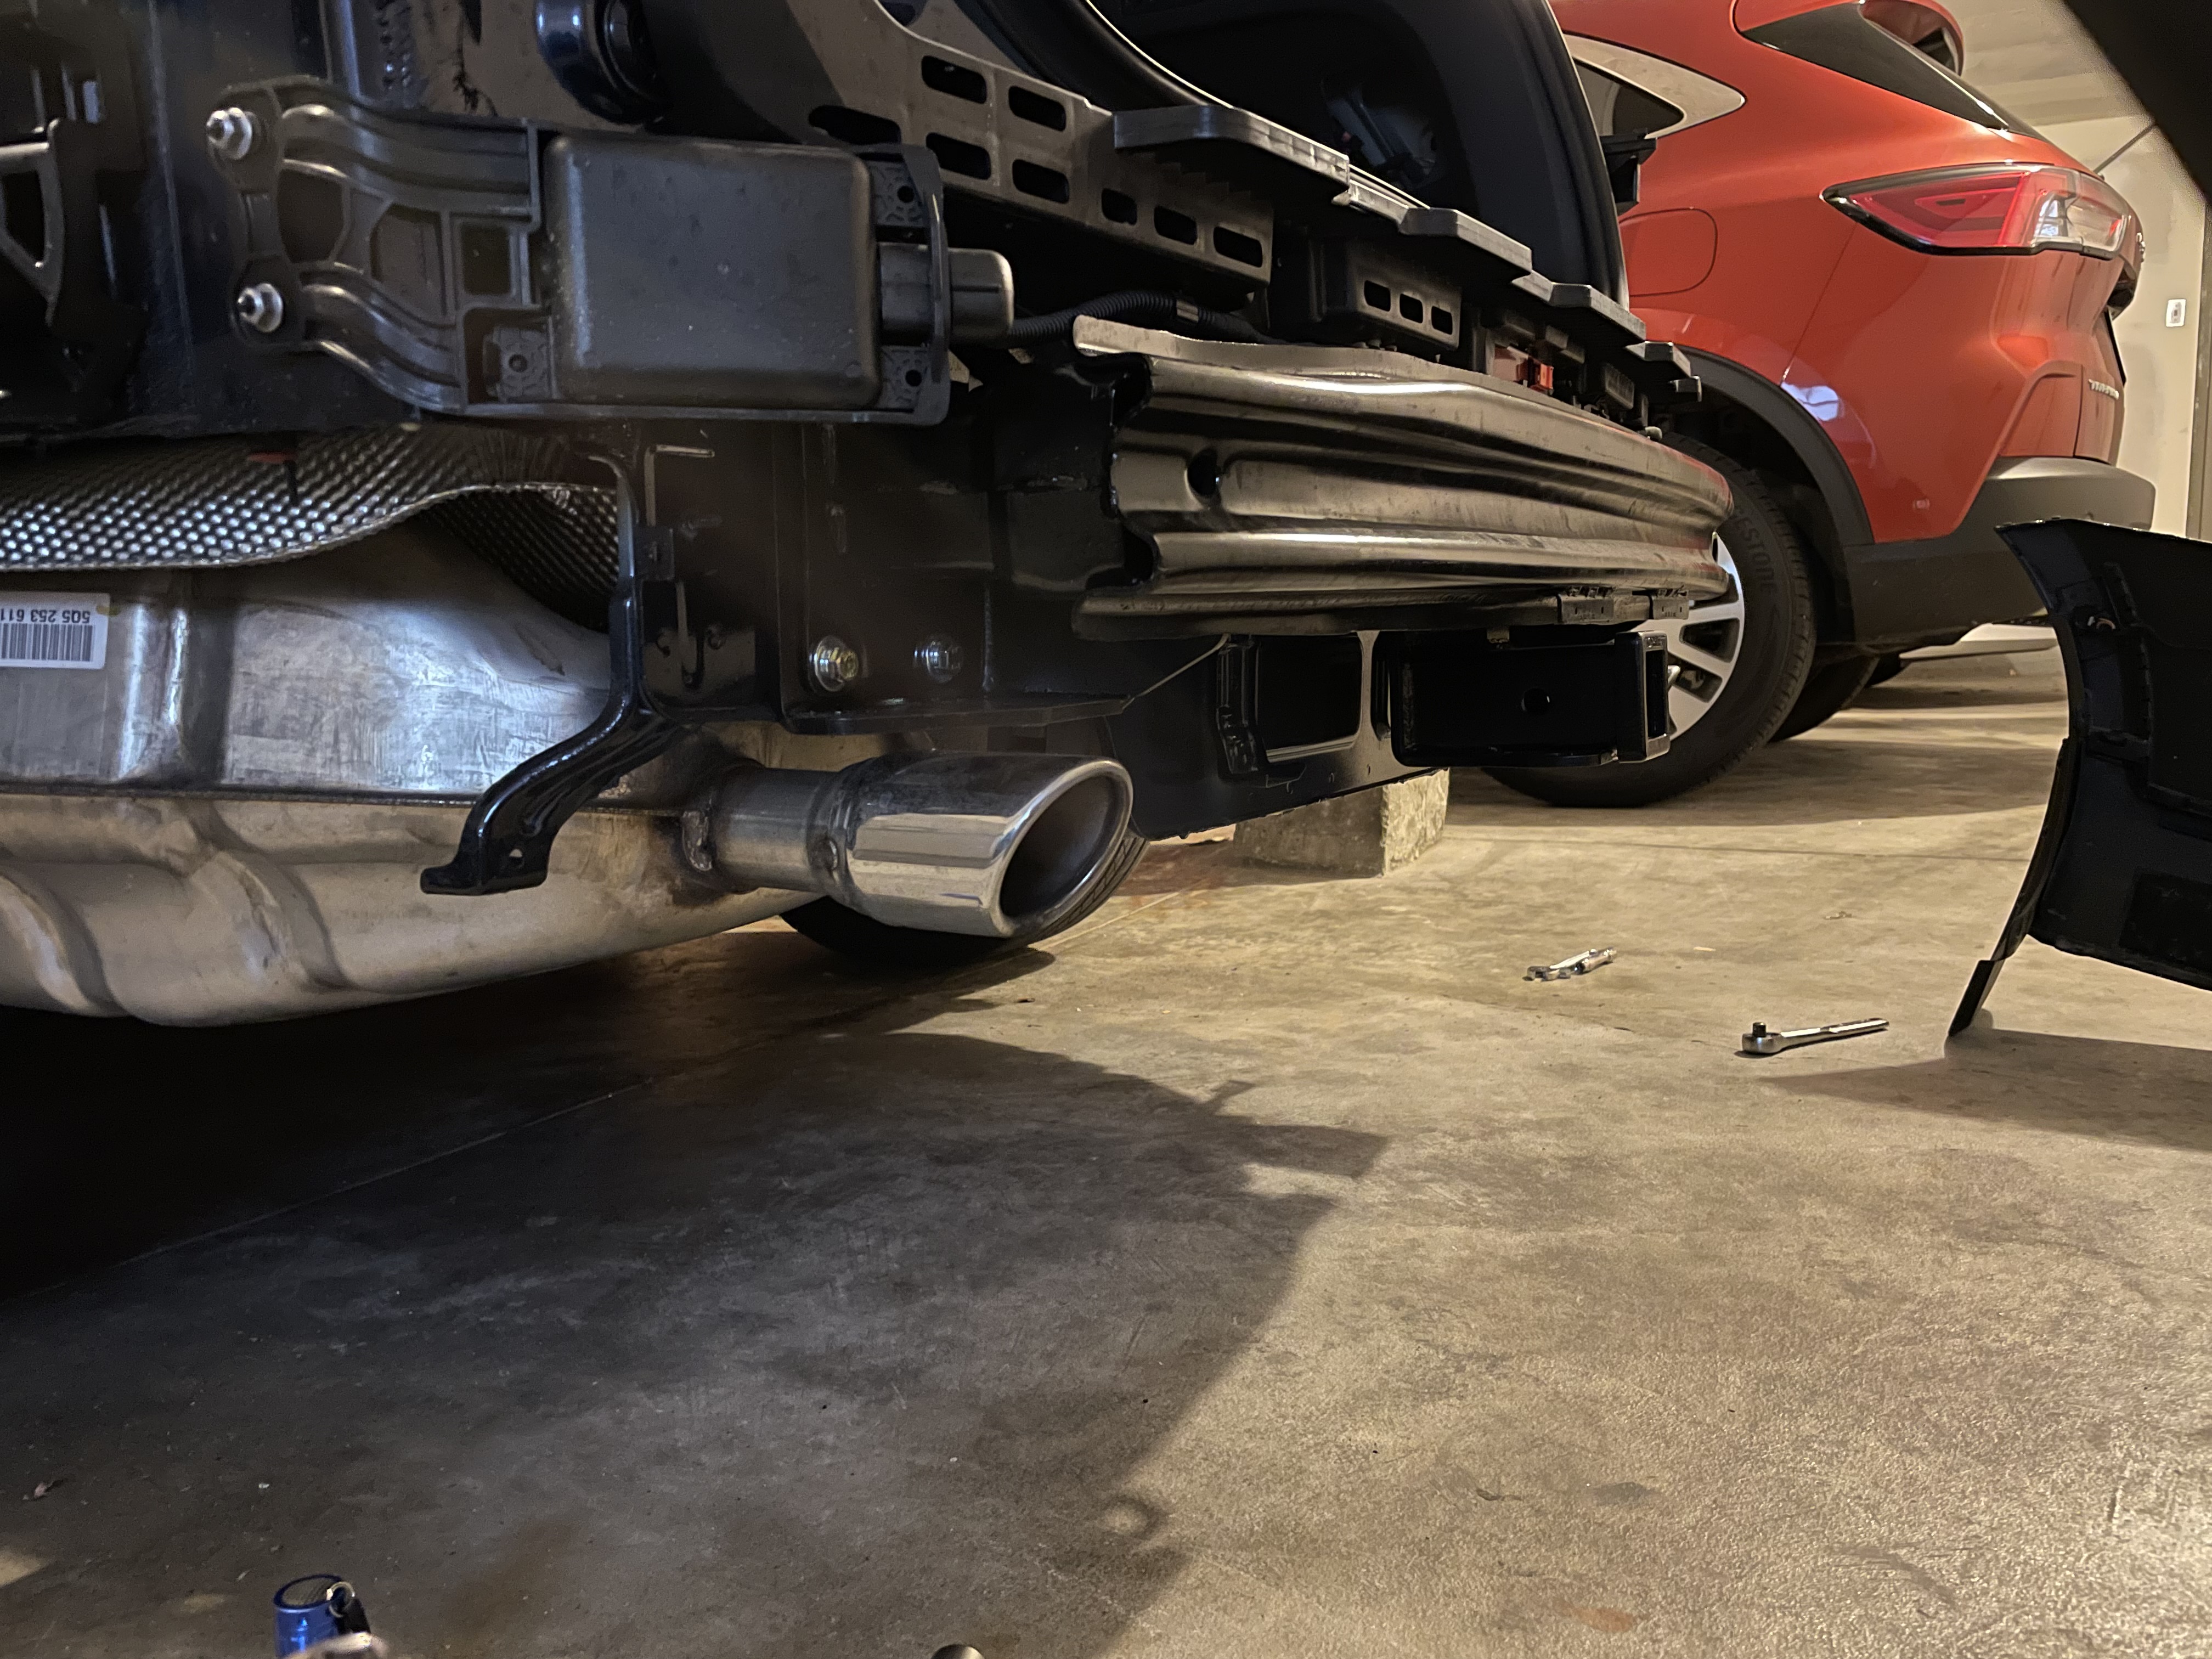
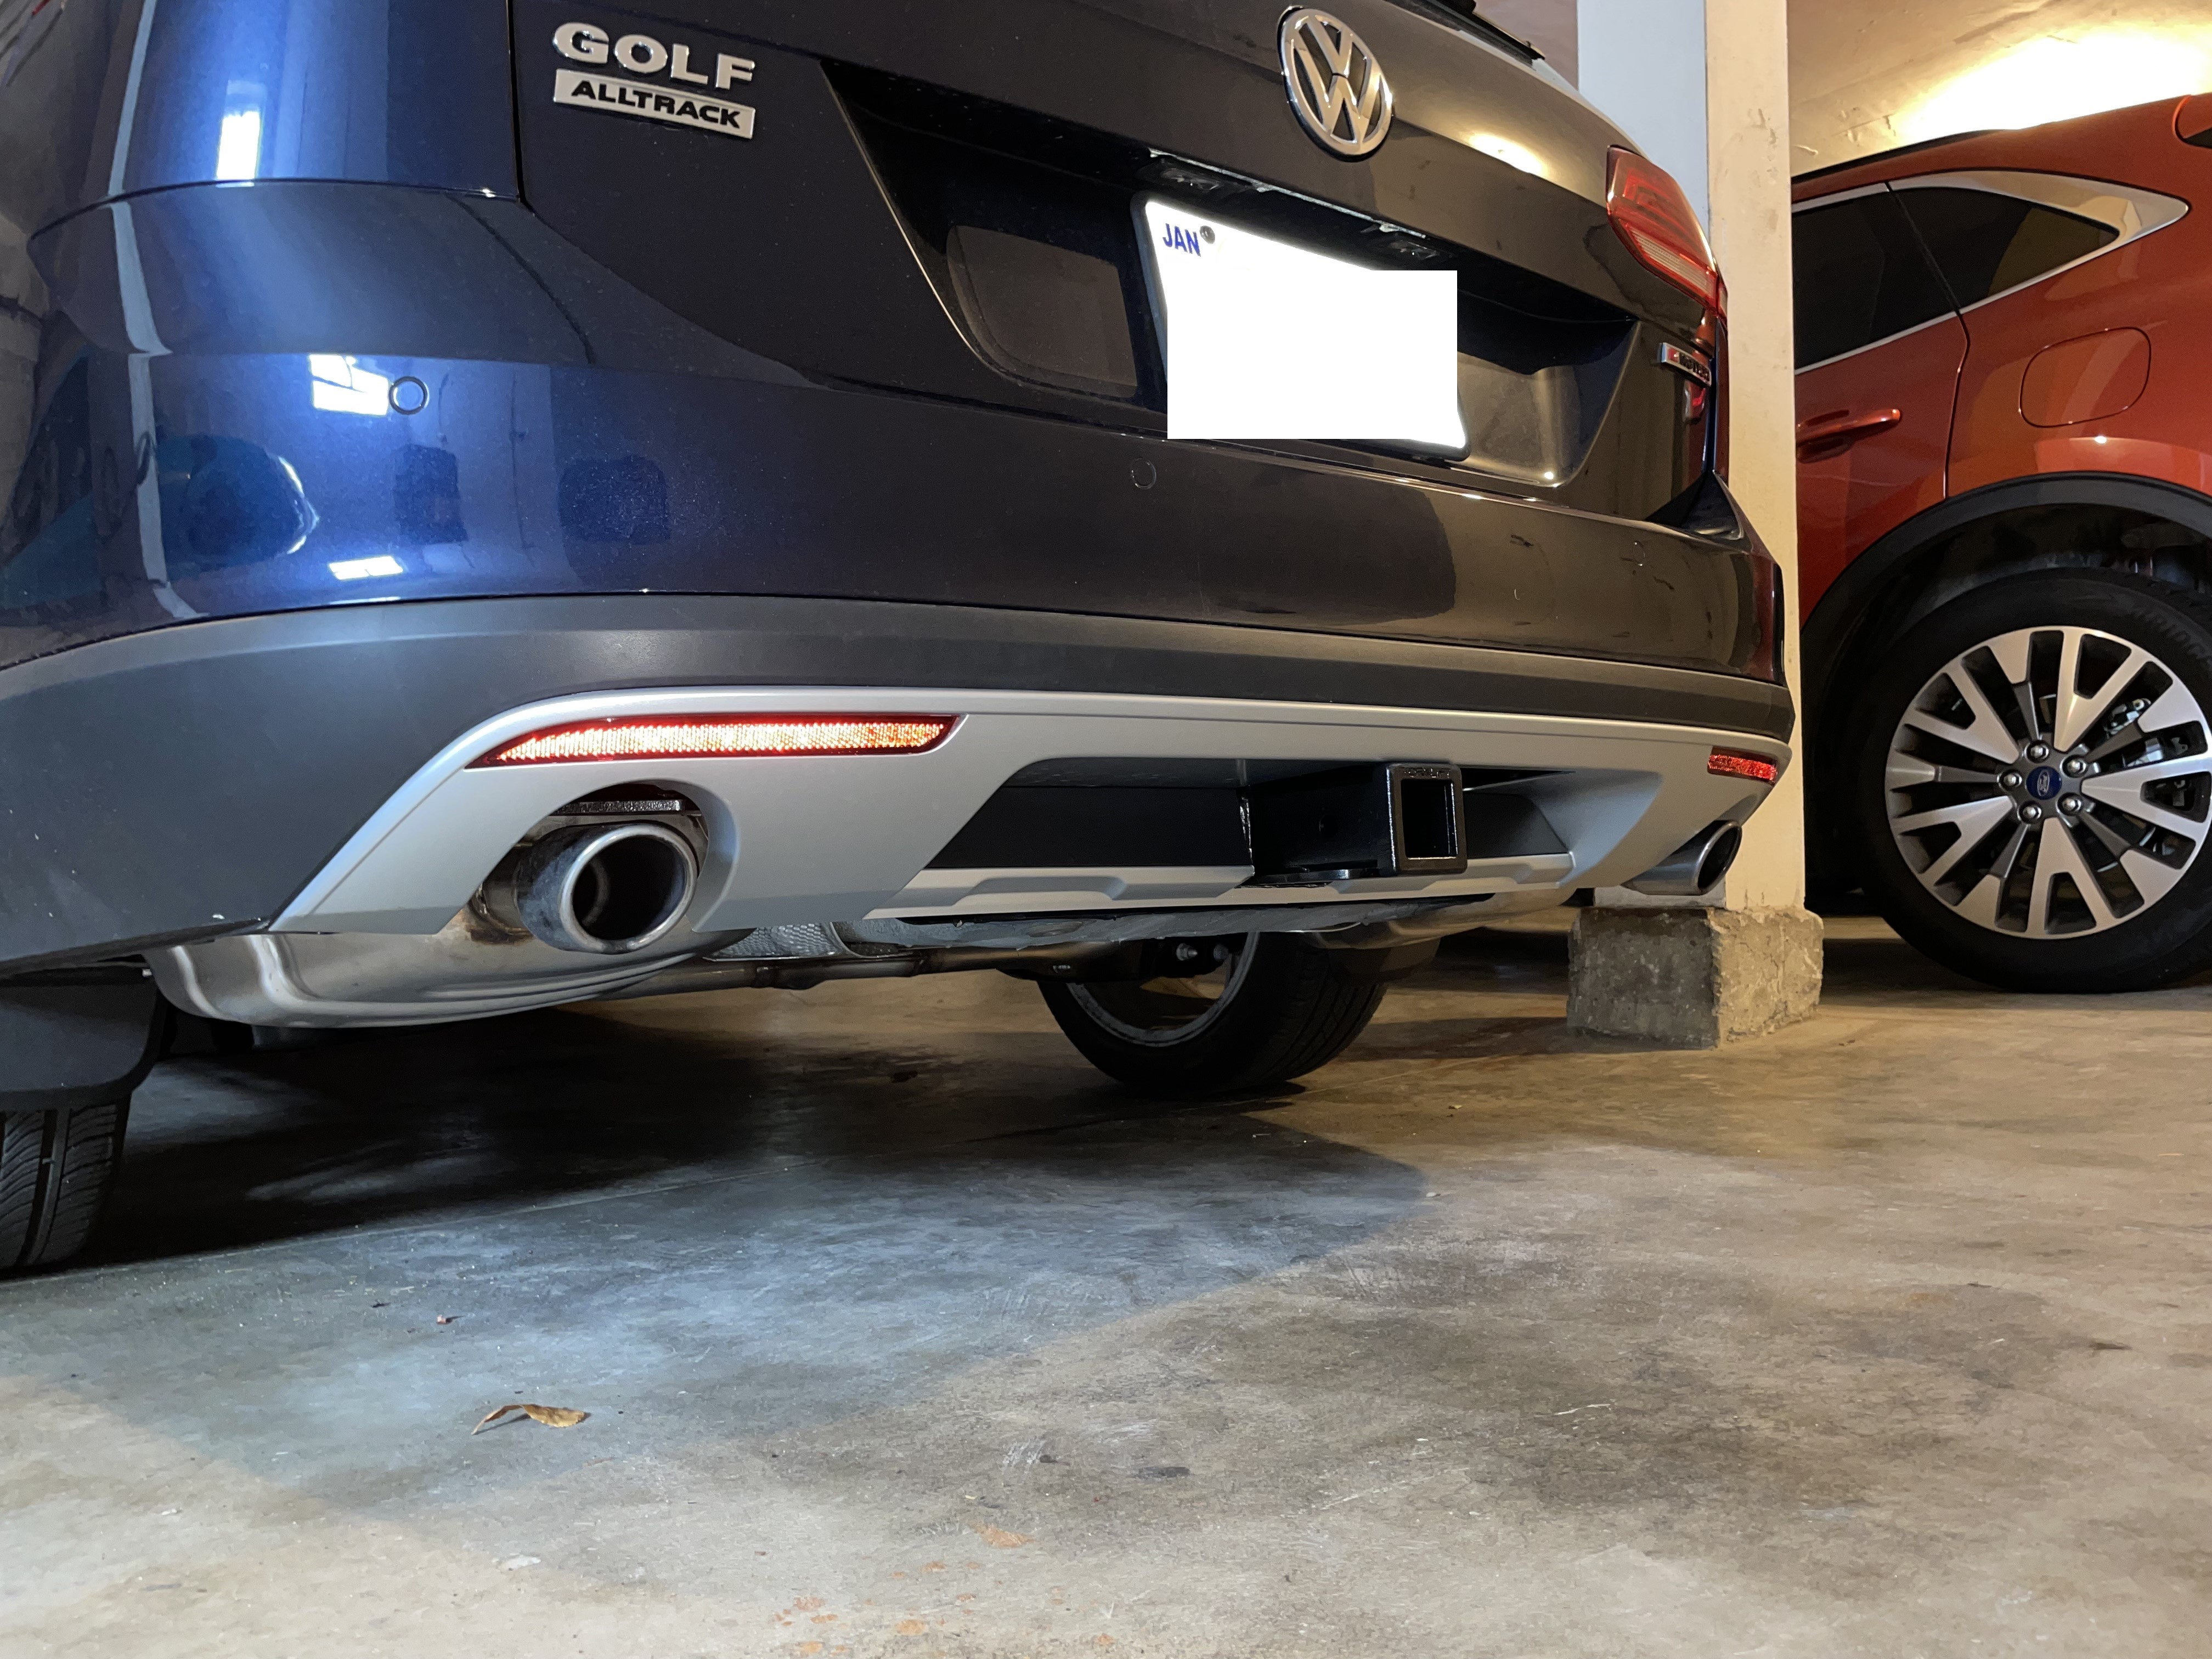
Snapped right into place. Done!# |
|

|
|
Comments
comments powered by Disqus